Table of Contents
Advertisement
Quick Links
c.LOGiC lite-Interface
CI-C1-MFD2-R1
Compatible with navigation systems
Volkswagen MFD2/RNS2
Skoda Nexus
Only for vehicles WITH factory rear-view camera
Product features
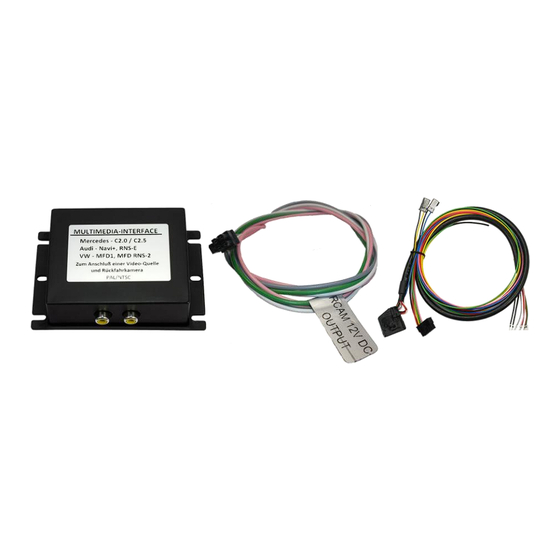
• full plug and play multimedia interface
• 1 AV-input with separate IR-control channel
• control of after-market devices, e.g. DVB-T tuner, DVD-player, DVD-changer, ...
• automatic switching to rear-view camera input
• power on remote out trigger signal (+12V max. 1A) to switch on connected devices
Version 20.09.2017
CI-C1-MFD2-R1
Advertisement
Table of Contents

Subscribe to Our Youtube Channel
Related Manuals for Car-Interface.com c.LOGiC lite


Summary of Contents for Car-Interface.com c.LOGiC lite
- Page 1 CI-C1-MFD2-R1 Compatible with navigation systems Volkswagen MFD2/RNS2 Skoda Nexus Only for vehicles WITH factory rear-view camera Product features • full plug and play multimedia interface • 1 AV-input with separate IR-control channel • control of after-market devices, e.g. DVB-T tuner, DVD-player, DVD-changer, …...
-
Page 2: Table Of Contents
Contents 1. Prior to Installation 1.1. Delivery contents 1.2. Check compatibility of vehicle and accessories 2. Connection schema 3. Installation 3.1. Interconnecting Interface-box and harness 3.2. Connections to camera control-box 3.3. Connecting peripheral devices 3.3.1. AV-source 3.3.2. Installing AV-source’s IR-sensor additionally 4. -
Page 3: Legal Information
Legal Information By law, watching moving pictures while driving is prohibited, the driver must not be distracted. We do not accept any liability for material damage or personal injury resulting, directly or indirectly, from installation or operation of this product. This product should only be used while standing or to display fixed menus or rear-view-camera video when the vehicle is moving, for example the MP3 menu for DVD upgrades. -
Page 4: Check Compatibility Of Vehicle And Accessories
1.2. Check compatibility of vehicle and accessories Requirements Vehicle Volkswagen and Skoda With factory rear-view camera Navigation MFD2/RNS2 or Nexus navigation Limitations Factory-TV-tuner Must NOT be installed. 2. Connection schema 3. Installation Switch off ignition and disconnect the vehicle’s battery! If according to factory rules disconnecting the battery has to be avoided, it is usually sufficient to put the vehicle is sleep-mode. -
Page 5: Interconnecting Interface-Box And Harness
3.1. Interconnecting Interface-box and harness Plug harness C1C-VNR into 12pin Molex of Interface-Box C1C-M01. Version 20.09.2017 CI-C1-MFD2-R1... -
Page 6: Connections To Camera Control-Box
3.2. Connections to camera control-box Locate the camera control-box which is depending on the vehicle located either underneath the passenger seat, underneath the center console or above the wheel case of the rear right or left tire (e.g. T5 underneath the passenger seat, Tiguan rear right, Alhambra rear left). Signal Colour 54pin... -
Page 7: Connecting Peripheral Devices
3.3. Connecting peripheral devices It is possible to connect one after-market AV-source to the c.LOGiC Interface. Before final installation of the peripheral devices, we recommend to test-run the c.LOGiC functions to detect incompatibility of vehicle, navigation, factory accessories or peripheral devices as soon as possible. -
Page 8: Installing Av-Source's Ir-Sensor Additionally
3.3.2. Installing AV-source’s IR-sensor additionally Additionally to the control via OEM navigation, it is possible to install the original IR-sensor of a connected device. By using the respective Y-adapter (e.g. STA-Y35MM or STA-RJ12) for the IR-Port of the connected device, the controls of navigation AND device’s IR-sensor can be connected and used simultaneously. -
Page 9: Button Assignment Table
4.3. Button assignment table The button assignment table shows which functions of the connected device can be executed by head-unit buttons. Once the AV-input is activated, the head-unit button in the left column will execute the function described in the corresponding device column. The function description equals the remote control buttons of the optional c.LOGiC remote control or the additional device. -
Page 10: Picture Settings
4.4. Picture settings By pressing the button 17, it is possible to switch between 4:3 and 16:9 picture format. To enter the picture settings menu longpress button 11. The picture settings menu always starts with the brightness settings. The respective current picture value is displayed on the instrument panel.
Need help?
Do you have a question about the c.LOGiC lite and is the answer not in the manual?
Questions and answers