Table of Contents
Advertisement
Quick Links
Advertisement
Table of Contents

Related Manuals for VigilLink VLIP-SD10G-CTRL


Summary of Contents for VigilLink VLIP-SD10G-CTRL
- Page 1 VLIP-SD10G-CTRL AVoIP Controller for SDVoE VER 1.0...
-
Page 2: Table Of Contents
Thank you for purchasing this product Please read these instructions carefully for optimum performance and safety before connecting, operating, or adjusting this product. Please keep this manual for future reference. A surge protection device is recommended. This product contains sensitive electrical components that may be damaged by electrical spikes, surges, electric shocks, lightning strikes, etc. -
Page 3: Introduction
1. Introduction This Video over IP Controller is used to control and manage IP products. It supports dual 1G network ports, which can realize dual-network isolation of the Control network and Multicast video distribution network. It supports Web GUI/TCP/RS-232/IR/GPIO controls, POE function, and IR control signal pass-through. - Page 4 ⑨ 1 ⅹ User Manual 2/29...
-
Page 5: Specifications
3. Specifications Technical Network Video Up to 1G Bandwidth Transmission 100m CAT 5E/6/6A/7 Distance 2 x 1G LAN [RJ45 connector] [VIDEO LAN support POE] 1 x IR IN [3.5mm audio jack, 12V level] 1 x IR OUT [3.5mm audio jack] Control Ports 1 x DIGITAL I/O [6-pin 3.81mm phoenix connector] 2 x RS-232 [3-pin 3.81mm phoenix connector]... -
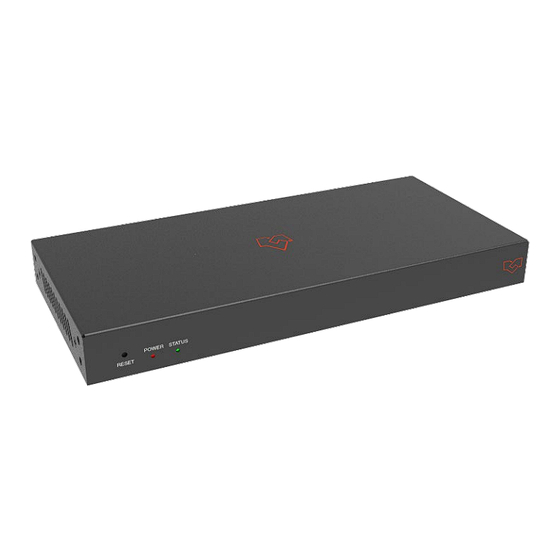
Page 6: Rear Panel
Name Function Description Press and hold this button (about 10 seconds) until Status RESET Button LED starts flashing; Controller will be reset automatically. POWER LED The red LED will light on when the Controller is powered on. The status LED will flash in yellowish-green every 1 second until the Controller boots up entirely and Control LAN is STATUS LED ready;... -
Page 7: Ir Pin Definition
4.3 IR Pin Definition 5. Rack Mounting Instruction 5.1 6U Rack Mounting This Controller can be mounted in a standard 6U rack (Please contact your supplier for a 6U rack sale). The mounting steps are as follows: Step 1: Use included screws to fix two mounting ears on the Controller, as shown in the figure below: 5/29... - Page 8 Step 2: Insert the Controller with mounting ears into a 6U rack (up to 10 units can be installed vertically), as shown in the figure below: Step 3: Use screws to fix mounting ears on the rack to complete the mounting, as shown in the figure below: 6/29...
-
Page 9: Rack Mounting
5.2 1U Rack Mounting This Controller also can be mounted in a standard 1U rack (up to 4 units can be installed horizontally). The mounting steps are as follows: Step 1: Stack two Controllers on top of each other, then use included screws to fix two 1U rack panels on the Controllers, as shown in the figure below: Step 2: Fix two 1U rack panels on another two stacked Controllers in the same way, then use screws to fix two 1U rack panels together, as shown... -
Page 10: Web Gui User Guide
6. Web GUI User Guide 6.1 Preparation before Entering the System You can use Controller’s Web GUI to control all IP products at the Switch. The operation method is shown below: Step 1: Input the Controller’s default IP address (192.168.0.225) or the URL (http://controller.local) into the Web browser address bar on the PC to enter the Web GUI login interface. - Page 11 Step 2: Click the “Close” button to load an existing project on the web page directly, or click the “Next” button to go to the next step. On this interface, you need to set the IP mode of Video LAN. Mode 1: Automatically managed by Controller Box.
- Page 12 10/29...
- Page 13 Click the “Next” button and wait for the completion to enter the interface, as shown in the figure below. Select “Automatically add Encoders and Decoders to project” and click the “Scan” button to enter the Project page. All the connected devices will be listed in the Current Devices list.
-
Page 14: Functions And Operation
6.2 Functions and Operation ■ Preview Page On this page, you can preview the Encoder/Decoder by clicking the drop- down list on the right side. ■ Matrix Control Page Encoders: Display all the current Encoders. The text in the figure is the name of the device. - Page 15 Operating Instructions: If an Encoder shows “No Signal,” the Encoder cannot be dragged. If an Encoder has an image, it means that the Encoder can be dragged. As shown in the figure above, if an Encoder is dragged to the place where the red arrow points to, all Decoders will share the same signal resource from this Encoder;...
- Page 16 Click “Scan Once” to search devices that do not appear in the current project. Click “Start Scan & Auto Assign” to search new devices automatically and add to the current project. ■ Encoders Page ID: The ID of the current device. (Note: ID is not duplicated.) Name: The name of the current device.
- Page 17 Click the icon on the left of the ID to check the detailed information about the current Encoder, as shown below: On this page, you can set up the current Encoder as required. 15/29...
- Page 18 ■ Decoders Page ID: The ID of the current device. (Note: ID is not duplicated.) Name: The name of the current device. MAC Address: The MAC Address of the current device. IP Address: The IP Address of the current device. Firmware: The Firmware version No.
- Page 19 Click “Command” to set the CEC command for the Decoder. Click the icon on the left of the ID to check the detailed information about the current Decoder, as shown below: On this page, you can set up the current Decoder as required. 17/29...
- Page 20 ■ Locked Signal Routing Page On this page, you can independently route the video and audio signals between Encoder & Decoder devices. You also can set the IR/Serial/USB signals as required. Please click “Locked Routing Help” for details. ■ Video Wall Management Page You can create and configure a video wall as required on this page.
- Page 21 You can set the Video Wall ID, Name, and Horizontal and Vertical panel numbers. Then click “Create” to create the Video Wall. Note: Up to 9 video walls can be created. Step 2: Select the video wall you want to configure on the “Video Wall List,”...
- Page 22 Step 3: Click “Class Configuration” to enter the class configuration page, then click each screen to select the corresponding Class as required (the same class name will form a video wall, you can create a regular or irregular video wall by Class Configuration). Then click “Apply.” Note: Up to seven configurations can be set up for different application scenarios.
- Page 23 On this page, you can select different video walls and configurations that you have set up by clicking the drop-down box on the right of “Video Wall Selection / Configuration Selection”. Besides, you can directly drag Encoders at the top of the page to the video wall to change signal sources.
- Page 24 ■ Multiview Management Page On this page, you can create and configure multiview as required. Please follow the below steps to create a video wall. Step 1: Click the drop-down list of Decoders to select the Decoder device, as shown in the above figure. Then click to choose the desired Multiview Layout, which will be displayed in the lower right corner, as shown in the figure below.
- Page 25 Step 2: Drag Encoders from the Encoder List to the Multiview Layout respectively, then click the “Apply” button. Step 3: After configuration, you can switch to the “Multiview Control” page for video preview, as shown below. On this page, you can select different Decoders and configurations you have set up by clicking the drop-down box on the right of “Receiver Selection.”...
- Page 26 If you want to delete a multiview, just click the “Reset” button. A prompt window will pop up, and you can delete it after clicking “Yes.” If you want to delete all multiview configurations you set before, just click the “Reset All”...
- Page 27 ■ Users Page On this page, you can add new user accounts. ■ Controller Settings Page General Settings: The basic settings of the Controller. Control Network: The network port configuration of the Controller connected to the Switch. Video Network: The network port configuration of the Controller connected to video source devices.
- Page 28 ■ Firmware Update Page On this page, you can separately update the firmware of any Encoder/Decoder by clicking the corresponding “Update” button on the right or update all the firmware of the Encoder/Decoder simultaneously by clicking the corresponding “Update All” button. Also, you can edit the Second Stream (SS) chip firmware and the NXP firmware.
-
Page 29: Application Example
■ Log Out Page Click “Log Out” on the left; the Web GUI will automatically exit and skip to the login interface. 7. Application Example 27/29... - Page 30 28/29...
- Page 31 29/29...
- Page 32 Notes: (1) Currently, only Mode 1 is available; Mode 2 and Mode 3 will be ready in t h e short future. (2) For the default IP mode of the Control LAN port of the Controller Box is DHCP, the PC also needs to be set to “Obtain an IP address automatically” mode, and an optional DHCP server (e.g., network router) is recommended in the system.
Need help?
Do you have a question about the VLIP-SD10G-CTRL and is the answer not in the manual?
Questions and answers