Advertisement
Quick Links
Advertisement

Related Manuals for Jaap NERDYGURDY Nerdyharpa v4


Summary of Contents for Jaap NERDYGURDY Nerdyharpa v4
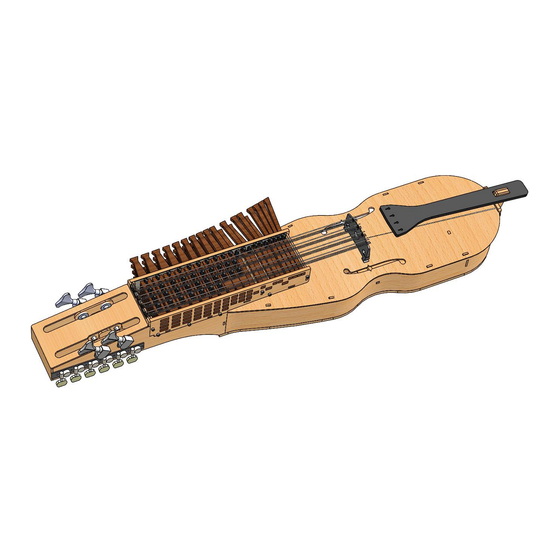
- Page 1 Jaap Brand, NL 2024 Nerdyharpa v4 Assembly manual v4.1.0...
- Page 2 Introduction This manual describes how to assemble a Nerdyharpa kit. Go to https://www.nerdygurdy.nl for more info about these instruments.
-
Page 3: General Directions
General directions It’s best to read through the whole sequence, before starting. ● When removing parts from the plate that are still attached, it’s best to cut the attached points with a sharp knife or ● chisel, to avoid splintering. Before gluing, it is wise to assemble the parts without glue, so that you’re sure how they fit together. - Page 4 Parts included in kit (1) Screw Nut M3 Bolt M3 x 12 Strap pin Bolt M2,5 x 25 Tangent S Tangent M (3,5 x 20) Flathead (17x) 17 x 13 x (7x) Small screws Tangent L Tangent XL (14x) 10 x 12-string guitar Bass guitar Bolt M2,5 x 10...
- Page 5 Parts included in kit (2) Melody strings: - Cello C - Cello G - Cello D - Cello A Resonance strings: .022 guage .020 guage .018 guage .017 guage (2x) .016 guage .015 guage .014 guage .013 guage .012 guage (2x) .011 guage Note: to keep the cost of the kits reasonable, we include basic Cello strings as melody strings.
-
Page 6: Tooling List
Tooling list Tools, glue and paint are not included in the kit. You may need the following tools and materials to build your instrument: Wood glue (Extra strong, preferably!) ● Some screwdrivers ● Lots of glue clamps ● A (retracting) knife ●... - Page 7 Let’s start building!
- Page 9 Check alignment of holes...
- Page 10 Check alignment of holes...
- Page 13 Check alignment on bottom...
- Page 21 The tabs should stick through the bottom plate a bit, so you can sand-off the dark edge and so you can check that they are inserted all the way...
- Page 22 Only glue the wooden parts. The carbon fiber rod should be free to slide a bit. (It will be fixed later)
- Page 24 Before continuing, it is best to sand down these tabs, so that the bottom is flat...
- Page 25 It’s easiest to do this segment-by- segment...
- Page 26 Top plate bending (1) Before mounting the top, you will need to bend it. Bending a plywood plate is a matter of making it soaking wet, putting a force on it, and then waiting. A good way to bend it in shape is by putting cable ties around the plate, and then adding spacers under the cable ties on one side.
- Page 27 Top plate bending (2) 2) Put cable ties around the plate and tighten them. Use wide cable ties for preference, and more = better.
- Page 28 Top plate bending (3) 3) Put some spacers under the cable ties on the INSIDE of the top plate (there is a marking). You can basically use anything for this. I use a strip of wood, or just pieces of LEGO DUPLO and Kapla.
- Page 29 Top plate bending (4) 4) Make the wood nice and wet, using warm water. Allow it to soak for some time.
- Page 30 Top plate bending (5) 5) Add more spacers under the cable ties, as you feel the tension lessen • As the wood gets softer, you'll notice that you can put more and more spacers under the cable ties. • Re-soak the wood now and then.
- Page 31 Top plate bending (6) 6) Let the wood dry under tension. When you release the cable ties you should have a curved plate.
- Page 33 File down to edges a bit slanted, so the shape better follows the top plate...
- Page 34 Avoid gap!
- Page 35 Open Source glue clamps: https://www.thingiverse.com/ thing:6517348...
- Page 36 Push wedge sideways, to lock carbon rod in place (and glue)
- Page 39 It is advised to sand down this edge, to make it nicer to hold and play...
- Page 40 This is where you can get creative and bring personality into your instrument. Below is how we often paint them: a clear coat on the keybox and body, and black for the tail piece. But you can do whatever you like here of course. Try to avoid getting paint in the holes for the keys!
- Page 42 Glue the felt on the inside (peel off the backing paper – it’s self-adhesive). Use a bunch of keys to position the felt correctly, so that all the holes line up well.
- Page 48 Note orientation...
- Page 49 It is best to drill 1 mm Note orientation holes for the screws, of tuners. before screwing Left and right are different...
- Page 50 Note orientation It is best to drill 1 mm of tuners holes for the screws, before screwing Plates go on the inside...
- Page 51 Same thing on the other side It is best to add some lubrication to all these exposed gears...
- Page 53 Time to mount the strings! (More details in the next slides)
- Page 54 String positions and tuning Don’t try to tune the strings all the way immediately, but allow the instrument to settle for a bit. The first few days ● you will need to re-tune the instrument regularly, which is normal for all stringed instruments. The traditional Swedish tuning is C G C A.
- Page 55 Do NOT glue...
- Page 56 Notches indicate bridge position...
- Page 58 Revisions V4.1.0 Release of Nerdyharpa V4. Main changes: new tailpiece, changed slope of the head, added carbon rod.
Need help?
Do you have a question about the NERDYGURDY Nerdyharpa v4 and is the answer not in the manual?
Questions and answers