Chapters
Table of Contents

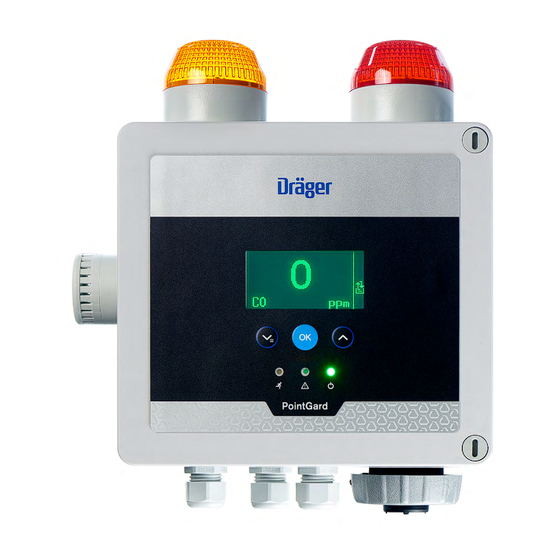
Summary of Contents for Drager PointGard 3000 Series
- Page 1 Dräger PointGard 3000 Series Firmware version ≥ 4.10 Instructions for use enUS · de · fr · es · it · zh WARNING To properly use this product, read and comply with these instructions for use.
- Page 2 enUS Instructions for use........... 5 Gebrauchsanweisung ........39 Notice d'utilisation .......... 75 Instrucciones de uso ........112 Istruzioni per l'uso ........149 使用说明............186...
- Page 3 Dräger PointGard 3xx0 EC / CAT / IR NC COM NO NC COM NO NC COM NO (AC) (DC) M / - P / + M / - P / +...
- Page 4 Dräger PointGard 3100 EC Dräger PointGard 3100 EC Remote Dräger PointGard 3200 CAT Remote Dräger PointGard 3200 CAT Dräger PointGard 37x0 IR Remote grey SCR/PE grey SCR/PE brown green/yellow brown yellow black black brown black white 3 wires 5 wires grey SCR/PE brown...
- Page 5 Menu ..............12.3.1 Default setting: Horn only active on A2 alarms ... 7.6.1 Navigating in a menu ........... 12.3.2 Setting: Horn only active on A1 alarms ....7.6.2 Passwords ............Instructions for use Dräger PointGard 3000 Series Firmware version ≥ 4.10...
- Page 6 17.5 Environmental parameters ........17.6 Tightening torque for instrument threads..... 17.7 Cable specifications CatEx remote...... 17.8 Cable specifications PIR remote ......17.9 Sensor range and default alarm values ....Instructions for use Dräger PointGard 3000 Series Firmware version ≥ 4.10...
-
Page 7: Mechanical Installation
1 and 2, zones 21 sharing a common phase. and 22 and Class I and II, Div 1 and 2. Depending on the type of protection of the actually selected sensing head. Instructions for use Dräger PointGard 3000 Series Firmware version ≥ 4.10... -
Page 8: Conventions In This Document
NOTICE Indicates a potentially hazard- Jumper ous situation. If not avoided, it could result in damage to the Horn acknowledgment button product or environment. Rotary switch PointGard 3100 EC Instructions for use Dräger PointGard 3000 Series Firmware version ≥ 4.10... -
Page 9: Feature Description
>100 substances. electrochemical (EC) sensor. The EC sensor has to be – PIR 7200 continuously monitors carbon dioxide. ordered separately and installed. An EC remote sensor Instructions for use Dräger PointGard 3000 Series Firmware version ≥ 4.10... - Page 10 1. Open the instrument. 2. Remove the dome plug from the appropriate cable gland. – For relay connections: Cable gland 5 – For 4-20mA interface connections: Cable gland 3 Instructions for use Dräger PointGard 3000 Series Firmware version ≥ 4.10...
-
Page 11: Relay Connections
NO or NC. To be configured according 2. Insert the relay wires in the provided 9-pin connector. DIP switch (figure 8), pin 7 (see "DIP switch", page 26). A 2- Instructions for use Dräger PointGard 3000 Series Firmware version ≥ 4.10... -
Page 12: Installing Software Dongles
The cable length shall be ≤ 30 m. In normal operation, the display 20.9 shows the measured gas concentra- tion, the selected gas and the unit of measurement. Vol.% Instructions for use Dräger PointGard 3000 Series Firmware version ≥ 4.10... - Page 13 20.9 symbol is displayed on the that over range latching is active at the control unit. right side of the display. Analog interface: Warning current Vol.% Relays: No change Instructions for use Dräger PointGard 3000 Series Firmware version ≥ 4.10...
-
Page 14: Control Panel
To change passwords, see 11.1. 7.6.3 Entering the menu ● To directly enter the Information menu: a. Tap and hold for 1 second in the measuring mode. Instructions for use Dräger PointGard 3000 Series Firmware version ≥ 4.10... -
Page 15: Displaying Information
Displays the data logger status (active or non-active) status Displays the history of the past 15 minutes Graph on a time/concentration graph. 1) Function only available with diagnostic dongle. Instructions for use Dräger PointGard 3000 Series Firmware version ≥ 4.10... -
Page 16: Menu Overviews
Set DSA warning Alert < 50% Sensitiv. Check UGLD signals Alert < 40% Fault detection Modbus address Modbus baudrate 1) Parameter not used by Dräger PointGard 3100. Modbus parity Instructions for use Dräger PointGard 3000 Series Firmware version ≥ 4.10... - Page 17 Set concentr. Set fault Set warning Set mainten. Set beamblock Set DSA warning UGLD signals Modbus address Modbus baudrate 1) Parameter not used by Dräger PointGard 3200/PointGard 3310. Modbus parity Instructions for use Dräger PointGard 3000 Series Firmware version ≥ 4.10...
- Page 18 Set concentr. Set fault Set warning Set mainten. Set beamblock Set DSA warning UGLD signals Modbus address Modbus baudrate 1) Parameter not used by Dräger PointGard 3700/PointGard 3720. Modbus parity Instructions for use Dräger PointGard 3000 Series Firmware version ≥ 4.10...
-
Page 19: Test Gases
► Make sure that test gas is no longer applied after calibration. Prerequisites: 1) Observe sensor data sheet and sensor IfU 2) For applications in line with EN 45544-1 the calibration interval must not exceed 6 months. Instructions for use Dräger PointGard 3000 Series Firmware version ≥ 4.10... -
Page 20: Performing Zero Calibration
Nitrogen or Synthetic Air without any CO of the sensor output signal (see DSIR Instructions for Use, content may be used for a zero calibration. part number 9023981) and subsequent calibration at the instrument. Instructions for use Dräger PointGard 3000 Series Firmware version ≥ 4.10... -
Page 21: Troubleshooting
1) Not applicable for all sensors (see "Display, analog interface and relay status", page 12). 2) For LC sensors the test gas must be applied for at least 6 minutes. Instructions for use Dräger PointGard 3000 Series Firmware version ≥ 4.10... -
Page 22: Maintenance
The analog output is set to the maintenance signal. without being deac- 2. Apply a known concentration of gas. tivated. 3. Press OK to return to measurement. Instructions for use Dräger PointGard 3000 Series Firmware version ≥ 4.10... -
Page 23: Sensor Replacement
3. Check calibration. If necessary, calibrate the instrument (see "Calibration", page 19). 10.3.3 PointGard 3700/3720 IR Remote Replacing the remote sensor 1. If necessary, set the maintenance current for the analog interface. Instructions for use Dräger PointGard 3000 Series Firmware version ≥ 4.10... - Page 24 Shows the remaining sensor vitality. The orange LED is lit continuously. 1) Only with diagnostic dongle 11.5 Resetting to default settings This function resets the instrument to factory default settings. Instructions for use Dräger PointGard 3000 Series Firmware version ≥ 4.10...
-
Page 25: Alarm Configuration
11.11.1 Changing the backlight color of the anymore. display d. Set acknowledgement mode. The backlight color can be switched to red or green. 1. Loosen the screws (2) and open the cover. Instructions for use Dräger PointGard 3000 Series Firmware version ≥ 4.10... -
Page 26: Changing The Display Contrast
External contact is closed figuration: External con- on error. tact is open on error. 1) For instruments with green/red strobe combination, Pin 7 only affects the behavior of the green light. Instructions for use Dräger PointGard 3000 Series Firmware version ≥ 4.10... - Page 27 Set the desired alarm thresholds for A1 and A2. b. Set the same alarm direction and acknowledgment settings for A1 and A2. 5. Close the instrument. 6. Commission the instrument. Instructions for use Dräger PointGard 3000 Series Firmware version ≥ 4.10...
- Page 28 2. Set the signal type and confirm. follows the NAMUR recommendation NE43. 13.1.1 Full scale deflection static A constant current that can be configured. PointGard 3100 EC, 37x0 IR and 3200 CAT Remote LC only Instructions for use Dräger PointGard 3000 Series Firmware version ≥ 4.10...
- Page 29 1. Select Settings > Communication > Analog interface and the desired option. 2. Once the alarms at the control unit are inhibited, confirm the message Inhibit all alarms with Next. Instructions for use Dräger PointGard 3000 Series Firmware version ≥ 4.10...
- Page 30 3. Set the lowest value of the capture range to 0 and confirm with Next. 2. Select Start sensor test and confirm. 4. Set the highest value of the capture range to 0 and confirm with Next. Instructions for use Dräger PointGard 3000 Series Firmware version ≥ 4.10...
-
Page 31: Factory Default Settings
[OK]. Normal operation Energized Energized / Not A1 relay energized Confirm Select Confirm to accept the settings and confirm with Normal operation [OK]. A2 relay Instructions for use Dräger PointGard 3000 Series Firmware version ≥ 4.10... - Page 32 Depending on the 0 to 720 val [days] sensor 1) For firmware versions < 3.0.0 Display capture 20.9 Vol% (O 0 to 25 Vol% (O offset 0 to 100 Vol% O Instructions for use Dräger PointGard 3000 Series Firmware version ≥ 4.10...
- Page 33 0 to 3.5 mA current Response Normal Normal / Fast Beam block 7.5 %LEL 0 to max. 15 %LEL limit Calibration 0 to 720 interval [days] Response Normal Normal / Fast Instructions for use Dräger PointGard 3000 Series Firmware version ≥ 4.10...
- Page 34 This is indicated by the adjacent icon. Measuring range 20 ... 20.5 mA You can return this product to Dräger free of charge. For exceeded information please contact the national marketing organisations and Dräger. Instructions for use Dräger PointGard 3000 Series Firmware version ≥ 4.10...
-
Page 35: Power Supply
(AC) , 50 Hz Min. 0.1 A - Cables must be suitable for the intended ambient 5 A at 30 V (DC) temperature. Screen must be hard-wired on both sides. Cores 3 or 5, braided screen Instructions for use Dräger PointGard 3000 Series Firmware version ≥ 4.10... -
Page 36: Order List
PointGard 3200 CAT AC remote green 3728170 S HC 6809710 1000 100 PointGard 3200 CAT DC 3728169 6810740 PointGard 3200 CAT DC remote 3728168 6810745 PointGard 3700/3720 IR AC remote 3728167 6809625 Instructions for use Dräger PointGard 3000 Series Firmware version ≥ 4.10... -
Page 37: Accessories And Spare Parts
19.1.4 Mounting screws To mount the instrument all screws with inner drive and the following properties can be used. Head diameter max. 11.5 mm / max. 0.45 In Instructions for use Dräger PointGard 3000 Series Firmware version ≥ 4.10... - Page 38 Dräger PIR 7000 334 (M25) 6811825 complete set Dräger PIR 7000 340 (M25) 6811819 complete set Dräger PIR 7200 (NPT) 6811572 Dräger PIR 7200 (M25) 6812290 HART, complete set Instructions for use Dräger PointGard 3000 Series Firmware version ≥ 4.10...
- Page 39 Im Infomodus navigieren........12.2.2 Einstellung: Signalhorn ist nur bei A2-Alarmen 7.5.3 Funktionstaste verwenden ........aktiv..............Menü ..............12.2.3 Einstellen, dass das Signalhorn nur bei A2- Alarmen aktiviert wird .......... 7.6.1 In einem Menü navigieren........Gebrauchsanweisung Dräger PointGard 3000 Series Firmwareversion ≥ 4.10...
- Page 40 15.2.4 PointGard 3200 CAT Remote DSIR ....15.2.5 PointGard 3700/3720 IR........15.2.6 PointGard 3720 IR ..........Entsorgung............Technische Daten ..........17.1 Messbereiche ............17.2 Signalübertragung zur Auswerteeinheit....17.3 Spannungsversorgung ........17.3.1 AC-Version ............17.3.2 DC-Version ............Gebrauchsanweisung Dräger PointGard 3000 Series Firmwareversion ≥ 4.10...
-
Page 41: Mechanische Installation
– Das Gerät ist nicht für den Betrieb in Bereichen mit 500 Ohm nicht überschreiten. Je nach Betriebsspannung explosionsfähiger Atmosphäre ausgelegt. und Anwendung, z. B. HART-Betrieb, ist eine bestimmte Mindestimpedanz zu beachten (siehe „Signalübertragung zur Auswerteeinheit”, Seite 71). Gebrauchsanweisung Dräger PointGard 3000 Series Firmwareversion ≥ 4.10... -
Page 42: Bedeutung Der Warnhinweise
Bedingungen, in denen das Gerät verwendet wird, müssen diese ggf. verkürzt werden. Abbildungen finden Sie auf der Ausklappseite. – Siehe den Abschnitt zur Wartung in der Gebrauchsanweisung des Transmitters. Serie PointGard 3xx0 Signalhorn Gebrauchsanweisung Dräger PointGard 3000 Series Firmwareversion ≥ 4.10... - Page 43 Aktiviert den Sensor-Selbst- Funktionsbeschreibung test (nur für bestimmte Sen- soren) Dräger PointGard 3000-Geräte sind unabhängig arbeitende Gaswarnanlagen. Alarmbedingungen werden durch die eingebauten Alarmgeber angezeigt. Es stehen 2 unterschiedliche Kombinationen aus Stroboskopleuchten zur Verfügung. Gebrauchsanweisung Dräger PointGard 3000 Series Firmwareversion ≥ 4.10...
-
Page 44: Montage Und Installation
über eine integrierte Gas/Dampf-Bibliothek mit sind mit Kabelbindern gesichert. über 100 Substanzen. 3. Die Abdeckung schließen und die Schrauben mit dem – PIR 7200 überwacht kontinuierlich Kohlenstoffdioxid. richtigen Drehmoment (22 Lbs. In./2.5 Nm) festziehen. Gebrauchsanweisung Dräger PointGard 3000 Series Firmwareversion ≥ 4.10... -
Page 45: Montage Des Geräts
Bei Verwendung der Werkseinstellungen und während des 1. Nach den Vorgaben der Montageanweisung (90 33 793) Normalbetriebs sind die Relais erregt. Dadurch ist oder den Abmessungen auf der Rückseite des Gehäuses “fehlersicherer” Betrieb gewährleistet. eine gerade Oberfläche vorbereiten. Gebrauchsanweisung Dräger PointGard 3000 Series Firmwareversion ≥ 4.10... - Page 46 5-poliger Steckverbinder mitgeliefert. Software-Dongles installieren PointGard 3000 EC-spezifisch: 1. Das Gerät öffnen. 2. Dongle mit Dräger-Logo nach oben in den Steckplatz auf der Leiterplatteneinheit auf der Rückseite der Abdeckung einsetzen. 3. Gerät schließen. Gebrauchsanweisung Dräger PointGard 3000 Series Firmwareversion ≥ 4.10...
-
Page 47: Inbetriebnahme Des Geräts
Abgesetzter EC-Messkopf übersteigt (9033247) – wenn eine Störung auftritt – wenn Alarme deaktiviert sind. Die Kabellänge sollte ≤ 30 m sein. Die Messfunktion (Anzeigeausgabe und analoge/digitale Schnittstelle) bleibt aktiv. – bei Justiervorgängen Gebrauchsanweisung Dräger PointGard 3000 Series Firmwareversion ≥ 4.10... - Page 48 Die verbleibende Zeit wird auf der linken Bildschirmseite angezeigt. Symbol Beschreibung Analogschnittstelle: Wartungsstrom Alarm ausgelöst Relais: Fehlerrelais-Schalter Gelb Störung Das Fehlerrelais-Verhalten lässt sich für Einlaufphase 1 konfigurieren (siehe „Fehlerrelais Einlaufen 1 einstellen”, Grün Eingeschaltet Seite 60) Gebrauchsanweisung Dräger PointGard 3000 Series Firmwareversion ≥ 4.10...
- Page 49 ● Um das Menü Kalibrierung zu öffnen: Je nach Art des Menüs verschiedene Funktionen a. Im Messmodus 3 Sekunden lang gedrückt halten. b. Kennw. eingeben wählen. c. Kennwort Kalibr. wählen. ● Um auf alle Menüs zuzugreifen: Gebrauchsanweisung Dräger PointGard 3000 Series Firmwareversion ≥ 4.10...
-
Page 50: Darstellung Von Informationen
Datenspeicher Status Anzeige des Datenlogger-Status (aktiv oder Datenlog- nicht aktiv) Anzeige des Verlaufs der letzten 15 Minu- Grafik ten in einer Zeit/Konzentrations-Grafik. 1) Die Funktion ist nur mit dem Diagnosedongle verfügbar. Gebrauchsanweisung Dräger PointGard 3000 Series Firmwareversion ≥ 4.10... - Page 51 BeamBlock setzen Aktivierung LifeTest DSA Warn. setzen Alarm < 50% Sensitiv. check UGLD Signale Alarm < 40% Fehlerdetektion Modbus Adresse Modbus Baudrate 1) Parameter wird von Dräger PointGard 3100 nicht verwendet. Modbus Parität Gebrauchsanweisung Dräger PointGard 3000 Series Firmwareversion ≥ 4.10...
- Page 52 Stromsig. setzen Konz. setzen Fehler setzen Warnung setzen Wartung setzen BeamBlock setzen DSA Warn. setzen UGLD Signale Modbus Adresse Modbus Baudrate 1) Parameter wird von Dräger PointGard 3200/PointGard 3310 nicht verwendet. Modbus Parität Gebrauchsanweisung Dräger PointGard 3000 Series Firmwareversion ≥ 4.10...
- Page 53 DSA Warn.-Strom Display Fangber. DSA Warn.-Grenze Analog Offset Analog Empfindl. Stromsig. setzen Konz. setzen Fehler setzen Warnung setzen Wartung setzen BeamBlock setzen DSA Warn. setzen UGLD Signale Modbus Adresse Modbus Baudrate Modbus Parität Gebrauchsanweisung Dräger PointGard 3000 Series Firmwareversion ≥ 4.10...
- Page 54 Insektenschutz muss nicht entfernt werden. 2) Für Anwendungen gemäß EN 45544-1 darf das Justierintervall 4. Den Schlauch an die Stecknippelverbindung anschließen. 6 Monate nicht überschreiten. 3) Wenn nötig, die Vorgaben der IEC 60079-29-2 beachten. Gebrauchsanweisung Dräger PointGard 3000 Series Firmwareversion ≥ 4.10...
- Page 55 ) zur Verifizierung verwenden. PointGard 3200 CAT Remote with IR sensor: Aufgrund der Gestaltung des DSIR-Gassensors ist das Ausgangssignal des Gassensors auf 45 % . . . 55 % der geräteinternen Versorgungsspannung begrenzt. Sollte die Gebrauchsanweisung Dräger PointGard 3000 Series Firmwareversion ≥ 4.10...
-
Page 56: Austausch Der Sicherung
Justierung durchzuführen in das sen. Justierungsmenü zurück. 1) Nicht für alle Sensoren zutreffend (siehe „Anzeige, Analogschnittstelle 2) Bei LC-Sensoren muss das Prüfgas mindestens 6 Minuten lang auf- und Relaisstatus”, Seite 47). gegeben werden. Gebrauchsanweisung Dräger PointGard 3000 Series Firmwareversion ≥ 4.10... - Page 57 EC-Sensors SIL-Kennwort Kennwort erneut eingeben. 1) Nur bei PointGard 3100 EC stimmt nicht mit PIR 7000/7200 PointGard 37x0 IR-spezifisch überein. War- Ursache Abhilfe nungs- nummer Sensortemperatur ist sehr hoch. Gebrauchsanweisung Dräger PointGard 3000 Series Firmwareversion ≥ 4.10...
- Page 58 Die gesamte Messstrecke muss berücksichtigt Das Wartungssymbol wird angezeigt. werden (z. B. Latenzzeit der Auswerteeinheit). 2. Alten Sensor durch einen neuen Sensor ersetzen: ► Sicherstellen, dass die benötigte Ansprechzeit a. Einstellschraube lösen. eingehalten wird. Gebrauchsanweisung Dräger PointGard 3000 Series Firmwareversion ≥ 4.10...
-
Page 59: Sprache Einstellen
2. Wie im Handbuch des Messkopfs beschrieben vorgehen. 3. Justierung überprüfen. Das Gerät (siehe „Justierung”, Sens. Vitali- Zeigt die verbleibende Sensorvitalität an. Seite 54) bei Bedarf justieren. tät 1) Nur mit Diagnosedongle Gebrauchsanweisung Dräger PointGard 3000 Series Firmwareversion ≥ 4.10... - Page 60 Wert übersteigen muss, 11.7.2 Fehlerrelais Einlaufen 1 einstellen um einen Alarm auszulösen. Mit dieser Funktion wird der Betrieb des Fehlerrelais während Einlaufen 1 eingestellt, um den Status Einlaufen 1 auf dem Relaisausgang darzustellen. Gebrauchsanweisung Dräger PointGard 3000 Series Firmwareversion ≥ 4.10...
-
Page 61: Display-Einstellungen
Status zurückgesetzt. unabhängig vom ausgewählten Anzeigemodus. 1. Unter Einstellungen > Instrument > Alarm > die gewünschte Alarmbedingung wählen und bestätigen. Alarm A1 set- Simuliert einen Voralarm Alarm A2 set- Simuliert einen Hauptalarm Gebrauchsanweisung Dräger PointGard 3000 Series Firmwareversion ≥ 4.10... -
Page 62: Dip-Schalter
Kombination aus grüner/roter Stroboskopleuchte Signal- Alarmbedingungen Stroboskop- Schiebehebel horn leuchten System- Grün fehler 12.1.1 Einstellen der Schiebehebel des DIP- Schalters 1. Das Gerät öffnen. 2. Schiebehebel des DIP-Schalters umlegen: Nach oben Nach unten Gebrauchsanweisung Dräger PointGard 3000 Series Firmwareversion ≥ 4.10... - Page 63 6. Gerät in Betrieb nehmen. 12.3 Kombination aus bernsteinfarbener/roter Stroboskopleuchte 12.3.3 Einstellung: Signalhorn aktiv bei A1- und 12.3.1 Standardeinstellung: Signalhorn ist nur A2-Alarmen bei A2-Alarmen aktiv. Einstellungen des DIP-Schalters Einstellungen des DIP-Schalters Schiebehebel Schiebehebel EIN/A EIN/A Gebrauchsanweisung Dräger PointGard 3000 Series Firmwareversion ≥ 4.10...
- Page 64 4-bis-20-mA-Schnittstelle. Ein Konstantstrom, der konfiguriert werden Statisch Über den Messbereichsendwert wird ein Endpunkt innerhalb kann. des Messbereichs des Sensors bestimmt. Falls die Gaskonzentration diesen Endpunkt erreicht, überträgt die 4- bis-20-mA-Schnittstelle 20 mA. Gebrauchsanweisung Dräger PointGard 3000 Series Firmwareversion ≥ 4.10...
- Page 65 PIR 7000/7200-Sensor) zur Verfügung. Wenn die Beam Block-Funktion eingeschaltet und das optische System des PIR 7000/7200-Sensors verschmutzt ist, wird das Beam Block-Signal auf die Analogschnittstelle übertragen. Das optische System des Sensors kann durch Gebrauchsanweisung Dräger PointGard 3000 Series Firmwareversion ≥ 4.10...
- Page 66 Sensor ein. Dadurch werden aller- dings sämtliche benutzerdefinierten Einstel- Fangbereichswert (Offset) lungen durch die Standardeinstellungen des Der Fangbereichswert wird dauerhaft angezeigt, solange der neuen Sensors überschrieben. Messwert sich zwischen der oberen und unteren Fangbereichsgrenze befindet. Gebrauchsanweisung Dräger PointGard 3000 Series Firmwareversion ≥ 4.10...
- Page 67 Eine Übersicht mit den neuen Gaseinstellungen wird 2. Messgas aus der Liste wählen und bestätigen. angezeigt. Die aktuelle Messeinheit wird angezeigt. 6. Nach der Überprüfung Zurück zum Menü oder Bestätigen wählen. Gebrauchsanweisung Dräger PointGard 3000 Series Firmwareversion ≥ 4.10...
- Page 68 0 bis 100 Vol% (O Justierungs-Kenn- _ _ _ 1 Displayerfassung -0,25 Vol% (O 0 bis -0,75 Vol% wort niedrig Einstellkennwort _ _ _ 2 Displayerfassung 0,25 Vol% (O 0 bis 0,75 Vol% hoch LCD-Einstellung Ein/Aus Gebrauchsanweisung Dräger PointGard 3000 Series Firmwareversion ≥ 4.10...
- Page 69 -0,5 %UEG -0,5 bis 0 %UEG Grenze niedrig Kal.-Intervall 0 bis 720 Displayerfassung 0,2 %UEG 0 bis 0,4 %UEG [Tage] hoch Ansprech?ver normal normal / schnell 1) Für Firmwareversionen < 3.0.0 halten Gebrauchsanweisung Dräger PointGard 3000 Series Firmwareversion ≥ 4.10...
- Page 70 (Methan) ► Sensoren nicht im Feuer entsorgen. -1800 bis 2200 ppm -85 ppm (Methan Typ 340) ► Nicht gewaltsam öffnen. (Propan) Displayerfas- 750 ppm sung hoch (Methan) 85 ppm (Propan) Gebrauchsanweisung Dräger PointGard 3000 Series Firmwareversion ≥ 4.10...
- Page 71 SPDT, 0,1 A bis 5 A bei 230 V (AC) , 50 Hz Min. Gerätefehler ≤ 1,2 mA 0,1 A bis 5 A bei 30 V (DC) Fehler an der Ana- > 21 mA logschnittstelle Gebrauchsanweisung Dräger PointGard 3000 Series Firmwareversion ≥ 4.10...
- Page 72 6814150 CatEx-Sensor 194 ± 17 22 ± 2 Steckverbinder-Schrauben Netzanschlusska- 4,4 ... 5,3 0,5 ... 0,6 Steckverbinder 4,4 ... 5,3 0,5 ... 0,6 Relais 4-bis-20-mA- 1,9 ... 2,2 0,22 ... 0,25 Steckverbinder Gebrauchsanweisung Dräger PointGard 3000 Series Firmwareversion ≥ 4.10...
-
Page 73: Zubehör Und Ersatzteile
Blaue Stroboskopleuchte 8326472 NH3 FL 6813260 12,5 Rote Stroboskopleuchte 8326487 NH3 TL 6813095 12,5 Grüne Statusleuchte 8326489 NH3 TH 6800055 1000 1000 Bernsteinfarbene Statusleuchte 8326488 Ozon 6814005 19.1.3 Netzanschlusskabel Region Sachnummer Brasilien 8326448 Gebrauchsanweisung Dräger PointGard 3000 Series Firmwareversion ≥ 4.10... - Page 74 Anschlussgehäuse aus Edel- 4544098 stahl (explosionsgeschützt Ex d) DrägerSensor PR NPT DQ 6814150 Kleines Standardgehäuse 6812711 ® Polytron SE Ex PR M1 DQ (mit Sensor) (erhöhte Sicherheit Ex e) Prozessadapter DQ M30 x 6812470 Gebrauchsanweisung Dräger PointGard 3000 Series Firmwareversion ≥ 4.10...
- Page 75 A1 et les alarmes A2 ..7.5.3 Utiliser la touche de fonction ........ 12.2.2 Réglage : L’avertisseur sonore est activé Menu ..............uniquement en cas d’alarmes A2......Notice d'utilisation Dräger PointGard 3000 Series Version du firmware ≥ 4.10...
- Page 76 15.2.5 PointGard 3700/3720 IR........105 15.2.6 PointGard 3720 IR ..........106 Élimination ............107 Caractéristiques techniques......107 17.1 Plages de mesure..........107 17.2 Transmission du signal vers l'unité de commande Notice d'utilisation Dräger PointGard 3000 Series Version du firmware ≥ 4.10...
-
Page 77: Installation Mécanique
– Pour les tensions > 30 V CA ou > 42,4 V CA, on recouvrira les lignes de relais avec une gaine de ► N’utilisez pas l’instrument dans des environnements protection ou on utilisera des lignes à double isolation. explosifs. Notice d'utilisation Dräger PointGard 3000 Series Version du firmware ≥ 4.10... -
Page 78: Pendant Le Fonctionnement
– Consulter la section Maintenant dans la notice d'utilisation Légende du schéma du transmetteur. Pour voir les figures, veuillez vous reporter à la page dépliante. Série PointGard 3xx0 Avertisseur sonore Notice d'utilisation Dräger PointGard 3000 Series Version du firmware ≥ 4.10... -
Page 79: Description Des Fonctions
Les conditions d'alarme sont diagnostic du capteur (uni- indiquées par les dispositifs d'alarme intégrés. 2 versions des quement certains capteurs et combinaisons de feux clignotants sont disponibles. fonctions) Notice d'utilisation Dräger PointGard 3000 Series Version du firmware ≥ 4.10... -
Page 80: Domaine D'application
Un connecteur à 3 broches est fourni pour brancher un câble ► Ne pas utiliser dans les atmosphères à risque d'explosion. d'alimentation. Veuillez vous reporter aux figures 15 et 16. Notice d'utilisation Dräger PointGard 3000 Series Version du firmware ≥ 4.10... -
Page 81: Branchement Du Câble D'alimentation
1. Préparer une surface plane en respectant les instructions mise à la terre) du connecteur d'alimentation à la de montage (90 33 793) ou les dimensions mentionnées à protection de mise à la terre. l'arrière du boîtier Notice d'utilisation Dräger PointGard 3000 Series Version du firmware ≥ 4.10... - Page 82 Dräger Un connecteur à 5 broches est fourni pour le branchement du câblage de l'interface 4-20 mA. Veuillez-vous reporter à la notice d'utilisation jointe au système de commande Dräger. Notice d'utilisation Dräger PointGard 3000 Series Version du firmware ≥ 4.10...
-
Page 83: Installation Des Capteurs
PointGard 3200 CAT Têtes de mesure Polytron SE PointGard 3200 CAT Remote Ex (9033888) DSIR PointGard 37x0 IR PIR 7000/7200 (9023885) La longueur des câbles doit être ≤ 30 m. Notice d'utilisation Dräger PointGard 3000 Series Version du firmware ≥ 4.10... - Page 84 PointGard 3200 CAT à distance avec capteur LC : Relais : Aucune modification Indication d'avertissement 20.9 Le symbole s’affiche sur le côté droit de l’écran. Interface analogique : Courant Vol.% d’avertissement Relais : Aucune modification Notice d'utilisation Dräger PointGard 3000 Series Version du firmware ≥ 4.10...
-
Page 85: Panneau De Commande
7.6.1 Navigation dans le menu fié SIL. Les fonctionnalités SIL ne sont pas prises en charge, mais le symbole pourrait Bou- Fonction apparaître à l'écran. Défiler vers le haut. Définir des valeurs. Notice d'utilisation Dräger PointGard 3000 Series Version du firmware ≥ 4.10... -
Page 86: Mots De Passe
Si de l'appa- reil tous les codes sont 00, il n'y a pas de mes- sages d’avertissement ou d'erreur de dis- ponibles. Notice d'utilisation Dräger PointGard 3000 Series Version du firmware ≥ 4.10... -
Page 87: Aperçu Des Menus
Activacion DSA Régl.Maint4-20mA Acquitt. défauts Test Beamblock Activacion LifeTest Déf. alerte DSA Alerte < 50% Cont.sensibilité Signaux UGLD Alerte < 40% Détection défaut Adresse Modbus Modbus baud Modbus parite Notice d'utilisation Dräger PointGard 3000 Series Version du firmware ≥ 4.10... - Page 88 Cour. alerte DSA CaptDQ auto-main Limit.alerte DSA Corr. analogique Analogique sens. Régl.cour.4-20mA Régl.conc.4-20mA Test erreur Régl.Alar.4-20mA Régl.Maint4-20mA Test Beamblock Déf. alerte DSA Signaux UGLD Adresse Modbus Modbus baud Modbus parite Notice d'utilisation Dräger PointGard 3000 Series Version du firmware ≥ 4.10...
- Page 89 Cour. alerte DSA Affichage plage Limit.alerte DSA Corr. analogique Analogique sens. Régl.cour.4-20mA Régl.conc.4-20mA Test erreur Régl.Alar.4-20mA Régl.Maint4-20mA Test Beamblock Déf. alerte DSA Signaux UGLD Adresse Modbus Modbus baud Modbus parite Notice d'utilisation Dräger PointGard 3000 Series Version du firmware ≥ 4.10...
- Page 90 1) Respecter les indications de la fiche technique et de la notice d'utilisa- tion du capteur 7000/7200). 2) Pour les applications en ligne conformes à la norme EN 45544-1, l’intervalle de calibrage ne doit pas dépasser 6 mois. Notice d'utilisation Dräger PointGard 3000 Series Version du firmware ≥ 4.10...
-
Page 91: Réglage Du Zéro
été atteint, cela ne fait pas augmenter les valeurs affichées sur la réponse de vérification. l'instrument transmise à la centrale. Dans le cas des Notice d'utilisation Dräger PointGard 3000 Series Version du firmware ≥ 4.10... -
Page 92: Élimination Des Dérangements
1) Ne s’applique pas à tous les capteurs (Voir «Affichage, interface ana- 2) Pour les capteurs LC, le gaz étalon doit être appliqué pendant au mois logique et état du relais», page 83). 6 minutes. Notice d'utilisation Dräger PointGard 3000 Series Version du firmware ≥ 4.10... - Page 93 Optique du PIR Nettoyer l’optique du PIR La mémoire en Faire contrôler l'instrument 7000/7200 sale. 7000/7200. mode empilement par DrägerService. est pleine à 100 % et n’enregistre plus de données. Notice d'utilisation Dräger PointGard 3000 Series Version du firmware ≥ 4.10...
-
Page 94: Calendrier De Maintenance
Le symbole de maintenance est affiché. 2. Remplacer l'ancien capteur par un neuf : a. Veuillez desserrer la vis de réglage. b. Veuillez dévisser l'anneau à baïonnette sur le boîtier. Notice d'utilisation Dräger PointGard 3000 Series Version du firmware ≥ 4.10... -
Page 95: Régler La Date Et L'heure
3. Vérifier le calibrage. Si nécessaire, nous vous invitons à Vitalité Cap- Affiche la vitalité restante du capteur. calibrer l'instrument (Voir «Calibrage», page 90). teur 1) Avec le dongle Diagnostic seulement Notice d'utilisation Dräger PointGard 3000 Series Version du firmware ≥ 4.10... -
Page 96: Réinitialisation Des Réglages Par Défaut
Si une alarme est déclenchée, le contact du relais devient actif. En Hausse Le sens de l'alarme est dit ascendant, si la concentration de gaz doit être supérieure à une certaine valeur pour déclencher une alarme. Notice d'utilisation Dräger PointGard 3000 Series Version du firmware ≥ 4.10... -
Page 97: Réglages De L'affichage
Alarme A1 simule la pré-alarme sonore ne doivent pas être utilisés pour des applications relatives à la sécurité. Alarme A2 simule l'alarme principale test. Erreur simule le signal de défaut Notice d'utilisation Dräger PointGard 3000 Series Version du firmware ≥ 4.10... - Page 98 Feux cligno- tisseur 1. Ouvrir l'instrument. tants sonore 2. Placer les broches du commutateur DIP : Défaut du Vert Rouge système haut 3. Fermer l'instrument. 4. Mettre l'appareil en service. Notice d'utilisation Dräger PointGard 3000 Series Version du firmware ≥ 4.10...
- Page 99 A2 Réglage du commutateur DIP Broches 12.3.3 Réglage : L’avertisseur sonore est activé pour les alarmes A1 et les alarmes A2 ON/OF Réglage du commutateur DIP Broches ON/OF Notice d'utilisation Dräger PointGard 3000 Series Version du firmware ≥ 4.10...
- Page 100 Interface analog > Signal Mainten. et confirmer. 4-20 mA. 2. Régler le type de signal et confirmer. Statique Un courant constant qui peut être configuré. Notice d'utilisation Dräger PointGard 3000 Series Version du firmware ≥ 4.10...
- Page 101 ● Pour mettre les signaux beam block sur activé/désactivé : gique et la sensibilité analo- gique ne sont pas utilisées 1. Sélectionner Configuration > Communication > pour cette fonction. Interface analog et l’option souhaitée. Notice d'utilisation Dräger PointGard 3000 Series Version du firmware ≥ 4.10...
- Page 102 14.2.1 Réglage de la plage de capture 2. Sélectionner Désactivation fonc.. Le dongle sélectionné est désactivé. 1. Sélectionner Configuration > Capteurs > Affichage plage et confirmer. 2. Régler la correction dans la première fenêtre. Notice d'utilisation Dräger PointGard 3000 Series Version du firmware ≥ 4.10...
- Page 103 14.8.1 Type de capteur 8. Après révision, sélectionner Retour Menu ou Confirmer. Cette fonction définit le type de capteur installé. 1. Sélectionner Configuration > Capteurs > Type de capteur et valider. Notice d'utilisation Dräger PointGard 3000 Series Version du firmware ≥ 4.10...
- Page 104 0 à 100 Vol% (O avertissement, Capture d'affi- -0,25 Vol% (O 0 à –0,75 Vol% vitalité, test au gaz chage faible Capture d'affi- 0,25 Vol% (O 0 à 0,75 Vol% chage élevée Notice d'utilisation Dräger PointGard 3000 Series Version du firmware ≥ 4.10...
- Page 105 0,2 % LIE De 0 à 0,4% LIE Intervalle de 0 à 720 chage élevée calibrage [jours] 1) Pour les versions du micrologiciel < 3.0.0 Réponse Normal Normal / rapide Notice d'utilisation Dräger PointGard 3000 Series Version du firmware ≥ 4.10...
- Page 106 : Réponse Normal Normal / rapide Capture d'affi- -200 ppm De -1 000 à 1 000 ppm chage faible (dioxyde de carbone) Capture d'affi- 200 ppm chage élevée Notice d'utilisation Dräger PointGard 3000 Series Version du firmware ≥ 4.10...
-
Page 107: Caractéristiques Techniques
1) Pour un dépassement d’échelle complet adaptable, voir 15.2. démarrage à froid 25 °C 2) La plage de mesure varie en fonction de la substance. Courant de fonctionnement 100 mA à 24 V (AC), 25 °C (maximum) Notice d'utilisation Dräger PointGard 3000 Series Version du firmware ≥ 4.10... -
Page 108: Spécifications Physiques
à consulter la docu- Pression 700 ... 1300 hPa mentation du capteur Dräger PIR 7000 / PIR 7200 correspondant. 20,7 ... 38,4 inHg Degré de pollution Notice d'utilisation Dräger PointGard 3000 Series Version du firmware ≥ 4.10... -
Page 109: Liste De Commande
Protection anti-éclabous- 6812510 sures 6809685 1000 3000 200 Adaptateur de calibrage V 6810536 COCI2 6809930 Adaptateur de gazage 6806978 Hydra- 6810180 Supports de fixation 8326497 zine HCI SC 6809640 6810595 Notice d'utilisation Dräger PointGard 3000 Series Version du firmware ≥ 4.10... -
Page 110: Câbles D'alimentation
Dräger PIR 7000 Type 340 6811832 teur (NPT) Dongle Test pour capteur 8317619 Dräger PIR 7000 334 (M25) 6811825 Kit complet Dräger PIR 7000 340 (M25) 6811819 Kit complet Notice d'utilisation Dräger PointGard 3000 Series Version du firmware ≥ 4.10... - Page 111 Accessoires et pièces détachées Description Référence de pièce Dräger PIR 7200 (NPT) 6811572 Dräger PIR 7200 (M25) 6812290 HART, kit complet Notice d'utilisation Dräger PointGard 3000 Series Version du firmware ≥ 4.10...
- Page 112 Uso de la tecla de función ........122 alarmas A2............135 Menú..............122 12.2.2 Ajuste: la bocina solo está activa en alarmas A2 135 7.6.1 Navegación por menús........122 Instrucciones de uso Dräger PointGard 3000 Series Versión de firmware ≥ 4.x10...
- Page 113 15.2.6 PointGard 3720 IR ..........143 Eliminación ............144 Características técnicas ........144 17.1 Rangos de medición ..........144 17.2 Transmisión de señal al controlador ....144 17.3 Alimentación eléctrica .......... 145 Instrucciones de uso Dräger PointGard 3000 Series Versión de firmware ≥ 4.x10...
-
Page 114: Instalación Mecánica
– Los cables de conexión para el módulo de relés opcional ► No se debe utilizar el instrumento en atmósferas deben seleccionarse y asegurarse con fusibles según las potencialmente explosivas. tensiones y corrientes nominales y las condiciones medioambientales. Instrucciones de uso Dräger PointGard 3000 Series Versión de firmware ≥ 4.x10... -
Page 115: Puesta En Funcionamiento
Los Unidad PCB significados de las advertencias se definen de la siguiente manera: Ranura para mochila de sensor Interruptor DIP Puerto para sensor Instrucciones de uso Dräger PointGard 3000 Series Versión de firmware ≥ 4.x10... -
Page 116: Descripción De Las Características
1 y 2, 21 y 22 y clase I y II, divisiones 1 y 2. Instrucciones de uso Dräger PointGard 3000 Series Versión de firmware ≥ 4.x10... -
Page 117: Uso Previsto
Las luces estroboscópicas y la 2. Pasar el cable de alimentación por el prensaestopas bocina no deben utilizarse para aplicaciones relevantes para correspondiente (4). la seguridad. Instrucciones de uso Dräger PointGard 3000 Series Versión de firmware ≥ 4.x10... - Page 118 Se proporciona un conector de 9 clavijas para el cableado de los tornillos con el par correcto (4.4 ... 5.3 Lbs. In. / 0.5 ... relés. 0.6 Nm). Instrucciones de uso Dräger PointGard 3000 Series Versión de firmware ≥ 4.x10...
- Page 119 PointGard 3200 CAT Remote Polytron SE (9033888) provocando el apagado de la luz verde. DSIR No existe función para las variantes sin luz verde. Instrucciones de uso Dräger PointGard 3000 Series Versión de firmware ≥ 4.x10...
-
Page 120: Modo De Medición
Relés: Interruptores de relé de fallo Ejemplo de visuali- Designación zación Durante el funcionamiento normal, la pantalla muestra la concentración de 20.9 gas medida, el gas seleccionado y la unidad de medida. Vol.% Instrucciones de uso Dräger PointGard 3000 Series Versión de firmware ≥ 4.x10... - Page 121 Mensaje de aviso disponible. desaparece en cuanto la concentración de gas se encuentre dentro del rango de medición. Señal de mantenimiento transmitida. Rango de medición de la interfaz analógica excedido. Instrucciones de uso Dräger PointGard 3000 Series Versión de firmware ≥ 4.x10...
-
Page 122: Panel De Control
Si no se pulsa ninguna tecla durante 30 segundos, el ponibles, existirá un indicador (por ejemplo, instrumento retornará automáticamente al modo de 1/3 = pantalla 1 de 3). funcionamiento normal. Instrucciones de uso Dräger PointGard 3000 Series Versión de firmware ≥ 4.x10... - Page 123 (activo o no activo) Grafico Muestra el historial de los últimos 15 minu- tos en un gráfico de tiempo/concentración. 1) Función sólo disponible con la mochila de diagnóstico. Instrucciones de uso Dräger PointGard 3000 Series Versión de firmware ≥ 4.x10...
-
Page 124: Descripción General Del Menú
Aj.Mante.4-20mA Confirmar fallos Test beamblock Activatión LifeTest Ajustar adv.DSA Alerta < 50% Compr. sensibil. Señales UGLD Alerta < 40% Detección fallos Direcc. Modbus Tasa de baudios Modbus paridad Instrucciones de uso Dräger PointGard 3000 Series Versión de firmware ≥ 4.x10... - Page 125 SensDQ autoencl. Lim. advert DAS Comp. analógica Sensibil. 4-20mA Aj.Corri.4-20mA Aj.Conce.4-20mA Ajuste Fallo Aj.Aviso 4-20mA Aj.Mante.4-20mA Test beamblock Ajustar adv.DSA Señales UGLD Direcc. Modbus Tasa de baudios Modbus paridad Instrucciones de uso Dräger PointGard 3000 Series Versión de firmware ≥ 4.x10...
- Page 126 Captura visualiz Lim. advert DAS Comp. analógica Sensibil. 4-20mA Aj.Corri.4-20mA Aj.Conce.4-20mA Ajuste Fallo Aj.Aviso 4-20mA Aj.Mante.4-20mA Test beamblock Ajustar adv.DSA Señales UGLD Direcc. Modbus Tasa de baudios Modbus paridad Instrucciones de uso Dräger PointGard 3000 Series Versión de firmware ≥ 4.x10...
- Page 127 (véanse las instrucciones de instalación para accesorios PIR 2) Para aplicaciones conformes a la norma EN 45544-1, el intervalo de 7000/7200). calibración no debe superar los 6 meses. Instrucciones de uso Dräger PointGard 3000 Series Versión de firmware ≥ 4.x10...
- Page 128 PointGard 3200 CAT Remote with IR sensor: punto cero. En caso de un fallo, repita la comprobación del punto cero o cambie el sensor en caso necesario. Utilice nitrógeno (N ) para la verificación. Instrucciones de uso Dräger PointGard 3000 Series Versión de firmware ≥ 4.x10...
-
Page 129: Eliminación De Averías
1) No aplicable a todos los sensores (consulte "Pantalla, interfaz analó- 2) En los sensores LC, el gas de prueba debe aplicarse durante al gica y estado del relé", página 120). menos 6 minutos. Instrucciones de uso Dräger PointGard 3000 Series Versión de firmware ≥ 4.x10... - Page 130 Compruebe la conexión de bración vencido. en el sensor PIR 4 a 20 mA al sensor PIR Lectura negativa. Recalibrar el punto cero. 7000/7200. 7000/7200. Valor por debajo del rango mínimo. Instrucciones de uso Dräger PointGard 3000 Series Versión de firmware ≥ 4.x10...
-
Page 131: Mantenimiento
3. Pulse OK para volver a la medición. señal de fallo en la unidad de control. Además se asegura Instrucciones de uso Dräger PointGard 3000 Series Versión de firmware ≥ 4.x10... -
Page 132: Ajuste De La Fecha Y La Hora
Sustitución del sensor remoto claro. 1. Si es necesario, ajustar la corriente de mantenimiento para la interfaz analógica. Noticia report Los mensajes de aviso se muestran en texto claro. Instrucciones de uso Dräger PointGard 3000 Series Versión de firmware ≥ 4.x10... -
Page 133: Restablecimiento De Los Ajustes Por Defecto
1. Seleccionar Ajustes > Instrumento > Alarma> Relé A1 o sucesivamente con Sigue. Relé A2 y confirmar. a. Establezca el valor para el umbral de alarma. 2. Seleccionar la opción deseada y confirmar. Instrucciones de uso Dräger PointGard 3000 Series Versión de firmware ≥ 4.x10... -
Page 134: Ajustes De Pantalla
. Al cerrar esta función, el estado del relé e indicador LED volverá automáticamente a su estado anterior. Instrucciones de uso Dräger PointGard 3000 Series Versión de firmware ≥ 4.x10... - Page 135 12.1.1 Ajustar las clavijas del interruptor DIP Fallo de Verde Roja sistema 1. Abrir el instrumento. 2. Conmutar las clavijas del interruptor DIP: arriba abajo 3. Cerrar el instrumento. Instrucciones de uso Dräger PointGard 3000 Series Versión de firmware ≥ 4.x10...
- Page 136 A1 y A2. 5. Cerrar el instrumento. Condiciones de alarma Luces estrobos- Bocina 6. Poner en marcha el instrumento. cópicas Fallo de Ámbar Roja sistema Instrucciones de uso Dräger PointGard 3000 Series Versión de firmware ≥ 4.x10...
- Page 137 1. Seleccionar Ajustes > Comunicacion > Interf.analogico > Noticia report y confirmar. 2. Seleccionar Activado o Desactivado y confirmar. Instrucciones de uso Dräger PointGard 3000 Series Versión de firmware ≥ 4.x10...
- Page 138 2. Una vez que se hayan inhibido las alarmas en la unidad 4. Seleccione Confirmar y confírmelo con [OK]. de control, confirme el mensaje Por favor apaga el alarma. 3. Seleccione Activado o Desactivado y confírmelo. Instrucciones de uso Dräger PointGard 3000 Series Versión de firmware ≥ 4.x10...
- Page 139 Las fluctuaciones de medición son unas variaciones menores existentes en valores medidos (como ruido de señal, variaciones en la concentración). Esas variaciones no cambian el valor transmitido o visualizado. Los valores Instrucciones de uso Dräger PointGard 3000 Series Versión de firmware ≥ 4.x10...
- Page 140 1. Seleccionar Ajustes > Sensores > Confg. Gas y confirmar. Se muestra el gas actualmente medido. 2. Seleccionar un gas medido de la lista y confirmar. Se muestra la unidad de medida actual. Instrucciones de uso Dräger PointGard 3000 Series Versión de firmware ≥ 4.x10...
- Page 141 Sin enclavamiento Con enclava- defecto miento A1 miento/Sin encla- Alarma A1 En función del vamiento Modo de enclava- Con enclavamiento sensor miento A2 Alarma A2 En función del sensor Instrucciones de uso Dräger PointGard 3000 Series Versión de firmware ≥ 4.x10...
- Page 142 0 a 4 % LIE Deflexión a plena 100 % LIE Rango no ajustable lla, valor alto escala Desviación total de 100 % LIE Rango no ajustable la escala Instrucciones de uso Dräger PointGard 3000 Series Versión de firmware ≥ 4.x10...
- Page 143 2 vol% defecto Tipo de LIE Gas de cali- Propano Gas medido bración Unidades de vol% vol% / ppm Unidades de % LIE gas medido gas de cali- bración Instrucciones de uso Dräger PointGard 3000 Series Versión de firmware ≥ 4.x10...
- Page 144 PointGard 3200 CAT con 0 a 100 % LIE 0 a 500 Ω 18 a 30 V CC ® DrägerSensor PointGard 3200 CAT con 0 to 10 % LIE ® DrägerSensor Instrucciones de uso Dräger PointGard 3000 Series Versión de firmware ≥ 4.x10...
- Page 145 1) Para obtener más información acerca de la longitud de los cables y otras posibles especificaciones de cables, véase la documentación ® correspondiente del cabezal detector Polytron SE Ex o de la caja de ® conexiones Polytron Instrucciones de uso Dräger PointGard 3000 Series Versión de firmware ≥ 4.x10...
- Page 146 PointGard 3700/3720 IR CA remoto 3728167 6809625 PointGard 3700/3720 IR CA remoto verde 3728166 6809630 PointGard 3700/3720 IR CC remoto 3728165 6809720 Hidruros 6809635 Hidru- 6809980 ros SC 6809650 HCN LC 6813200 Instrucciones de uso Dräger PointGard 3000 Series Versión de firmware ≥ 4.x10...
-
Page 147: Accesorios Y Piezas De Repuesto
Diámetro de cabeza Máx. 11,5 mm/máx. 0,45 Sensor IR pulg. juego completo e Diámetro mayor de la rosca 6 mm/0,2 pulg. Cabezal detector, Dräger- 6811265 Sensor IR juego completo e2 Instrucciones de uso Dräger PointGard 3000 Series Versión de firmware ≥ 4.x10... - Page 148 Dräger PIR 7000 334 (M25) Juego completo de 6811819 Dräger PIR 7000 340 (M25) Dräger PIR 7200 (NPT) 6811572 Juego completo de 6812290 Dräger PIR 7200 (M25) HART Instrucciones de uso Dräger PointGard 3000 Series Versión de firmware ≥ 4.x10...
- Page 149 Attivazione della modalità info ......159 12.2.1 Impostazione predefinita: segnalatore acustico 7.5.2 Navigazione nella modalità informazioni....159 attivo sugli allarmi A1 e sugli allarmi A2....172 7.5.3 Utilizzo del tasto funzione ........159 Istruzioni per l'uso Dräger PointGard 3000 Series Versione firmware ≥ 4.10...
-
Page 150: Table Of Contents
15.2.3 PointGard 3200 CAT DrägerSensor LC .... 179 15.2.4 PointGard 3200 CAT Remote DSIR ....179 15.2.5 PointGard 3700/3720 IR........179 15.2.6 PointGard 3720 IR ..........180 Smaltimento ............181 Istruzioni per l'uso Dräger PointGard 3000 Series Versione firmware ≥ 4.10... -
Page 151: Installazione Meccanica
Letture molto fuori scala potrebbero indicare la presenza di impedenze minime (vedi "Trasmissione del segnale una concentrazione esplosiva. all'unità di comando", pagina 181). ► Non utilizzare lo strumento in atmosfere esplosive. Istruzioni per l'uso Dräger PointGard 3000 Series Versione firmware ≥ 4.10... -
Page 152: Durante Il Funzionamento
Serie PointGard 3xx0 abbreviare gli intervalli definiti. Segnalatore acustico – Fare riferimento alla sezione manutenzione nelle istruzioni per l'uso del trasmettitore. Viti per avvitare/svitare il coperchio Istruzioni per l'uso Dräger PointGard 3000 Series Versione firmware ≥ 4.10... -
Page 153: Descrizione Funzionalità
A2. 3.2.2 PointGard 3200 CAT – Luce di stato verde e luce stroboscopica rossa Lo strumento monitora le concentrazioni dei gas infiammabili e dei vapori nell’aria ambiente. Istruzioni per l'uso Dräger PointGard 3000 Series Versione firmware ≥ 4.10... -
Page 154: Impiego Previsto
(segnalatore acustico e luci stroboscopiche) dello strumento. I Terra di protezione dispositivi di allarme esterni possono anche essere collegati e Neutro Istruzioni per l'uso Dräger PointGard 3000 Series Versione firmware ≥ 4.10... - Page 155 – Per le connessioni dei relè: Passacavo 5 Normalmente aperto – Per i collegamenti dell’interfaccia 4-20 mA: Passacavo 3. Serrare il controdado alla coppia corretta (13 +/- 4.4 Lbs. In. / 1.5 +/- 0.5 Nm). Istruzioni per l'uso Dräger PointGard 3000 Series Versione firmware ≥ 4.10...
-
Page 156: Installazione Dei Sensori
5. Inserire il connettore nella presa e serrare le viti alla coppia corretta (1.9 ... 2.2 Lbs. In. / 0.22 ... 0.25 Nm). Istruzioni per l'uso Dräger PointGard 3000 Series Versione firmware ≥ 4.10... -
Page 157: Messa In Funzione Dello Strumento
SIL. HART viene supportato, tuttavia il PointGard viene visualizzato come un Polytron 8xx0 per un controller HART. Per maggiori informazioni consultare il manuale della serie Polytron 8000 9033848. Istruzioni per l'uso Dräger PointGard 3000 Series Versione firmware ≥ 4.10... - Page 158 Indicazione di guasto/avvertenza Guasti e avvertenze sono senza ritenuta. Se la condizione di guasto o avvertenza si risolve, il messaggio scompare. Istruzioni per l'uso Dräger PointGard 3000 Series Versione firmware ≥ 4.10...
-
Page 159: Pannello Di Comando
Tenere premuto per 3 secondi in modalità di ● Tenere premuto per 3 secondi in modalità di misurazione misurazione. b. Selezionare Enter password. c. Accedere Settings PWD Istruzioni per l'uso Dräger PointGard 3000 Series Versione firmware ≥ 4.10... -
Page 160: Visualizzazione Delle Informazioni
Visualizza lo stato del data logger (attivo o status non attivo) Graph Visualizza la cronologia dei 15 minuti pre- cedenti su un grafico tempo/concentra- zione. 1) Funzione disponibile solo con chiave per funzioni diagnostiche. Istruzioni per l'uso Dräger PointGard 3000 Series Versione firmware ≥ 4.10... - Page 161 Set DSA warning Alert < 50% Sensitiv. Check UGLD signals Alert < 40% Fault detection Modbus address Modbus baudrate 1) Parameter not used by Dräger PointGard 3100. Modbus parity Istruzioni per l'uso Dräger PointGard 3000 Series Versione firmware ≥ 4.10...
- Page 162 Set concentr. Set fault Set warning Set mainten. Set beamblock Set DSA warning UGLD signals Modbus address Modbus baudrate 1) Parameter not used by Dräger PointGard 3200/PointGard 3310. Modbus parity Istruzioni per l'uso Dräger PointGard 3000 Series Versione firmware ≥ 4.10...
- Page 163 Set concentr. Set fault Set warning Set mainten. Set beamblock Set DSA warning UGLD signals Modbus address Modbus baudrate 1) Parameter not used by Dräger PointGard 3700/PointGard 3720. Modbus parity Istruzioni per l'uso Dräger PointGard 3000 Series Versione firmware ≥ 4.10...
- Page 164 1) Osservare la scheda tecnica del sensore e le istruzioni per l'uso del sensore 2) Per le applicazioni in linea con EN 45544-1, l’intervallo di calibrazione non deve superare i 6 mesi. Istruzioni per l'uso Dräger PointGard 3000 Series Versione firmware ≥ 4.10...
- Page 165 100 % LIE. Per questa ragione, per calibrazioni con gas di sostituzione, Istruzioni per l'uso Dräger PointGard 3000 Series Versione firmware ≥ 4.10...
-
Page 166: Risoluzione Dei Problemi
1) Non applicabile per tutti i sensori (vedi "Display, interfaccia analogica 2) I sensori LC devono essere esposti al gas campione per almeno 6 e stato relè", pagina 157). minuti. Istruzioni per l'uso Dräger PointGard 3000 Series Versione firmware ≥ 4.10... - Page 167 Numero Causa Soluzione di avver- di avver- tenza tenza La tensione di ali- Controllare la tensione di La temperatura del mentazione è fuori alimentazione. sensore è molto intervallo. alta. Istruzioni per l'uso Dräger PointGard 3000 Series Versione firmware ≥ 4.10...
-
Page 168: Manutenzione
(per es. a. Allentare la vite di regolazione. latenza dell'unità di comando). b. Svitare l’anello a baionetta dall’alloggiamento. ► Assicurarsi che il tempo di risposta richiesto sia mantenuto. Istruzioni per l'uso Dräger PointGard 3000 Series Versione firmware ≥ 4.10... -
Page 169: Impostazione Data E Ora
(vedi "Calibrazione", pagina 164). definitive 10.4 Esecuzione test del display Questa funzione ripristina nello strumento le impostazioni 1. Selezionare Settings > Instrument > Display > predefinite di fabbrica. Displaytest e confermare. Istruzioni per l'uso Dräger PointGard 3000 Series Versione firmware ≥ 4.10... - Page 170 Per eliminare un allarme a Il LED arancione si illumina di continuo. ritenuta, esso deve essere confermato. Istruzioni per l'uso Dräger PointGard 3000 Series Versione firmware ≥ 4.10...
-
Page 171: Impostazioni Del Display
Istruzioni per l'uso Dräger PointGard 3000 Series Versione firmware ≥ 4.10... -
Page 172: Impostazione: Segnalatore Acustico Attivo Solo Sugli Allarmi A2
Se si verifica un errore, la luce di stato verde ON/OF rimane accesa. È necessario eseguire le impostazioni nel menu, (vedi "Impostazione del segnalatore acustico su attivo solo sugli allarmi A2", pagina 173) Istruzioni per l'uso Dräger PointGard 3000 Series Versione firmware ≥ 4.10... -
Page 173: Impostazione Del Segnalatore Acustico Su Attivo Solo Sugli Allarmi A2
Errore di Gialla Rossa sistema Modello di allarme per luci stroboscopiche e segnalatore acustico Segna- Condizioni di allarme Luci strobosco- latore piche acu- stico Errore di Gialla Rossa sistema Istruzioni per l'uso Dräger PointGard 3000 Series Versione firmware ≥ 4.10... -
Page 174: Conferma Del Segnalatore Acustico
4 - 20 mA trasmette interface > Maint. signal e confermare. 20mA. 2. Impostare il tipo di segnale e confermare. static Una corrente costante che può essere con- figurata. Istruzioni per l'uso Dräger PointGard 3000 Series Versione firmware ≥ 4.10... -
Page 175: Impostazione Della Corrente Di Manutenzione Statica
L'offset analogico e l'inter- vallo analogico non sono uti- ● Per attivare/disattivare i segnali beam block: lizzati per questa funzione. 1. Selezionare Settings > Communication > Analog interface e l'opzione desiderata. Istruzioni per l'uso Dräger PointGard 3000 Series Versione firmware ≥ 4.10... -
Page 176: Impostazioni Del Sensore Pointgard 3Xx0
Il limite di valore di acquisizione inferiore indica il limite 14.6.1 Disattivazione di unachiave inferiore dell'intervallo in cui è visualizzato il valore di acquisizione. Specifico per PointGard 3000 EC: Istruzioni per l'uso Dräger PointGard 3000 Series Versione firmware ≥ 4.10... -
Page 177: Impostazioni Del Sensore Pointgard 3100 Ec
Altrimenti, l'attuale deviazione totale viene menti e confermare con [OK]. visualizzata. Continuare con il passaggio 6. 4. Selezionare una categoria e confermare. 5. Impostare il valore LIE e confermare. Istruzioni per l'uso Dräger PointGard 3000 Series Versione firmware ≥ 4.10... -
Page 178: Impostazioni Predefinite Di Fabbrica
Lingua DE / EN / FR / ES / Intervallo di cali- in funzione del da 0 a 720 RU / ZH brazione [giorni] sensore Autocalibrazione on / off Istruzioni per l'uso Dräger PointGard 3000 Series Versione firmware ≥ 4.10... -
Page 179: Pointgard 3200 Cat Drägersensor ® Dq
Tipo di LIE NIOSH IEC / PTB / NIOSH / configu- da 1 a 10 % LIE rabile Intervallo di cali- da 0 a 360 Gas misurato Metano brazione [giorni] Istruzioni per l'uso Dräger PointGard 3000 Series Versione firmware ≥ 4.10... -
Page 180: Pointgard 3720 Ir
Intervallo di da 0 a 720 misurato %LIE calibrazione [giorni] Deviazione 100 % LIE da 20 a 100% LIE totale Risposta normale normale / rapida Beam block on / off Istruzioni per l'uso Dräger PointGard 3000 Series Versione firmware ≥ 4.10... -
Page 181: Smaltimento
Da 0 a (1,25 x LIE max) 1)2) Vol%, Potenza nominale PointGard 12 W a 230 V (AC), 25 °C Per CH4 (metano) da 0 a 100 3700/3720 Vol% Istruzioni per l'uso Dräger PointGard 3000 Series Versione firmware ≥ 4.10... -
Page 182: Versione Cc
0 … 95 % (senza formazione Diametro esterno per passa- 6-12 mm / 0,2 in - 0,47 in mento) di condensa) cavo Dimensione cavo 1 - 1,5 mm² (14-18 AWG) Istruzioni per l'uso Dräger PointGard 3000 Series Versione firmware ≥ 4.10... -
Page 183: Intervallo Del Sensore E Valori Di Allarme Predefiniti
Numero d'ordine 6809705 Dispositivo antispruzzo 6812510 6809675 1000 4000 7000 200 2800 Adattatore di calibrazione V 6810536 Adattatore per gassificazione 6806978 6809685 1000 3000 200 Staffe di montaggio 8326497 Istruzioni per l'uso Dräger PointGard 3000 Series Versione firmware ≥ 4.10... -
Page 184: Parti Di Ricambio
Dräger PIR 7000 Tipo 340 6811832 Dongle per test del sensore 8317619 (NPT) Dräger PIR 7000 334 (M25) 6811825 set completo Dräger PIR 7000 340 (M25) 6811819 set completo Istruzioni per l'uso Dräger PointGard 3000 Series Versione firmware ≥ 4.10... - Page 185 Accessori e parti di ricambio Descrizione Numero d'ordine Dräger PIR 7200 (NPT) 6811572 Dräger PIR 7200 (M25) 6812290 HART, set completo Istruzioni per l'uso Dräger PointGard 3000 Series Versione firmware ≥ 4.10...
- Page 186 7.5.3 12.3.2 设置:仅在 A1 报警时激活喇叭 ....206 菜单 ........194 12.3.3 设置:A1 报警和 A2 报警时激活喇叭 ..206 菜单导航 ........194 7.6.1 喇叭确认........206 12.4 密码 ........194 7.6.2 输入菜单 ........194 7.6.3 Dräger PointGard 3000 Series 固件版本 ≥ 4.10 使用说明...
- Page 187 17.5 设备螺纹的紧固扭矩......213 17.6 CatEx 远程电缆规格 ......213 17.7 PIR 远程电缆规格 ......213 17.8 传感器测量范围与默认报警值....213 17.9 17.9.1 催化剂球 (CatEx) 传感器测量范围 ..... 213 17.9.2 电化学 (EC) 传感器测量范围 ....213 17.10 有毒有害物质名称及含量..... 214 Dräger PointGard 3000 Series 固件版本 ≥ 4.10 使用说明...
-
Page 188: 与安全相关的信息
触电危险 PointGard 本身不适合在可能有爆炸性气体的危险区域内使 操作过程中打开设备可能导致触电。 用。 ► 断开设备电源并至少等待 1 分钟才可进行下一步。 ► 不适合在潜在爆炸空气中使用。 1.6.1 维护 机械安装 – 必须制定每个单一装置的维护间隔。根据仪器的安全注意 – 设备的正确放置由最终用户负责。如果对放置位置有疑 事项和所使用的特定应用环境,可能需要缩短这些维护间 问,请咨询应用工程师。 隔。 – 必须严格遵守有关气体监测设备安装的地方、州和国家规 – 请参阅发射器使用说明书中的维护部分。 范与法规。 正确的放置位置应考虑以下方面内容: – 待检测的气体或蒸汽的物理性质 (如:密度) – 区域内的气流特点 Dräger PointGard 3000 Series 固件版本 ≥ 4.10 使用说明... -
Page 189: 文档编写惯例
视化指示。频闪和喇叭不得用于安全相关用途。 PCB 装置 集成报警装置的报警模式,比如频闪灯闪烁和喇叭音调,可用 DIP 开关进行配置。 传感器加密狗插槽 设备装配加密狗: DIP 开关 – 传感器测试加密狗启动传感器自测 (仅适用于部分传感 传感器端口 器) 4-20mA 接口专用 5 针插座 – 诊断加密狗启动传感器自测、传感器活性显示和传感器诊 断功能 (仅适用于部分传感器和功能) 连接继电器专用 9 针插座 本仪器安装有数据记录器。 适用于 PC 配置的 DIRA 接口 Dräger PointGard 3000 Series 固件版本 ≥ 4.10 使用说明... -
Page 190: Pointgard 3100 Ec
汽。 PIR 7000 具有集成的气体 / 蒸汽库 (包含超过 100 种 零线 物质) 。 布线表 (直流电) – PIR 7200 用于持续监测二氧化碳。 针 标记 功能 注意 M / - 爆炸危险 设备本身不适合在潜在爆炸空气的危险区域使用。 保护性接地 ► 不适合在潜在爆炸空气中使用。 P / + Dräger PointGard 3000 Series 固件版本 ≥ 4.10 使用说明... -
Page 191: 连接电源电缆
In./0.5 ... 0.6 Nm) 拧紧螺丝。 连接 4-20 mA 接口 4.5.3 4-20mA 接口 4. 关闭设备。 4.5.2 连接继电器 4.5.3 4-20mA 接口 连接继电器可以触发外置报警装置。 4-20 mA 接口可以将测量值传输至控制装置。仅当设备为电流 9 针连接器 源操作时是可能的。 9 针连接器供继电器接线用。 5 针连接器 3 针连接器供连接 4-20mA 接口接线用。 Dräger PointGard 3000 Series 固件版本 ≥ 4.10 使用说明... -
Page 192: 外部错误输入
设备开始预热。 2. 使加密狗的 Dräger 商标朝上,将加密狗插入到盖板背面 显示屏显示传感器正在准备测量,剩余时间 hh:mm:ss PCB 装置的插槽中。 (倒计时) 。 3. 关闭设备。 2. 等待预热阶段结束。 根据安装的传感器不同,预热阶段可能需要 5 分钟到 12 小 时。已经可以在菜单中进行设置。 3. 必要时标定传感器。 4. 进行测试: a. 检查信号是否发送至控制单元。 b. 检查集成的报警装置触发是否正常。 c. 选配连接的外部继电器 Dräger PointGard 3000 Series 固件版本 ≥ 4.10 使用说明... -
Page 193: 显示屏、模拟接口和继电器状态
超出传感器测量范围的气体浓度可能会导致传感器故障。 或远程传感器线路断开造成的。 ► 检查标定。 数值低于测量范围 PointGard 3200 CAT,带 DQ 传感器: 气体浓度超过传感器的测量范围。 模拟接口:零点以下漂移 验证气体浓度低于 100 %LEL (例如使用便携式仪器)后, 继电器:故障继电器切换 使用 [OK] (确定)对超过范围进行确认。 Vol.% 锁定报警是仪器的默认设置。 故障指示 PointGard 3200 CAT Remote,带 LC 传感器: 符号显示在显示屏的右侧。 模拟接口:故障电流 继电器:故障继电器切换 Dräger PointGard 3000 Series 固件版本 ≥ 4.10 使用说明... -
Page 194: Led 与符号指示
“ 预测 ” 维修保养:传感器已准备就绪 , 但 ● 要直接输入 Information 菜单: 已接近其使用寿命。 a. 在测量模式中,按住 1 秒。 “ 预测 ” 维修保养:传感器仍可使用,但应 ● 要输入 Calibration 菜单: 尽快更换。 a. 在测量模式中,按住 3 秒 b. 选择 Enter password c. 输入 Calibration PWD。 Dräger PointGard 3000 Series 固件版本 ≥ 4.10 使用说明... -
Page 195: 显示信息
不足 25 % 时, Dräger 建议更换传感器。 Last cal. 显示标定日期、单位以及最后标定的气体和 date 浓度。 Next cal. 显示下次标定的到期日期。 date Sensor 显示电流和传感器最高温度。 temperatur Data logger Logger 显示数据记录器状态 (激活或禁用) status Graph 在一幅时间 / 浓度图形上显示过去 15 分钟 的历史信息。 1) 仅在装配诊断加密狗时,此功能才可用。 Dräger PointGard 3000 Series 固件版本 ≥ 4.10 使用说明... -
Page 196: 菜单概述
Set beamblock Activation LifeTest Set DSA warning Alert < 50% Sensitiv. Check UGLD signals Alert < 40% Fault detection Modbus address Modbus baudrate 1) Parameter not used by Dräger PointGard 3100. Modbus parity Dräger PointGard 3000 Series 固件版本 ≥ 4.10 使用说明... - Page 197 Set current Set concentr. Set fault Set warning Set mainten. Set beamblock Set DSA warning UGLD signals Modbus address Modbus baudrate 1) Parameter not used by Dräger PointGard 3200/PointGard 3310. Modbus parity Dräger PointGard 3000 Series 固件版本 ≥ 4.10 使用说明...
- Page 198 Set current Set concentr. Set fault Set warning Set mainten. Set beamblock Set DSA warning UGLD signals Modbus address Modbus baudrate 1) Parameter not used by Dräger PointGard 3700/PointGard 3720. Modbus parity Dräger PointGard 3000 Series 固件版本 ≥ 4.10 使用说明...
-
Page 199: 测试气体
气体流量应符合运行的环境条件 (例如使用超过 2 l/min 的流 请参见下图。 量进行管道测量) 标定设备: 零点标定 – Dräger 减压阀 (1),对于活性气体,使用不锈钢减压阀 – Dräger 标定适配器 (2) (订货号 6810536) 。 只有当已知区域内无目标气体或对传感器交叉敏感的任何气体 (在传感器数据表中列出) ,才可用环境空气代替氮气或合成 空气来对传感器进行零点标定。在这种情况下,任何气瓶或标 1) 遵照传感器数据表和传感器的使用说明书 定适配器都不再需要进行零点标定。 2) 对于符合 EN 45544-1 的应用,标定间隔不得超过 6 个月。 Dräger PointGard 3000 Series 固件版本 ≥ 4.10 使用说明... -
Page 200: 执行零点标定
PointGard 3200 CAT / 3200 CAT Remote IR / 3700 IR - 特定 : 设备返回标定菜单。 应在最后一次有效零点标定后的 24 h 内进行灵敏度标定。 PointGard 3200 CAT Remote with IR sensor: 1) 并不适用于所有传感器 (请参见第 193 页 “ 显示屏、模拟接口和继电 器状态 ”) 。 2) 对于 LC 传感器,测试气体必须应用至少 6 分钟。 Dräger PointGard 3000 Series 固件版本 ≥ 4.10 使用说明... -
Page 201: 故障排除
不同部件号的传感 大测量误差。 前,请勿标定。 器。 167, 170 超出标定间隔。 重新标定仪器。 由 DrägerService 检查仪 仪器故障。 读数为负值。数值 重新标定零点。 器。 低于范围最小值。 137, 64, 仪器故障。 重启。如果此故障再次出 电化学传感器寿命 更换传感器 现:由 DrägerService 检查 不足 仪器。 1) 仅限 PointGard 3100 EC Dräger PointGard 3000 Series 固件版本 ≥ 4.10 使用说明... -
Page 202: 执行撞击测试
– 检测设备报警器触发来源: 仅对不带远程应用的 PointGard 3200 CAT 有效。 – 内置报警装置 1. 必要时为模拟接口设置维护电流。 – 选配连接的外部继电器 2. 打开设备。 – 如果集成到一个报警器管理系统中,经 4-20 mA 接口 3. 将传感器连接器从插座中拔出。 传输的信号 (可选) 。 4. 松开传感器并将其从端口中拉出。 – 传感器标定。 5. 使新传感器的电缆穿过传感器端口。 – 检查喇叭清洁度。 Dräger PointGard 3000 Series 固件版本 ≥ 4.10 使用说明... -
Page 203: Pointgard 3700/3720 Ir Remote
1. 选择 Settings > Instrument > Alarm> Fault warm up 所 1. 选择 Settings > Instrument > Function key 并确认。 需选项并确认。 2. 选择功能并确认。 static 故障继电器持续触发连接的报警指示器。 橙色 LED 持续亮起。 过去 15 分钟的测量值显示为时间 / 浓度图 Graph 形。 Faults 故障消息以纯文本形式显示。 Dräger PointGard 3000 Series 固件版本 ≥ 4.10 使用说明... -
Page 204: 报警设置
除。 2. 更改对比度并确认。 able 11.11.3 更改显示模式 Pre- 可以在报警条件清除可以确认报警状态。然 而,报警继电器和 LED 将保持激活状态, Acknowledge 1. 选择 Settings > Instrument > Display > Display mode 并 able 直至报警条件清除。 确认。 2. 选择所需模式并确认。 e. 设置滞后模式。 标准 显示标准的显示屏。 Dräger PointGard 3000 Series 固件版本 ≥ 4.10 使用说明... -
Page 205: 检查集成的报警装置的配置
12.1.1 设置 DIP 开关针脚 系统故障 绿色 红色 1. 打开设备。 2. 切换 DIP 开关针脚: 向上 开 向下 关 3. 关闭设备。 4. 调试设备。 此组合不会通过绿色状态灯发出故障信号。如果发生故障, 绿色状态灯保持亮起。 必须在菜单中设置。 (请参见第 206 页 “ 将喇叭设置为仅在 A2 报警时激活 ”) Dräger PointGard 3000 Series 固件版本 ≥ 4.10 使用说明... -
Page 206: 将喇叭设置为仅在 A2 报警时激活
可以使用继电器电路板顶部中心的 4 级旋转开关 (图 33)设 置喇叭再次打开的时间。 0:无限 (不再打开喇叭) 12.3.2 设置:仅在 A1 报警时激活喇叭 1:3 分钟 Dip 开关设置 2:6 分钟 针 3:10 分钟 一旦警报停止,喇叭确认将重置,喇叭将在下一个警报中再次 打开 / 激活。 关 关 开 开 开 关 关闭 Dräger PointGard 3000 Series 固件版本 ≥ 4.10 使用说明... -
Page 207: 接口设置
2. 抑制控制单元的报警后,请用 Next 确认 Inhibit all alarms 消息。 1. 选择 Settings > Communication > Analog interface > 3. 选择要编辑的行并点击 [OK] (确定)进行确认。 Warning current 并确认。 4. 设置所需值。 2. 设置电流并点击 [OK] (确定)确认。 5. 选择 Next 并确认。 Dräger PointGard 3000 Series 固件版本 ≥ 4.10 使用说明... -
Page 208: 开启或关闭自动标定
1. 选择 Settings >Sensor > Sensor lock 并确认。 上,此功能可定义最大限值。 2. 选择 On 或 Off。 2. 选择编辑电流行,然后确定。 仪器会拒绝任何订货号与早期安装的传感器 3. 设置并确定电流。 订货号不一致的传感器。 显示光阻电流的设置。 设备接受任何适用的传感器并上传此传感器 4. 选择 Confirm 然后点击 “OK (确定) ” 进行确认。 的默认设置。但是,新传感器的默认设置会 覆盖任何自定义的设置。 Dräger PointGard 3000 Series 固件版本 ≥ 4.10 使用说明... -
Page 209: Ec 传感器软件加密狗
14.8 传感器设置 PointGard 3200 CAT 15.1.1 PointGard 3xx0 14.8.1 传感器类型 菜单 默认设置 范围 此功能定义安装的传感器类型。 报警 / 无报警时激 开 / 关 报警时激活 1. 选择 Settings > Sensor > Sensor type 并确认。 活继电器 2. 选择传感器类型并确认。 Dräger PointGard 3000 Series 固件版本 ≥ 4.10 使用说明... - Page 210 取决于传感器 0.2 %LEL 0 至 0.4 % LEL 显示采集上限 0 至 A1 在增大方向上的 1) 适用于 < 3.0.0 的固件版本 A1 报警器滞后 0 至 A2 在增大方向上的 A2 报警器滞后 0 至满量程偏转 -A1 在减小方向上的 A1 报警器滞后 Dräger PointGard 3000 Series 固件版本 ≥ 4.10 使用说明...
- Page 211 辕杆垫板电流 2 mA 0 — 3.5 mA 315 ppm 辕杆垫板限值 0.1 Vol% 0 至 0.1 Vol% (丙烷) 405 ppm 0 至 720 标定间隔 (乙烯) [ 天 ] 1) 辕杆垫板最大限值取决于发射器的类型和所选择的测量气体。 正常 / 快速 响应模式 正常 Dräger PointGard 3000 Series 固件版本 ≥ 4.10 使用说明...
- Page 212 6 W, 24 V (DC), 25 °C (IDS 01x5) 率 PointGard 3700/3720 额定功 12 W, 24 V (DC), 25 °C 1) 有关可调节满量程偏转,请参见 15.2。 2) 测量范围因物质而异。 率 2 x 1.5 mm² / 2 x AWG 16/7 电缆规格 Dräger PointGard 3000 Series 固件版本 ≥ 4.10 使用说明...
- Page 213 CatEx 传感器 6810435 S HC 6809710 1000 100 连接器螺丝 4.4 ...5.3 0.5 ...0.6 6810740 电源线 4.4 ...5.3 0.5 ...0.6 6810745 继电器连接器 1.9 ...2.2 0.22 ...0.25 4-20 mA 连接器 6809625 6809630 6809720 6809635 混合 Dräger PointGard 3000 Series 固件版本 ≥ 4.10 使用说明...
- Page 214 注意 : 产品标签上的环保使用期限 (Environmental Protection Use Period, EPUP)标识表示在此期间内,在正常操 作条件下,产品中所含有毒或危险物质或成份不会发生泄漏和变异。因而此类产品的使用不会导致任何严重的 环境污染、任何人身伤害或财产损失。 不应将此期间视为保修期或保证有效期。 标签上带有污染控制标志的产品是可回收的,不应随意进行处理。 订货单 名称 订购编号 3728175 PointGard 3100 EC AC 绿色 名称 订购编号 PointGard 3100 EC DC 3728174 PointGard 3100 EC AC 3728176 Dräger PointGard 3000 Series 固件版本 ≥ 4.10 使用说明...
-
Page 215: 附件与备件
DrägerSensor IR NPT 6811901 8326449 欧盟 / 俄罗斯联邦共和国 6811165 感应头, DrägerSensor IR 8326450 英国 整套 e 8326451 美国 6811265 感应头, DrägerSensor IR 8326452 澳大利亚 整套 e2 对于壁式电源插座,必须仅使用 Dräger 电源线。对于固定式 装置,电源线必须符合 17.3 电源 中的规格。 Dräger PointGard 3000 Series 固件版本 ≥ 4.10 使用说明... -
Page 216: Pointgard 37X0 Ir
6811832 Dräger PIR 7000 类型 340 (NPT) Dräger PIR 7000 334 (M25) 6811825 完整套件 Dräger PIR 7000 340 (M25) 6811819 完整套件 Dräger PIR 7200 (NPT) 6811572 Dräger PIR 7200 (M25) 6812290 HART,完整套件 Dräger PointGard 3000 Series 固件版本 ≥ 4.10 使用说明... - Page 218 Manufacturer Dräger Safety AG & Co. KGaA Revalstraße 1 D-23560 Lübeck Germany +49 451 8 82-0 9300988 – 4683.750 me © Dräger Safety AG & Co. KGaA Edition: 05 – 2024-02 (Edition: 1 – 2023-06) Subject to alterations www.draeger.com...
Need help?
Do you have a question about the PointGard 3000 Series and is the answer not in the manual?
Questions and answers