Advertisement
Quick Links
Advertisement

Related Manuals for Bolia Cana Wardrobe Series


Summary of Contents for Bolia Cana Wardrobe Series
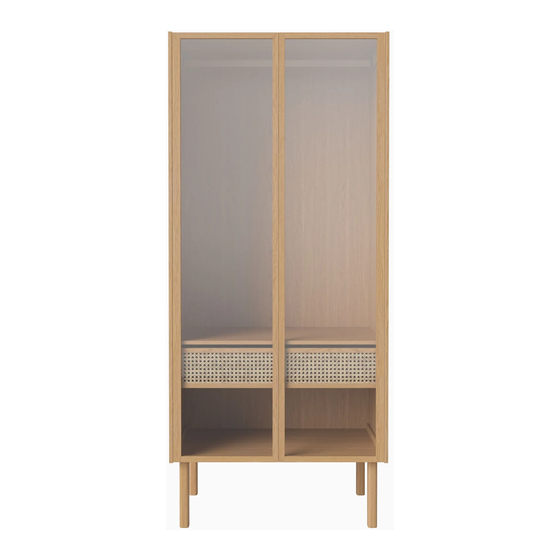
- Page 1 Product Manual Cana Wardrobe Series Version 02 - Aug/2024...
- Page 2 Further information can be found on our website: Bolia.com Technical information As we are constantly developing and improving our products, design and technical changes may occur. This products manual can be downloaded as a PDF file from our website: Bolia.com donnez ou recycler votre produit...
- Page 3 Warnings GB: ANTI-TOPPLE WARNING! This product must be permanently fixed to the wall with the metal bracket(s) or tip-over restraint included, to avoid fatal injuries in case it topples over. The pack only contains screws for fastening the anti-topple metal bracket(s) itself to the product. Please contact a DIY or hardware store for advice on the correct type of screws/wall plugs for your type of wall.
- Page 4 Warnings GB: Please tighten the screws/legs after 4-5 weeks of use and then subsequently every 4-5 month. DK: Spænd skruerne/benene efter 4-5 ugers brug og derefter hver 4.-5. måned DE: Ziehen Sie die Schrauben/Beine nach 4 bis 5 Wochen Gebrauch und anschließend alle 4 bis 5 Monate nach.
- Page 5 Warnings GB: DANGER OF TIPPING OVER – do not use furniture as a climbing assist DK: FARE FOR AT VÆLTE – brug ikke møbler som klatrehjælp DE: KIPPGEFAHR – Möbel nicht als Aufstiegshilfe verwenden NO: VELTEFARE – ikke bruk møblene som klatrehjelp SE: TIPPRISK –...
- Page 6 Use of the product GB: Do not push or drag furniture across the floor – please lift when moving. DK: Skub eller træk ikke møbler hen over gulvet – løft dem, når du flytter dem. DE: Schieben oder ziehen Sie Möbel nicht über den Boden – heben Sie sie bitte an, wenn Sie sie bewegen NO: Ikke skyv eller trekk møblene over gulvet –...
- Page 7 Tools, fittings and product parts for wardrobe Tools overview H x 1 pcs screwdriver hammer allen wrench 3mm S x 2 pcs drill wall screw & rawlplug Fittings and product parts A x 49 pcs B x 32 pcs C x 4 pcs D x 24 pcs wooden dowel excenter bolt...
- Page 8 Tools, fittings and product parts for wardrobe sides bottom doors divider backplate shelves drawer...
- Page 9 Tools, fittings and product parts for plinth Tools overview N x 1 pcs allen wrench 4mm Fittings and product parts L x 4 pcs M x 8 pcs wooden dowel allen screw O x 4 pcs P x 4 pcs Q x 2 pcs This product must be permanently fixed to...
- Page 10 Assembly steps STEP 01 screwdriver sides...
- Page 11 Assembly steps STEP 02 B x 26 pcs screwdriver excenter bolt sides...
- Page 12 Assembly steps STEP 03 B x 6 pcs A x 34 pcs wooden dowel hammer & screwdriver excenter bolt divider bottom shelf...
- Page 13 Assembly steps STEP 04 A x 15 pcs hammer wooden dowel backplate 1 backplate 2...
- Page 14 Assembly steps STEP 05 shelf divider bottom side STEP 06 backplate 1...
- Page 15 Assembly steps STEP 07 Please use the correct connector caps shade, that fits the oil finish of your cabinet that is either natural oiled oak or white oiled oak. D + F F x 4 pcs D x 15 pcs C x 4 pcs E x 9 pcs double-sided pin...
- Page 16 Assembly steps STEP 08 backplate 2 backplate 1 STEP 09 F x 8 pcs excenter house 15X10 OBS: insert from backside backplate 2 backplate 1...
- Page 17 Assembly steps STEP 10...
- Page 18 Assembly steps STEP 11 H x 1 pcs allen wrench 3mm D x 9 pcs E x 3 pcs F x 4 pcs G x 2 pcs excenter house 15X10 confirmat 5X50 excenter house 15X13 excenter connector caps OBS insert from backside OBS insert from backside D x3 D + E...
- Page 19 Assembly steps - plinth STEP 12 N x 1 pcs allen wrench 4mm O x 4 pcs P x 4 pcs L x 4 pcs M x 4 pcs M6/ 10x30 roller nuts Bracket wooden dowel allen screw P + M...
- Page 20 Assembly steps STEP 13 STEP 14 N x 1 pcs M x 4 pcs allen screw allen wrench 4mm...
- Page 21 Assembly steps STEP 15 FIRST insert drawer N x 1 pcs allen wrench 4mm...
- Page 22 Assembly steps STEP 16 I x 6 pcs J x 12 pcs door hinge screws door hinge screwdriver doors...
- Page 23 Assembly steps STEP 17 K x 2 pcs R x 16 pcs Shelves x4 rod handle shelf supports Place 4x shelves Click on door...
- Page 24 Assembly steps - wall mount STEP 18 drill S x 2 pcs Q x 2 pcs This product must be permanently fixed to the wall with the tip-over restraint included, to avoid fatal injuries in case it topples over. tilt safety wall screw &...
- Page 25 Regulate door...
- Page 26 Assembly steps push mechanism for doors...
- Page 27 How to adjust the push mechanism GB: The push malfunction can happen when the internal pin is too far inside. In this position is very hard to release this mechanism when a push is applied and it must be adjusted. In order to return to a suitable pin length do the following: 1.
- Page 28 How to adjust the push mechanism SE: Tryckfel kan uppstå när den inre stiftet är för långt inne. I denna position är det mycket svårt att frigöra mekanismen när ett tryck appliceras, och den måste justeras. För att återgå till en lämplig stiftlängd, gör följande: Tryck hårt i mitten av stiftet med en skruvmejsel eller liknande verktyg.
- Page 29 Measurements & Maximum Load 2066 10 kg 22 lb 10 kg 22 lb 10 kg 22 lb 10 kg 22 lb 10 kg 22 lb...
Need help?
Do you have a question about the Cana Wardrobe Series and is the answer not in the manual?
Questions and answers