Table of Contents
Advertisement
Quick Links
RDW-ZW39
座檯式洗碗碟機 Table Top Dishwasher
使用說明書
OPERATION MANUAL
在使用本產品前,請仔細閱讀本說明書,並妥善保存本說明書以備用戶日後查詢。
Please read the operation manual carefully before using and well keep it in a safe place for future
reference.
本說明書中的圖示可能有與實物不同的地方,僅供參考。
Some figures in this manual may not match with the real object, just for reference only.
1
僅適用於家庭使用
For household use only
Advertisement
Table of Contents

Related Manuals for Rasonic RDW-ZW39


Summary of Contents for Rasonic RDW-ZW39
- Page 1 RDW-ZW39 座檯式洗碗碟機 Table Top Dishwasher 僅適用於家庭使用 For household use only 使用說明書 OPERATION MANUAL 在使用本產品前,請仔細閱讀本說明書,並妥善保存本說明書以備用戶日後查詢。 Please read the operation manual carefully before using and well keep it in a safe place for future reference. 本說明書中的圖示可能有與實物不同的地方,僅供參考。 Some figures in this manual may not match with the real object, just for reference only.
- Page 3 非常感謝您選購樂信牌座檯式洗碗碟機,在使用前請先詳細閱讀本說明書,並保存以備日後 參考。 目錄 安裝注意事項 安全注意事項 安裝方法 清潔及保養 特別注意事項 產品規格 產品說明 使用說明 故障排除 10. 特別聲明 11. 售後服務...
- Page 4 1. 安裝注意事項 本產品符合安全要求,不適當使用有可能導致個人傷亡及財物損失。因此,使用本產品時, 必須遵守下列安全注意事項: 為了防止火災、灼傷和觸電 使用本產品前 1. 本產品屬高耗電量電器,須使用獨立電源插座,不應與其他電器共用一個電源插座,亦須 確保當地的電壓與本產品上所標明的額定電壓相符。 2. 為防止觸電,必須確保本產品已接地良好。 3. 確保電源插頭與插座徹底連接,否則會因接觸不良導致電源線過熱而影響本產品運作,加 快本產品損壞或造成火災等危險。 4. 本產品淨重約 13 公斤,用戶應將本產品置於有足夠承托力的平面上使用。此機底部有排 氣口,避免置於地毯、塑膠檯布及棉檯布等低耐溫的物料上。 5. 使用時,須確保空氣流通。本產品屬於座檯式型號,切勿安裝於櫃內,避免堵塞本產品的 通風排氣孔而造成過熱。切勿在本產品頂部放置任何物件。切勿將金屬物件(如針或金屬 線等)插入產品的內部、縫隙或蒸氣出口等位置。 6. 應將本產品放在通風及乾爽的地方,並須遠離腐蝕性氣體、火源、高溫、強磁力、蒸氣、 潮濕、油煙或接觸到易燃物的的環境中使用。 2. 安全注意事項 2.1 首次使用注意事項 1. 取出所有包裝物料。如機門上附有保護膜,應將其撕掉。 2. 徹底檢查本產品及配件有否損壞及裂痕,如水箱、機門、噴水臂、上層╱下層盛載籃、過 濾網等出現損壞,切勿安裝及使用本產品。 3. 產品於出廠前均會進行多次測試,以確保運作正常。部分水氣和水漬或會殘留於水箱內或 機身,可用扭乾的濕布擦拭。 2.2 使用後,請切斷電器的電源 1.
- Page 5 2.3 重要安全指示 1. 切勿於水箱注入 40℃或以上的熱水,以免損壞本產品。 2. 必須使用洗碗機專用洗碗粉,切勿使用液態清潔劑、肥皂、洗衣粉或洗手液等容易起泡的 洗滌劑來替代,否則造成機器故障,甚至發生危險。儲存此類洗碗粉時,須放置於兒童無法 接觸的地方。讓兒童遠離洗碗粉!洗碗粉可能會導致口腔、咽喉和眼睛的化學灼傷或窒息。 如洗碗粉不慎濺入眼睛,應立即以大量清水沖洗,並須迅速就醫。 3. 時刻保持機門關閉。只有在機門完全關上後,才可操作本產品。洗滌時切勿打開機門,熱水 有可能會噴出,亦不要將手或面部靠近造成燙傷。 4. 為減低受傷風險,切勿讓兒童在本產品內部或上方玩耍,因為機器可能還有殘留的洗碗粉。 5. 機門開啟時,切勿放置重物或站立於機門、機頂或盛載籃上,否則可能導致產品向前傾倒。 6. 切勿將任何溶劑放入洗碗碟機內,有可能造成爆炸等危險。 7. 避免使用鋒利的器具刮傷門邊密封膠邊或機體,以免造成機身破裂及漏水,導致觸電。 8. 如發現機門不能緊閉、變形或門組件損壞,為避免危險應立即停止使用,並聯絡信興電器 服務中心有限公司進行檢查及維修。 9. 切勿在機身與機門之間放置任何物品,或讓灰塵、殘餘的洗碗粉積存於門縫表面。 2.4 操作注意事項 經常清潔產品的噴水臂及過濾網,以免影響噴水臂的轉動及清洗效果。如噴水臂轉動不順 暢或清洗效果不佳,立即檢查噴水臂及過濾網是否安裝妥當。建議拆除噴水臂及過濾網, 並檢查內腔的噴水孔、排水台是否有異物堵塞。如有堵塞應即時清除,並裝好所有配件並 選用<<預洗>>功能 (PRE-WASH) 清洗空機。 為防止滿溢,注水切勿太快!為防止注入過多水量引致水從注水口溢出,部份水會預先注 水入內腔,此乃正常情況。注意!注水過多會令排水台滿溢,導致漏水。 產品運作時,切勿注水入水箱,否則會導致機內注水過多,引致漏水情況。 使用本產品前,應確保所有配件(包括噴水臂、過濾網及排水管等)都已完全安裝穏妥。 否則,清洗過程或會因水壓過強而引致漏水情況。 不建議清洗刀具或其他尖銳器具;如要清洗(如銳利刀具)必須妥善放置,以免刀具損壞 機門密封膠邊並減低割傷風險。警告!刀或其他尖銳的物品請小心放入盛載籃,並且尖端...
- Page 6 13. 切勿將本產品用於清洗餐具以外的其他用途:如用作存放用途或利用本產品烘乾布類、報 紙或其他東西等。(如本產品用於清洗其他物件,則有可能發生故障。) 14. 切勿將機身、電源線或插頭浸入水中或用水淋洗,以免影響產品的安全性能及防止造成觸 電的危險。 15. 小心使用電源線,不可在電源線上放重物或夾住電源線;不可改裝電源線;切勿用力拉扯 或扭曲電線;在拔出或插入插頭時,要用手握穩插頭本身。切勿將電源線懸掛在桌子、櫥 櫃的邊緣或令其接觸發熱的表面。 16. 使用後或長期不使用時 , 應將插頭從插座內拔出 , 以免因絕緣老化而發生漏電及觸電危險 。 切勿使用濕手接觸、插入或拔出插頭,以免觸電。 17. 移動、檢查或清潔本產品前,應先拔掉電源線插頭,待本產品冷卻後再進行。 18. 本產品只可作家庭使用 , 切勿在室外使用或用作說明書建議以外的其他用途 。 如不當使用 , 或作為 (半) 商業用途,維修保養將無效,本公司將不會承擔任何損壞的維修責任及賠償。 19. 切勿讓嬰兒靠近。若有孩童在旁,須加倍小心使用及看管小孩,以確保他們不會把此產品 當作玩具。切勿讓小孩單獨使用,亦切勿將本產品放於小孩能觸及的地方。 20. 本產品可供年齡在 8 歲或以上的兒童及體質、感覺或智力有障礙人士或缺乏經驗和相關知 識的人士使用,但他們必須接受負責安全人士的監督或指導如何安全地使用產品和理解 所涉及的危險。 21. 本產品適合於家用或在類似環境使用,如:商店內部、辦事處以及其他工作環境的員工廚 房區域;旅館、汽車旅館和其他住宿類型的環境。切勿於戶外使用。...
- Page 7 • 安裝完成後,必須試行運作,待檢查妥當後才可使用。 • 切勿使用舊進水管,以免運作時漏水。 • 產品於出廠前曾進行測試;如發現包裝物料有水滴殘留,此乃正常情況。 • 本產品適用的進水壓力介乎 0.04 MPa – 1.0 MPa,須確保使用地點的水壓於適用範圍。當水 壓較低時,運作時間或會延長。如有需要,可於安裝前向專業人員瞭解。 採用連接進水管 (固定進水) 方式的客戶,可按照以下步驟進行安裝: 1. 關閉水源 必須確認入水掣已完全關閉。 2. 安裝連接球閥(三通) 、進水喉及排水喉 如上圖所示,先將三通逆時針方向旋緊至水龍頭,然後將入水喉﹝不帶彎頭的一端﹞ 旋緊至三通閥的四分出口螺紋上,三通安裝已完成;如需拆卸,必須先關閉水龍頭開 關,然後拆除進水管,再將三通順時針旋轉以拆卸。...
- Page 8 3. 安裝進水喉 如上圖所示,將入水喉﹝帶彎頭的一端﹞旋緊至機背的進水口。 安裝完成後,水龍頭模式將會啟動,水龍頭指示燈 “ ” 會亮起,產品會於選定清洗模 式後,直接於水龍頭取水。 4. 安裝排水喉 將排水管﹝帶彎頭一端﹞套入機背的出水口位置,並用卡箍固定;另一端排口喉則連 接至鋅盤上,並用吸盤固定。 4. 清潔及保養 定期檢查及保養可以避免機器故障,建議用戶按以下各項定期檢查本產品: 1. 產品的整體狀況 檢查噴水臂及產品內腔是否積聚油脂及水垢沉積物;如發現有沉積物,請加入洗碗粉並選用 <<預洗>>功能 (PRE-WASH) 清洗空機。 2. 清潔機門的密封膠邊 定期以濕布清潔機門的密封膠邊。切勿使用蒸氣清潔機清潔,本公司對任何因使用蒸氣清潔機 所造成的損壞,恕不負責。 定期以濕布清潔產品的機門及控制面板。切勿使用粗糙潔具或含腐蝕性的清潔劑進行抹拭,否 則過程中可能會刮傷產品表面。...
- Page 9 3. 過濾系統 過濾系統包括粗過濾網、幼過濾網及平面過濾網。過濾系統是為了阻隔較大的食物殘渣進入產 品的水泵循環系統中,必須定期清理,否則殘渣可能會造成堵塞,影響本產品操作。 每次使用後,將過濾網囤積的食物殘渣清除。先以逆時針方向轉動將圓筒形過濾網取出,再取 出平面過濾網。清除堆積物及用清水沖洗乾淨後,放入平面過濾網,然後以順時針方向轉緊圓 柱型濾網,並確認上面的箭頭符號是否已對齊。 4. 噴水臂 水垢及食物殘渣有可能阻塞噴水臂,繼而影響噴水臂旋動,用戶必須時刻檢查,必要時可將噴 水臂取出清潔。用清水沖洗即可,完成後,將上及下噴水臂裝回內腔對應位置上。 (詳情可參考 章節 7.2 操作說明) 5. 排水泵 無法被過濾而留在排水台的食物殘渣有可能堵塞排水泵,令水無法排走而造成堵塞或滿溢。如 出現以上情況,先關掉電源並拔出插頭,取出所有過濾網,盡量將水滔出,或用海綿將水吸走 及同時清除食物殘渣。完成後,再重新安裝過濾網,才可繼續使用。 6. 進水口 產品於機頂及機背位置均設置進水口,為客戶提供手動進水或連接進水管 (固定進水) 兩個渠 道為產品提供水源;每個進水口均設有過濾網,為水源進行過濾。為免產品的進水口受阻而影 響產品運作,請確保定時為進水過濾網進行清潔。 餐具準備事宜 1. 烤焗、蒸蛋或蒸肉後,若出現燒焦痕跡或蛋白黏附於器皿上,必須事先浸泡及清理,否則可 能無法徹底清洗。 2. 如器皿上殘留明顯食物殘渣或以下殘渣,必須事先清除: A. 調味料、香料及芝麻等細小食物殘渣; B. 牙簽、魚骨及橡筋等可能妨礙噴水臂轉動之異物; C. 可能引起異味的殘渣:如魚皮及蒜頭等。 3. 如器皿上殘留較多油份或含食物色素的醬汁,建議事先用水沖洗,否則油份及色素有可能 沾染機身內部。...
- Page 10 2. 精緻的玻璃裝飾、工藝品和古董器皿等; 3. 塑膠器皿 (除非器皿標明 “洗碗碟機適用”,否則,用戶須向器皿製造商查詢); 4. 銅及錫製器皿; 5. 染有灰、蠟、潤滑油或油墨漬等器皿; 6. 鋁和銀製器皿 (多次循環清洗後,或會出現變色或褪色等情況); 7. 玻璃類器皿 (例如水晶玻璃等) (多次循環清洗後,或有可能變得渾濁); 8. 易潔塗層器皿 (除非器皿標明“洗碗機適用”,否則,用戶須向器皿製造商查詢)。 6. 產品規格 型號 RDW-ZW39 顏色 白色 額定電壓 220–240 伏特~ 50 赫茲 額定水壓 0.04 MPa – 1.0 MPa (只適用於固定進水安裝) 額定功率 950 – 1,050 瓦...
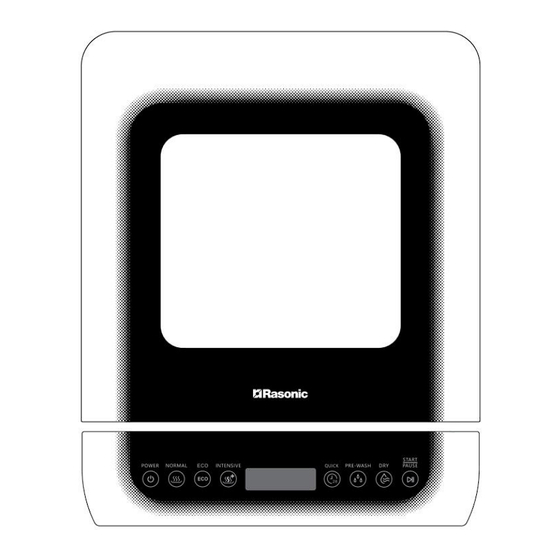
- Page 11 7. 產品說明 7.1 控制面板及顯示屏 控制面板...
- Page 12 顯示屏 7.2 操作說明(適用於手動注水) 注意!安裝前,確保本產品未有接駁電源。 1. 參考章節 3. 安裝方法連接排水喉至鋅盤,並利用吸盤固定出水喉,以免污水溢出。注意! 切勿將排水喉朝上安裝以至高於機底 15 厘米的位置,及保持鋅盤排水口暢通,切勿浸入水 中,否則污水將會倒流入機體內。 2. 將機內配件等全部取出,按次序將平面過濾網及圓筒形過濾網(由粗過濾網及幼過濾網組 成)順序裝入。順時針轉動圓筒形過濾網作鎖定。 3. 噴水臂安裝:用手握住噴水臂的中間位置,對準機內底座噴水孔,用力按下直至聽到 “咔嚓” 聲響。用手轉動噴水臂,以確保噴水臂安裝妥當及順暢旋動。﹝備註:不建議自行拆除上噴 水臂,以免影響產品工作﹞ 4. 先將餐具食物殘渣及醬料清理(可於水龍頭下稍作沖洗或用抹手紙擦淨) ,拉出盛載籃,然 後將餐具按指示(可參考章節 7.3 盛載籃裝載示意圖)放到盛載籃指定位置上。 5. 將盛載籃推入機內,將洗碗粉放入門背的洗碗粉格內(最大容量為 8 克) ,然後關上機門。 6. 接通電源,產品進入待機狀態。利用隨機的量杯於入水口注入約 2.5 杯水,直至聽到 “滴滴 滴” 聲音提示,表示水箱已注滿水。 *** 注意!在任何情況下,切勿擅自拆除入水口的圓型過濾網。 *** 請於機頂上方預留足夠位置,方便注水。...
- Page 13 *** 如用戶未能於 2 分鐘內完成手動注水程序,產品會返回待機狀態。用戶須長按【電源】鍵 3 秒重新開啟產品。 *** 如使用固定進水安裝方法,可忽略此步驟。固定進水安裝後,水龍頭模式啟動,產品會於 選定清洗功能後自動注水,詳細安裝資料可參考章節 3.安裝方法。 7. 長按【電源】鍵 3 秒啟動產品後,選擇所需的清洗功能,按【開始/暫停】鍵確認,產品 會開始運作。如確認後需變更清洗功能,可長按【電源】鍵 3 秒返回待機狀態,然後重新 啟動產品後選擇合適功能。 8. 洗滌完成後,建議即時清洗濾網及去除食物殘渣,以防細菌滋生。 (如發現難以去除的污垢, 可用軟刷協助清理;切勿使用鋼絲刷或百潔布等,否則過濾網會因此而損壞。) 9. 本產品備有通風換氣功能,於洗滌完成後會自動運作,烘乾指示燈 “ ” 會亮起。若要取 消通風換氣功能,可長按【電源】鍵 3 秒關機並拔除電源插頭。 7.3 盛載籃裝載示意圖 參考下圖,將所有餐具放置在上層及下層盛載籃的預定位置上,筷子及湯匙等必須放置於上層 盛載籃內。 (如有尖銳餐具,尖端須向內及小心放入,以免割傷。) 餐具方面,開面口應該向下斜放,切勿將餐具開口向上或餐具底向上。 警告!刀和其他鋒利的用具必須裝在上層盛載籃裏,並且尖端朝內水平向內放置。 為避免在操作過程中發出噪音,避免堆疊碗碟。較輕的餐具必須穩固地置於盛載籃中。 注意!開始啟動操作前,請確保碗碟、筷子、叉等餐具已穩固地放在籃中,如有任何餐具穿過 盛載籃,將會影響噴水臂的運作,令產品無法操作。...
- Page 14 8. 使用說明 接通電源,所有指示燈閃動一次,產品進入待機狀態。 1. 開機:待機狀態下,長按【電源】鍵 3 秒啟動產品。如 2 分鐘內沒有選取任何清洗功能, 產品會自動返回待機狀態。 2. 選擇應用程式:在啟動產品後,按功能鍵選擇所需應用程式,再按【開始/暫停】鍵一次, 產品會自動啟動有關功能程式。具體運作程式如下: 功能 圖示 洗滌時間 烘乾時間 通氣換氣功能 備註 (約)^ (約) 標準洗# 58 分鐘 60 分鐘 自動 建議加入約 8 克 (NORMAL) 洗碗粉 節能洗 88 分鐘 60 分鐘 手動 建議加入約 8 克 (ECO) (如須啟動,可於...
- Page 15 3. 暫停功能:運作過程中,如用戶需要暫停操作,可按【開始/暫停】鍵一次暫停運作。如須 恢復運作,再按【開始/暫停】鍵一次,產品會重新開始工作。 4. 通風換氣模式 :完成清洗功能後 ,產品會自動啟動通風換氣模式 (<<節能洗>>功能 (ECO) 需 要手動開啟此功能),以確保機內及餐具乾爽,防止產生異味。通風換氣運作時間為 3 天, 顯示屏會顯示 “72H” (72 小時),並會以倒數形式顯示剩餘時間。如須取消,長按【電源】 鍵 3 秒返回待機狀態。 5. 特長通風換氣功能:按實際需要,可啟動特長通風換氣功能。用戶可於清洗過程中,按 【烘乾】鍵一次,顯示屏顯示 “7d” (7 天) 表示特長通風換氣功能已開啟。特長通風換氣運 作時間為 7 天,並會以倒數形式顯示剩餘時間。如須取消,再按【烘乾】鍵一次,產品會返 回 “72H” (72 小時) 通風換氣功能。 6. 預約功能 (不適用於烘乾功能):選擇所需應用程式後,長按【烘乾】鍵 5 秒進入預約功能 設置,顯示屏顯示預設時間“1H”...
- Page 16 按鍵後沒有反應 機門是否未關妥? 請將機門關好後再選擇功能。 機門感應器異常 聯絡信興電器服務中心有限公司進 行檢查及維修。 機內出現大量泡沫 是否添加洗碗粉以外的 請使用洗碗機專用的洗碗粉清洗器 清潔劑? 具。 洗碗籃染色 器皿脫色 避免將會脫色器皿放入機內清洗, 擺放器皿前,請參考“章節 5 特別 注意事項”。 缺水指示燈亮起 水箱是否仍未加水? 選擇清洗程式前,將足夠水量注入 (手動注水) 水箱。 水龍頭是否仍未開啟? 確保水龍頭已開啟。如水壓低於 或水壓是否低於 0.04MPa,請客戶另行購置水泵, 0.04MPa? 為產品供水。 (固定注水) 進水管異常 請理順進水喉,確保沒有過份彎 (固定注水) 曲、屈摺或堵塞。 進水閥異常 聯絡信興電器服務中心有限公司進 行檢查及維修。 故障代碼 E1 進水異常 確保水龍頭已開啟,重新啟動本產...
- Page 17 10. 特別聲明 1. 本資料上所有內容經過核對,如有任何印刷及內容上的誤解,本公司將保留解釋權。 2. 本產品若有技術改進,會編進新版說明書中,恕不另行通知;產品外觀、顏色如有改動,則 以製造商資料為準。 3. 如本資料之中英文版本有差異時,應以中文版為準。 4. 使用說明書的電子副本可透過電子郵件發送致客戶,如有需要,請致電信興電工工程有限 公司:28612767。 11. 售後服務 1. 由購買收據日期起之一年保修期內,經信興電器服務中心有限公司之服務人員證實產品故 障屬正常使用下發生者,本公司將提供免費維修或更換零件服務。經更換之任何損壞零件, 將歸屬本公司所有。保修範圍不包括修理或更換損耗性零件╱配件如電源線、進水管、排 水管、卡箍、三通、吸盤、量杯、機門、上╱下噴水臂、上╱下層盛載籃、平面過濾網、粗 ╱幼過濾網及機殼等。如不當使用,或作為(半)商業用途,或未依照說明書使用,保修服 務將無效,本公司將不會承擔任何損壞的維修責任及賠償。 2. 用戶必須於維修時出示購買╱換購單據及蓋有銷售點╱換購中心印章的產品保修記錄卡, 如有任何疑問,請致電信興電器服務中心有限公司熱線查詢:24065666。...
-
Page 18: Table Of Contents
Thank you for choosing Rasonic table top dishwasher. Read the operation manual carefully before using and keep it for your future reference. Table of Contents 1. Installation Guideline 2. Important Safeguards for Usage 3. Installation Method 4. Cleaning and Maintenance 5. -
Page 19: Installation Guideline
1. Installation Guideline The appliance complies with current safety requirements. Inappropriate use may lead to personal injury and damage to property. When using the appliance, please follow the safety precautions as below: To prevent fire, burn or electric shock Before using the appliance The appliance is a high power consumption electric appliance. - Page 20 2.2 Switch off the main power after use 1. After operation, unplug the appliance to avoid damaging to electronic elements, or even causing fire due to long-term connection to the electricity. 2. Keep the appliance clean. Pay attention to dust and moisture protection and protect the appliance against cockroaches and other insects from entering the water tank and steam exhaust vent to avoid short circuit.
- Page 21 2. To prevent water overflowing from water tank inlet, do not fill water too quick. The appliance will automatically begin to drain excessive water to the cavity in advance. This is a normal operation. CAUTION: Excess water or filling rapidly will overflow the waste water pump and as a result of water leakage.
-
Page 22: Installation Method
16. After each use or when not using the appliance, make sure to unplug the appliance from the socket to prevent electric leakage and electric shock due to insulation degeneration. Do not touch, plug or unplug the appliance by wet hands which can result in electric shock. Do not hang the power cord over the edge of table, counter-top or contact with the hot surfaces. - Page 23 The using of water source of the appliance can be came from either manual water filling or fix water supply connection: for manual water filling, user can pour sufficient water into water tank directly; if fix water supply connection method is used, pay attention to the following: •...
- Page 24 2. Installing the connection (three-way) ball valve • As shown above, connect the connection ball valve to the faucet by rotating anti-clockwise direction. Then, connect the inlet hose (straight end) to the ball valve. The installation of ball valve is completed. To detach, close the faucet and disconnect the inlet hose, detach the ball valve by rotating in clockwise direction.
-
Page 25: Cleaning And Maintenance
• Connect the one end the drain hose to the water outlet at the back of the appliance, and secure the hose by the use of clamp; then, place the other end of the drain hose to the sink by fixing the sucker. 4. - Page 26 6. Water inlet The appliance is equipped with two water inlets where is on the top and at the back of the appliance, providing end user with two different channels to fill water into the appliance. Each inlet is equipped with a filter for water filtration. To prevent the water inlets from being obstructed and affecting the operation, make sure that those filters are cleaned regularly.
-
Page 27: Special Precautions
7. Types of glass (e.g. crystal glass objects) (Tendency to turn cloudy after many wash cycle); 8. Utensils with anti-stick coating (unless they are marked “dishware safe” or equivalent; otherwise, consult with manufacturer’s advice); 6. Product Specifications Identification Model no. RDW-ZW39 Color White Rated Voltage 220–240V~ 50Hz Rated Water Pressure 0.04 MPa –... -
Page 28: Product Identification
7. Product Identification 7.1 Control Panel and Display Control Panel... - Page 29 Display 7.2 Operation Instructions (Applicable to manual water filling) Attention! Prior to installation, disconnect the dishwasher from the power supply. 1. Refer to Chapter 3. Installation Method, direct the drain hose to the sink with sucker attached to prevent sewage flowing back. CAUTION! Keep the drain hose downward. If the hose is a pointing upward, the maximum acceptable height is 15cm from the bottom of the appliance.
- Page 30 5. Push the basket into the washing chamber. Put moderated amount of dishwasher powder detergent in the powder grid (Max. 8g) of the door. Then close the door firmly. 6. Connect the power supply, the appliance will enter standby mode. Fill approx. 2.5 cups of measuring cup supplied to the water tank until “Ding Ding Ding”...
-
Page 31: Instructions For Use
For dishware, the opening should be placed slightly downward, and it should not be opened upwards or the bottom of the dishware upwards. WARNING! Knife and other utensils with sharp points must be loaded in the basket pointing inside and placed in a horizontal position. To avoid thumping noises during operation: avoid overlapping dishes. - Page 32 Washing Icon Washing Drying Time Ventilation Mode Remarks Model Time (Approx.) (Approx.)^ NORMAL# 58 mins 60 mins Auto start 8g dishwasher powder detergent suggested 88 mins 60 mins Manual start 8g dishwasher (To activate, press powder 【Dry】key once detergent during the suggested operation.) INTENSIVE#...
-
Page 33: Troubleshooting And Treatment
#Remarks 3: For <<NORMAL>>, <<INTENSIVE>> and <<INTENSIVE PLUS>> washing modes, the faucet mode (fixed water supply connection) will have one more rinsing procedure than the hand box mode (manual water filling), but the overall operation time remains unchanged. 3. Pause function: During operation, user can press the【START/PAUSE】key to suspend the washing program. - Page 34 Dishware is not dried Dishware is not loaded Refer “Chapter 7.3 Prepare to load completely properly? the Dishwasher” to load the basket. Dishware is not clean Not enough powder Add sufficient dishwasher powder enough detergent added? detergent. Dishware is not loaded Refer “Chapter 7.3 Prepare to load properly? the Dishwasher”...
- Page 35 Faucet is closed? Or, Make sure the faucet is opened, and water pressure inputted make use of water pump if the water below 0.04MPa? pressure inputted below 0.04MPa. (for Fix water supply connection) Abnormal water inlet Straighten the inlet hose, make sure (for Fix water supply there is no excessive bend, fold or connection)
-
Page 36: Special Avowal
9. Special Avowal 1. The content in the manual has been checked. Our company reserves the hermeneutic power to any printing errors or misunderstanding on the content. 2. If there are technical improvements on the appliance, the operation manual will be updated in new version without prior notice. - Page 37 備忘錄...
- Page 38 備忘錄...
- Page 40 網址:http://www.rasonic.com 電郵:shew@shunhinggroup.com Office: 9/F, Peninsula Centre, 67 Mody Road, Tsimshatsui East, Kowloon, Hong Kong Tel: 2861 2767 Fax: 2865 6706 Website: http://www.rasonic.com E-mail: shew@shunhinggroup.com 保養及維修 Maintenance and Repair Service: 信興電器服務中心有限公司 SHUN HING ELECTRIC SERVICE CENTRE LTD. 香港新界葵涌勝耀街 2 號信興中心 11 樓...
Need help?
Do you have a question about the RDW-ZW39 and is the answer not in the manual?
Questions and answers