Advertisement
Quick Links
I. UNPACKING AND ASSEMBLY: MODEL DS-10
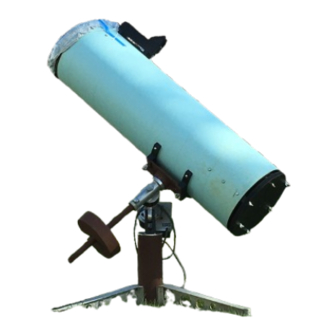
Prior to assembly of your Deep-Space telescope, you should familiarize yourself with the names of the various
parts of the instrument. See Fig. 1. In the following, part numbers in parenthesis refer to Fig. 1.
Your telescope has been carefully packed to insure safe arrival. When reassembling the tube assembly and
mount, you need only use a screwdriver and pliers or crescent wrench.
Packing of DS-10: The Model DS-10 is shipped in 4 cartons, as follows:
• Carton #1: Optical tube with secondary mirror and secondary mirror holder attached.
• Carton #2: Primary mirror, mounted in mirror cell; hardware for mirror cell.
• Carton #3: Equatorial Mount; focuser; eyepiece; hardware package; tripod legs.
• Carton #4: 1 piece--25 lb. counterweight.
Note that if you have ordered optional accessories to be shipped with your telescope, these accessories may be
packed in one of the above cartons, or may be packed in separate, additional cartons, depending on the size of
the accessories. Do not discard any packing materials until you have fully assembled the telescope and have
located all items of your order.
Assembly of the Equatorial Mount: The equatorial head is packed completely assembled with the pier
attached. The only assembly required is the addition of the three tripod legs. Use the three <-20 x l <" screws
with washers and <-20 wing nuts to attach each tripod leg to the pier. (For extra stability, use the <-20 hex nuts
instead of wing nuts and tighten with pliers or wrench.)
Latitude Adjustment: The mount is shipped with the latitude angle unset. In order for the telescope to track
accurately, the polar axis should be adjusted to your latitude. Basically, this operation involves loosening the
Latitude Locking Bolt (15) and turning the equatorial mount so that the angle of the polar axis to the horizontal
equals your latitude (see Fig. 1). Look up your latitude and set the angle of the polar axis using a protractor.
(Most road maps show latitudes.) Lock the latitude angle in place by firmly tightening the bolt (15). For now,
don't worry if the latitude angle is not set accurately. Just set the telescope polar axis at roughly the correct
angle. More precise latitude adjustment is discussed below. Extra tightening and support of the latitude angle is
provided by the 2 hex set screws located on each side of the pier cap (22). After setting the latitude angle
tighten these set screws with the proper hex wrench.
Counterweight: Slide the counterweight (10) onto the declination shaft, after removing the safety ring (12). Be
sure to firmly tighten the counterweight set-screw with the A1len hex wrench supplied. The counterweight
balances the entire weight of the telescope and should never be removed with the main tube attached. For now,
simply place the counterweight on the declination shaft. Exact positioning of the counterweight will be
explained later. Replace the safety ring (12).
Assembly of the Optical Tube: After removing the main optical tube from its shipping carton, attach the
focuser to the tube. Fasteners are supplied with both the standard #67 Focuser, and with the optional Deluxe
#680 Focuser, for this purpose. When attaching the focuser to the main tube, tighten the nuts to a "firm feel."
Do not over-tighten. Be sure that a washer is placed between each nut and the inside surface of the main tube.
Meade DS-10 Owner's Manual
Deep Space 10" f/4.5 Newtonian Reflector
Advertisement

Related Manuals for Meade DS-10


Summary of Contents for Meade DS-10
- Page 1 Your telescope has been carefully packed to insure safe arrival. When reassembling the tube assembly and mount, you need only use a screwdriver and pliers or crescent wrench. Packing of DS-10: The Model DS-10 is shipped in 4 cartons, as follows: • Carton #1: Optical tube with secondary mirror and secondary mirror holder attached.
- Page 2 This offset is approximately 3/16-inch in each direction. Note that these offsets have been performed at the factory prior to shipment of your DS-10 to you. It is only necessary for you to confirm below that the telescope has not been badly jarred out of collimation, and to...
- Page 3 FIG. 2: Collimation of the DS-10 Optical System 1. Focuser drawtube 2. Secondary mirror 3. Reflection of primary mirror 4. Observer's eye 5. Reflection of secondary mirror 6. Single-strut vane...
- Page 4 6. Main optical tube FIG. 4: Out-of-Focus Star Image Fig. 2 shows a correctly collimated DS-10 telescope, as it appears when viewed through the focuser with the eyepiece removed. To check and, if necessary, set the optical collimation follow these steps: Step 1: Observe through the focuser, without an eyepiece, and with your body oriented so that the telescope's primary mirror is to your left, and the open-end of the telescope tube is to your right.
- Page 5 II. USE OF THE TELESCOPE Lining up the Telescope with the Pole: The Meade Model DS-10 utilizes an equatorial mount, a type of mounting which greatly facilitates the tracking of astronomical objects. To use the telescope properly, the equatorial mount must be roughly aligned with the North Celestial Pole before each observing session.
- Page 6 This lock provides a comfortable "drag" in declination, so that the telescope will not turn too easily around this axis. On DS-10's not equipped with motor drive, the R.A. lock, located on top of the polar casting (18), may similarly be used to cause a smooth "drag" in right ascension.
-
Page 7: Care Of The Optics
A simple way to "stop-down" the DS-10 is to cut a 6" or 7" hole in a piece of cardboard, and tape this cardboard mask to the front of the telescope. (We recommend attaching the tape to the rubber end-ring of the telescope, and not to the tube body itself, to avoid marring the tube’s painted finish when the tape is removed.) -
Page 8: Optional Equipment
Electric Motor Drive: The Model 787 Electric Motor Drive System may be ordered at any time, for direct attachment to the Model DS-10 telescope. If you ordered the motor drive at the same time as you ordered your telescope, the drive was already installed at the factory, prior to shipment. The drive system is normally equipped with a synchronous timing motor of 115 volts A.C./60 Hertz, for use in the United States and Canada. - Page 9 NOTE: If you order a Meade viewfinder or photo-guide telescope for your DS-10 after receiving your telescope, be sure to mention, when ordering, that the finder will be used on the Meade DS-10. Due to the thick-wall main tube used on the DS-10, extra-long mounting screws are required for attaching finder or guide scope brackets to the main tube.
- Page 10 Grade Erfle 20mm eyepiece is probably the best choice obtainable; for lunar and planetary observations, eyepieces in the 4mm to 12.5mm range are advisable, for use both with and without a Barlow lens. NOTE: Because the DS-10 has been designed for such a wide range of visual and photographic applications, it...
- Page 11 (particularly with longer focal length eyepieces) to pull the eyepiece barrel slightly out from the extender tube, in order to reach proper focus. © 1985, Meade Instruments, Inc. All Rights Reserved. Reprinted without permission.
Need help?
Do you have a question about the DS-10 and is the answer not in the manual?
Questions and answers