Advertisement
C R5 0
+CR43
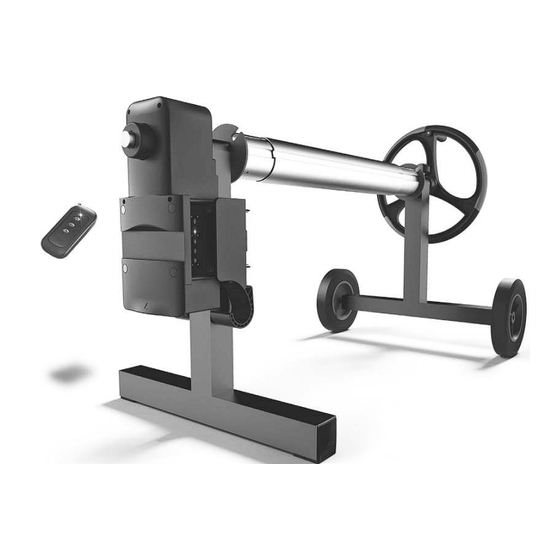
Re c h ar gea b l e m ot or ize d
i n - g rou n d so la r co ve r re el s et
U SE R M AN U A L
M o t o ri sa t i o n r ech a r ge ab l e p ou r
e n r o u l eu rs d e p i s c in e e n t er rées
MAN U E L D' U T I LI S AT I O N
S e t de e n ro l la d o r de c o b et or s ol a r de s u elo
m o t o ri z a d o c on b a t eri a re ca rg a b le
MAN U AL D E U S U AR I O
S e t r i c a ri c a b i l e mo t oriz z a to d i a v v olg i t or i
p e r c o p e rt ura s o l ar e in t er r a ta
MAN UALE D ' U S O
W i e d e ra u f l ad b a re s m o to ri s iert es
In -G ro u n d - So l ard eck e l- Ro lle n s et
G EBR AUC H SA N W E I S UN G
O p l a a d ba a r g e mo t ori s eer d e zon n e sp oelset
v o o r i n g e bo u wde zw em b a d en
H A NDLE ID I N G
Advertisement
Table of Contents

Summary of Contents for Roinstal CR50
- Page 1 C R5 0 +CR43 Re c h ar gea b l e m ot or ize d i n - g rou n d so la r co ve r re el s et U SE R M AN U A L M o t o ri sa t i o n r ech a r ge ab l e p ou r e n r o u l eu rs d e p i s c in e e n t er rées MAN U E L D' U T I LI S AT I O N...
- Page 2 PARTS DIAGRAM Screw bag Tube set Part number Description Replacement Parts number Frame K943-01 (for #6 wheel assembly) Main frame CR50ASM14R , CR50ASM14R/US (preinstalled with motorized unit) (for USA only) K943-03R Crank K943-05/DGRY Threaded locking knob K826-A03/DGRY (use only for MANUAL OPERATION) Wheels K826-013/DGRY Set screw...
- Page 3 Replacement parts for motorized unit Screw bag Part number Description Replacement Parts number Main motorized unit CR50ASM01-O , CR50ASM01-O/US (for USA only) Back plate CR5000401 Round decorative covers Long screw (with butterfly hand screw,locking washer and round washer) CR50ASM13 Set screw Hex wrench Battery: Rechargeable Li-ion battery pack, 2000mAh, 11.1V, 22.2Wh...
-
Page 4: Safety Warnings & Instructions
SAFETY WARNINGS & INSTRUCTIONS WARNING: Important safety instructions. It is important for the safety of persons to follow these instructions. SAVE THESE INSTRUCTIONS WARNING! - This product shall not be used by children. Keep the product and its cord out of reach of children. - This product can be used by persons with reduced physical, sensory or mental capabilities or lack of experience and knowledge if they have been given supervision or instruction concerning use of the product in a safe way and understand the hazards involved. - Page 5 • DO NOT handle the external adaptor and battery case with wet hands. • DO NOT handle the external adaptor, and battery case while charging with wet hands and without shoes. • Keep the external adaptor disconnected from power when it is not in use. •...
- Page 6 • Connecting tube X to hubs The "X" tube section has a smaller diameter and the "Y" tube section has a bigger diameter. The "Y" tube section is to be placed in the middle to connect sections "X" on each side. - Align the groove on the hub with pre-drilled holes on one of tubes "X", and insert the hub "#3"...
- Page 7 • Attaching pool cover to the cover reel Attaching elastic straps to the pool cover • For rectangular shaped in-ground pools - Lay the cover over the pool and align accordingly. - If you have grommets on the cover, you can put the plastic end of elastic strap "S1" through the grommet and then turn the plastic end by 90 degrees (perpendicular to the straps, Diagram A ).
-
Page 8: Getting Started
GETTING STARTED • Motorized unit inspection Tighten the butterfly hand screws and set screw (with hex wrench provided) on motorized unit as shown by hand to verify if they are secured enough. If necessary, tighten them further. Tighten by hand only. • Charging the battery IMPORTANT NOTE: Fully charge the battery (about 3-4 hours) before using it for the first time. -
Page 9: Operation
OPERATION WARNING! Make sure the threaded locking knob "#5" is not installed/locked to avoid damaging the motorized unit in operation. You can operate the motorized unit by pressing the buttons on the unit and the remote control respectively. NOTE: Open the battery compartment of the remote control and remove plastic sheet before operation. Button Motorized unit Remote control... -
Page 10: Maintenance And Storage
MAINTENANCE & STORAGE WARNING! - Unplug the battery case before cleaning, carrying out maintenance and replacing parts. - Cleaning and user maintenance should not be carried out by children. NOTE: 1. The battery discharges on its own during storage. Make sure to charge the battery case (installed with rechargeable Li-ion battery) to about 30% to 50% of the battery capacity before it is stored. -
Page 11: Troubleshooting
CAUTION! If a battery leak occurs, avoid contact with the leaking fluids and place the damaged battery in a plastic bag. - If leaking fluids come in contact with skin and clothing, wash immediately with plenty of soap and water. - If leaking fluids come in contact with eyes, do not rub eyes, immediately flush eyes with cool running water for at least 15 minutes and do not rub them.
Need help?
Do you have a question about the CR50 and is the answer not in the manual?
Questions and answers