Table of Contents
Advertisement
Quick Links
Advertisement
Table of Contents

Related Manuals for Decathlon E-EXPL520


Summary of Contents for Decathlon E-EXPL520
- Page 1 EN - INSTRUCTIONS E-EXPL520 Date of last update : V2 - 13/07/2024...
-
Page 2: Table Of Contents
TABLE OF CONTENTS LES BONNES PRATIQUES POUR PROFITER PLEINEMENT DE VOTRE VAE ....... 3 PRODUCT DESCRIPTION ........................4 GENERAL OPERATION OF THE ELECTRICAL ASSISTANCE ............4 SCREEN AND CONTROL ELEMENTS ....................5 MOTOR ............................... 11 BATTERY AND CHARGER ........................ 11 SAFETY INFORMATION ........................ -
Page 3: Les Bonnes Pratiques Pour Profiter Pleinement De Votre Vae
Thank you for buying a ROCKRIDER e-bike. Please read the instruction manual to make the most of your bike E-EXPL520. Never forget that an electrically-assisted bike is not a moped. It needs your help to go further, faster and longer. -
Page 4: Product Description
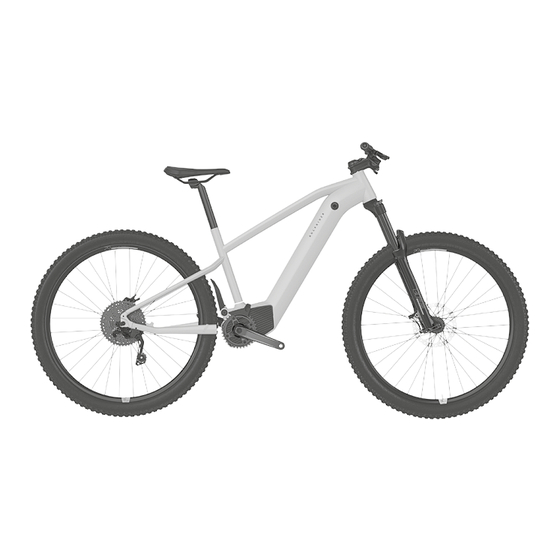
PRODUCT DESCRIPTION ELECTRICALLY-ASSISTED BIKE TECHNICAL FEATURES Battery Control screen Speed Sensor Assistance mode control Controller and motor Battery unlocking cylinder GENERAL OPERATION OF THE ELECTRICAL ASSISTANCE The electric bicycle can be used with or without assistance by pressing the ON/OFF button and playing around with modes 1 / 2 / 3 / 4 / AUTO. Assistance modes modes 1 / 2 / 3 / 4 / AUTO, which you can select via the «D»... -
Page 5: Screen And Control Elements
SCREEN AND CONTROL ELEMENTS DESCRIPTION OF SCREEN AND FUNCTION 17:30 km/h speed trip Assistance mode : «1» mode is the default assistance mode when the screen is switched on. The motor power adapts according to the selected mode The motor power according to the modes is defined below: Mode % of electrical assistance contribution + 40%... -
Page 6: Automatic Mode
AUTOMATIC MODE Getting started Flat Slope Ascent Descent The assistance mode of your bike will vary automatically according to your conditions of use (speed, torque, spin, slope, etc.). Speed Torque Spin Angle... - Page 7 NAVIGATING THE ASSISTANCE MODES 1’’ 1’’ 17:30 17:30 km/h km/h speed speed trip trip 1234 1234 1’’ 1’’ +40% +80% 1’’ 17:30 17:30 km/h km/h speed speed trip trip 1234 1234 1’’ +120% +320% LIGHTING ACTIVATION/DEACTIVATION 17:30 17:30 00:00 17:30 LIGHTS LIGHTS km/h...
-
Page 8: Battery Level
BATTERY LEVEL 00:00 km/h speed U03 FAILED trip 00000 BATTERY LIFE MODE 1 - 64km MODE 2 - 48km MODE 3 - 39km MODE 4 - 32km MODE 1 - 42km MODE 2 - 32km MODE 3 - 25km MODE 4 - 20km MODE 1 - 29km MODE 2 - 20km MODE 3 - 16km... - Page 9 INFORMATION SELECTION 00:00 00:00 00:00 km/h km/h km/h speed speed speed U03 FAILED 1’’ 1’’ 1’’ trip time cadence remaining range 00:00:00 00:00 00:00 00:00 electric power km/h km/h speed speed U03 FAILED U03 FAILED U03 FAILED 1’’ 1’’ 1’’ electric power user power user power...
- Page 10 RESET ≥ 3’’ 00:00 00:00 km/h km/h speed speed U03 FAILED U03 FAILED trip trip 00000 ≥ 3’’ Trip Time Partial distance ADJUSTMENTS AND DIAGNOSTICS 00:00 SETTINGS km/h speed U03 FAILED 3’’ trip 00000 LANGUAGES SETTINGS SLEEP MODE DUTCH LANGUAGES ENGLISH 1’’...
-
Page 11: Motor
36 V / 17.5 Ah battery Output: 42 V 504Wh Do not use a different charger from the one supplied by DECATHLON for this bike model. Using another charger may damage the battery or cause serious incidents (sparks, fire). BATTERY LIFE The battery life of the electric bike depends on numerous factors: •... - Page 12 Do not dispose of the battery in non-suitable containers. Return the used battery to your Decathlon store for recycling. Risk of fire. Risk of electrocution. Handle with care. Impact sensitive. Never short-circuit the battery by connecting the positive and negative terminals.
-
Page 13: Inserting And Removing The Battery
INSERTING AND REMOVING THE BATTERY Installation: CLIC Before inserting your battery in its housing, make sure that the lock is in the open position and does not interfere with the insertion of the battery. Removal: Remember to unlock your battery before removing it from its housing. RECHARGING THE BATTERY Start of charging red LED. -
Page 14: Maintenance And Lifetime (Warranty Conditions)
MAINTENANCE AND LIFETIME (WARRANTY CONDITIONS) Do not store the discharged battery (1 flashing blue LED) to avoid deep discharge, which may cause it to malfunction. In cases of extended storage, recharge the battery once every 3 months. 100% Your battery is guaranteed for 2 years or 500 charge and discharge cycles (1 cycle = 1 charge from 0% to 100% + 1 discharge from 100% to 0% or 1 cycle = 2 charges to 50%) subject to compliance with good conditions of use and storage. -
Page 15: Safety Information
Never modify the bike’s components or electrical system! Any modification is dangerous and prohibited by law. If a modified bike breaks down or is damaged, Decathlon will not be held responsible for the repairs under any circumstances (warranty cancelled). You will also be legally responsible for any accident that arises with the bike. -
Page 16: Maintenance
Check the integrity of the battery, in the event of a crash or if the battery falls off. Caution: the watertightness of your battery is no longer guaranteed following a fall. For more information on use, maintenance, after-sales services or if you have any questions, visit DECATHLON’s support website: support.decathlon.fr/languages or a DECATHLON store. -
Page 17: Displays Error Code On The Control Screen
DISPLAYS ERROR CODE ON THE CONTROL SCREEN ERROR km/h ENGINE vitesse distance parcourue Error code Definition Solutions Undervoltage protection Charge the battery > Battery diagnosis > HS > Change the battery Battery completely discharged. Temperature sensor error (-20°C) Restart the bike > If the error occurs on a resting motor > Replace the motor Temperature sensor error (+125°C) Charge the battery >... -
Page 18: Appendix 1: Component Tightening Torque
APPENDIX 1: COMPONENT TIGHTENING TORQUE Component Tightening torque Seat collar Bell immobile Headset Compression No Loose / No hard point Fork/Stem 6 N.m +/-1 N.m Display immobile Grip - handlebar immobile Handlebar - stem 7 N.m +/-1 N.m Seat post - saddle 19 N.m +2/-2 N.m Disc screw 5 N.m +/-1 N.m... -
Page 19: Contents Of The Commercial Warranty For Your Electrically-Assisted Bike
However, this contractual obligation will not apply in the event of poor maintenance or misuse of B’twin bikes, as defined in the user manual of the product in question. To benefit from the warranty covering one of the parts listed above, you must simply visit the repair shop of a DECATHLON retail store, bringing either your DECATHLON store loyalty card or your warranty certificate with you. - Page 20 https://www.decathlon.com.tr/...
Need help?
Do you have a question about the E-EXPL520 and is the answer not in the manual?
Questions and answers