Table of Contents
Advertisement
Available languages
Available languages
Quick Links
Advertisement
Table of Contents

Subscribe to Our Youtube Channel
Related Manuals for COSYLIFE CL-AF57D

Summary of Contents for COSYLIFE CL-AF57D
- Page 1 06/2024-V6 Air fryer Friteuse à air Airfryer Freidora de aire 981440 - CL-AF57D INSTRUCTIONS FOR USE ....02 CONSIGNES D'UTILISATION ....14 GEBRUIKSAANWIJZINGEN ....26 INSTRUCCIONES DE USO ....38...
- Page 4 Thank you! T h a n k y o u f o r c h o o s i n g t h i s C O S Y L I F E p ro d u c t . C O S Y L I F E p r o d u c t s a r e c h o s e n , t e s t e d , a n d recommended by ELECTRO DEPOT, so you can be sure y o u a re g e t t i n g a t o p - q u a l i t y, e a s y - t o - u s e p ro d u c t...
- Page 5 Table of Contents Parts Product overview Product overview Intended use Specifications Before first use Product usage Preparing for use Using the appliance Cleaning Cleaning and Troubleshooting maintenance Storage...
-
Page 6: Product Overview
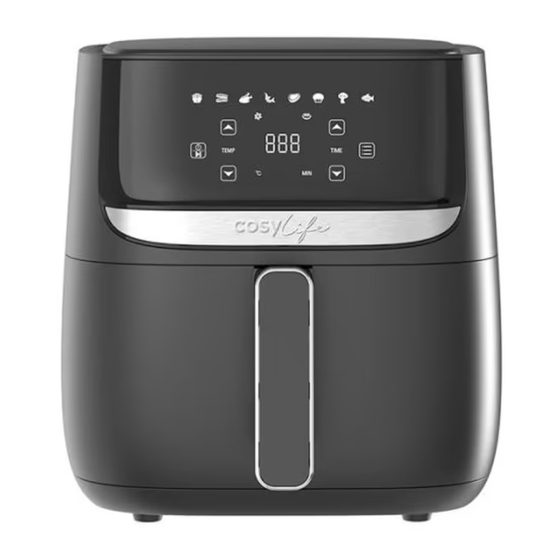
Product overview Parts Control panel MENU Display Motor working status Temp “+” key Power/START/PAUSE key Temp “-” key Temp/Time Display Heater working status Time “+” key Menu key Time “-” key Housing Metal rack Pot handle... -
Page 7: Intended Use
Use this air fryer to cook meats, vegetables and foods coated in breadcrumbs (such as cheese or chicken). It is intended for household use only and should not be used for commercial purposes. Any other use may damage the product or cause injury. Specifications Model: 981440 - CL-AF57D Voltage: 220-240V~ 50/60Hz Wattage: 1700 W Capacity of pot (without grid): 5.7L... -
Page 8: Product Usage
Product usage Before first use Remove all packaging materials. Remove any stickers or labels from the appliance . Thoroughly clean the metal rack and pot with hot water, some washing-up liquid and a non-abrasive sponge. Wipe inside and outside of the appliance with a moist cloth. This is an oil-free fryer that works on hot air. - Page 9 Product usage When you hear the beep sound, the set preparation time has elapsed. Pull the pot out of the appliance and place it on a trial framework. Check if the ingredients are ready. If the ingredients are not ready yet, simply slide the pot back into the appliance and set the timer to a few extra minutes.
- Page 10 Product usage Operation Instructions Locate the pot and plug unit in, the PCB power light on Touch “Power” key, an audible tone comes, screen showing 15 MIN, and jumping. Touch “MENU” key, switch to mode pre-setting. “Menu display”, touch “MENU” key, icons showing on one by one. One icon with it’s pre-setting time and temperature.
- Page 11 Product usage Settings This table below will help you to select the basic settings for the ingredients. Note: Keep in mind that these settings are indications. As ingredients differ in origin, size, shape as well as brand, we cannot guarantee the best setting for your ingredients.
- Page 12 Product usage Snacks Spring rolls 100-600 8-10 Frozen chicken 100-600 8-12 nuggets Frozen fish 100-500 6-10 fingers Frozen bread crumbed cheese 100-500 8-10 snacks Stuffed 100-500 12-20 vegetables Baking Cake 8-15 Quiche 20-22 Muffins 15-18 Sweet snacks Note: Add 3 minutes to the preparation time when you start frying while the Hot- air fryer is still cold.
-
Page 13: Cleaning And Maintenance
Cleaning and maintenance Cleaning Clean the appliance after every use. WARNING! • The pot and the metal rack are with the non-stick coating. Do not use metal kitchen utensils or abrasive cleaning materials to clean them, as this may damage the non-stick coating. -
Page 14: Troubleshooting
Cleaning and maintenance Troubleshooting Problem Possible cause Solution The Hot-air fryer • The appliance is not • Put the mains plug in an earthed wall does not work plugged in. socket. • You have not press • You can check whether you have the start key . - Page 15 Cleaning and maintenance Problem Possible cause Solution Fresh fries are • You did not use the • Use fresh potatoes and make sure fried unevenly in right potato type. they stay firm during frying. the air fryer. • You did not rinse •...
- Page 16 Merci ! M e rc i d ’ a v o i r c h o i s i c e p ro d u i t C O S Y L I F E . Choisis, testés et recommandés par ELECTRO DEPOT, le s p ro d u i t s d e l a m a rq u e C O S Y L I F E v o u s a s s u re n t u n e u t i l i s a t i o n s i m p l e , u n e p e r f o r m a n c e f i a b l e e t u n e q u a l i t é...
-
Page 17: Table Of Contents
Table des matières Description des pièces Aperçu de l’appareil Aperçu de l’appareil Aperçu de l’appareil Utilisation prévue Caractéristiques Avant la première utilisation Utilisation de Utilisation de Préparation avant l’utilisation l’appareil l’appareil Utilisation de l’appareil Nettoyage Nettoyage et Nettoyage et Guide de dépannage entretien entretien Rangement... -
Page 18: Aperçu De L'appareil
Aperçu de l’appareil Description des pièces Couvercle Panneau de commande Écran MENU État de fonctionnement du moteur Touche de température « + » Touche Marche/Arrêt, Démarrer et Pause Touche de température « - » Affichage Température/Temps État de fonctionnement de l’élément chauffant Touche de temps « + » Touche Menu Touche de temps « - »... -
Page 19: Utilisation Prévue
(comme du fromage ou du poulet). Cet appareil est conçu exclusivement pour un usage domestique et ne doit pas être utilisé à un usage commercial. Toute autre utilisation est susceptible d’endommager l’appareil ou de provoquer des blessures. Caractéristiques Modèle : 981440 - CL-AF57D Tension : 220-240 V~ 50/60 Hz Puissance : 1 700 W Capacité... -
Page 20: Utilisation De L'appareil
Utilisation de l’appareil Avant la première utilisation Retirez tous les matériaux d’emballage. Retirez tous les autocollants ou étiquettes se trouvant sur l’appareil. Nettoyez complètement la grille métallique et la cuve avec de l’eau chaude, du liquide vaisselle et une éponge non abrasive. Essuyez l’intérieur et l’extérieur de l’appareil à... - Page 21 Utilisation de l’appareil Il est nécessaire de secouer certaines ingrédients à mi-cuisson (voir la partie « Réglages » de ce chapitre). Pour secouer les ingrédients, sortez la cuve de l’appareil en la tenant par sa poignée et secouez-la. Faites ensuite à nouveau glisser la cuve dans la friteuse. Lorsqu’un bip sonore retentit, cela signifie que le temps de cuisson défini s’est écoulé.
- Page 22 Utilisation de l’appareil Consignes d’utilisation Repérez la cuve métallique et branchez l’appareil. Le voyant d’alimentation s’allume. Appuyez sur la touche Marche/Arrêt. Une sonnerie retentit et l’écran affiche 15 MIN en clignotant. Appuyez sur la touche « MENU » pour passer au mode de réglages prédéfinis.
- Page 23 Utilisation de l’appareil Réglages Le tableau ci-dessous vous aidera à sélectionner les réglages de base pour vos ingrédients. Remarque : N’oubliez pas que ces réglages sont des indications. Les ingrédients ayant tous des origines, tailles et formes différentes, et étant également de marques différentes, nous ne pouvons garantir quels réglages sont optimaux pour vos ingrédients.
- Page 24 Utilisation de l’appareil Viandes et volailles Steaks 100-600 12-18 Côtelettes de 100-600 12-18 porc Hamburger 100-600 10-20 Friands à la 100-600 13-15 saucisse Pilons de poulet 100-600 25-30 Blancs de poulet 100-600 18-25 En-cas Rouleaux de 100-600 8-10 printemps Nuggets de 100-600 8-12 poulet surgelés...
-
Page 25: Nettoyage Et Entretien
Nettoyage et entretien Nettoyage Nettoyez l’appareil après chaque utilisation. AVERTISSEMENT ! • La cuve et la grille métallique disposent d’un revêtement anti-adhésif. N’utilisez pas d’ustensiles de cuisine en métal ou de matériaux de nettoyage abrasifs pour les nettoyer, car cela pourrait endommager ce revêtement anti-adhésif. -
Page 26: Guide De Dépannage
Nettoyage et entretien Guide de dépannage Problème Cause possible Solution La friteuse à • L’appareil n’est pas • Branchez la fiche d’alimentation à air chaud ne branché. une prise murale mise à la terre. fonctionne pas. • Vous n’avez pas •... - Page 27 Nettoyage et entretien Problème Cause possible Solution De la fumée • Vous tentez de cuire • Lorsque vous faites frire des blanche émane de des ingrédients ingrédients gras dans la friteuse, une l’appareil. gras. grande quantité d’huile s’écoulera • La cuve contient dans la cuve.
- Page 28 Proficiat met uw keuze voor een product van COSYLIFE. De selectie en de testen van de toestellen van COSYLIFE g e b e u re n v o l le d i g o n d e r c o n t ro le e n s u p e r v i s i e v a n E L E C T R O D E P O T.
- Page 29 Inhoudstafel Onderdelen Overzicht van het Overzicht van het Overzicht van het product toestel toestel Beoogd gebruik Specificaties Voor ingebruikname Gebruik van het Gebruik van het Voorbereiding voor gebruik toestel toestel Het apparaat gebruiken Reiniging Reiniging en Reiniging en Probleemoplossing onderhoud onderhoud Opslag...
-
Page 30: Overzicht Van Het Toestel
Overzicht van het toestel Onderdelen Deksel Bedieningspaneel MENU-weergave Werkstatus van motor Temp '+' toets Aan/uit/START/PAUZE toets Temp '-' toets Temperatuur-/tijdweergave Werkstatus van verwarming Tijd '+' toets Menu toets Tijd '-' toets Behuizing Metalen rooster Handgreep van pan... -
Page 31: Overzicht Van Het Product
(zoals kaas of kip). Het is alleen bestemd voor huishoudelijk gebruik en mag niet voor commerciële doeleinden worden gebruikt. Elk ander gebruik kan het product beschadigen of verwondingen veroorzaken. Specificaties Model: 981440 - CL-AF57D Spanning: 220-240V ~ 50/60Hz Vermogen: 1700 W... -
Page 32: Voor Ingebruikname
Gebruik van het toestel Voor ingebruikname Verwijder alle verpakkingsmateriaal. Verwijder eventuele stickers of labels van het apparaat. Reinig het metalen rooster en de pan grondig me behulp van heet water, een beetje afwasmiddel en een niet-schurende spons. Veeg de binnen- en buitenkant van het apparaat schoon met een vochtige doek. Dit is een olievrije friteuse die op hete lucht werkt. - Page 33 Gebruik van het toestel Wanneer u een geluidssignaal hoort, is de ingestelde bereidingstijd verstreken. Trek de pan uit het apparaat en plaats deze op een onderzetter. Controleer of de ingrediënten gaar zijn. Als de ingrediënten nog niet gaar zijn, schuif de pan terug in het apparaat en stel de timer in op enkele extra minuten.
- Page 34 Gebruik van het toestel Gebruiksinstructies Breng de pan in het apparaat aan, steek de stekker in het stopcontact en het stroomcontrolelampje brandt Tik op de 'Aan/uit' toets. U hoort een geluidssignaal en het scherm geeft 15 MIN al knipperend weer. Tik op de 'MENU' toets en de instelmodus wordt geopend.
- Page 35 Gebruik van het toestel Instellingen De tabel hieronder helpt u bij het selecteren van de basisinstellingen voor de ingrediënten. Opmerking: Houd er rekening mee dat deze instellingen louter indicatief zijn. Gezien ingrediënten verschillen in herkomst, grootte, vorm en merk, kunnen we onmogelijk de beste instellingen voor uw ingrediënten garanderen.
- Page 36 Gebruik van het toestel Drumsticks 100-600 25-30 Kipfilet 100-600 18-25 Snacks Loempia's 100-600 8-10 Diepgevroren 100-600 8-12 kipnuggets Diepgevroren 100-500 6-10 vissticks Diepgevroren gepaneerde 100-500 8-10 kaassnacks Gevulde groenten 100-500 12-20 Bakken Cake 8-15 Quiche 20-22 Muffins 15-18 Zoete snacks Opmerking: Voeg 3 minuten aan de bereidingstijd toe wanneer u begint te frituren terwijl de airfryer nog koud is.
-
Page 37: Reiniging En Onderhoud
Reiniging en onderhoud Reiniging Reinig het apparaat na elk gebruik. WAARSCHUWING! • De pan en het metalen rooster zijn voorzien van een antiaanbaklaag. Gebruik geen metalen keukengerei of schurende schoonmaakmiddelen om deze onderdelen schoon te maken, de antiaanbaklaag kan worden beschadigd. - Page 38 Reiniging en onderhoud Probleemoplossing Probleem Mogelijke oorzaak Oplossing De airfryer werkt • De stekker zit niet • Steek de stekker in een geaard niet. in het stopcontact. stopcontact. • U hebt niet op de • Controleer of u al dan niet op de starttoets gedrukt.
- Page 39 Reiniging en onderhoud Probleem Mogelijke oorzaak Oplossing Er komt witte rook • U bereidt vette • Wanneer u vettige ingrediënten in uit het apparaat. ingrediënten. de airfryer bakt, lekt er een grote • De pan bevat nog hoeveelheid olie in de pan. De olie vetresten van produceert witte rook en de pan eerder gebruik.
- Page 40 ¡Muchas gracias! M u c h a s g r a c i a s p o r h a b e r e le g i d o n u e s t ro p ro d u c t o C O S Y L I F E .
- Page 41 Índice Partes Descripción del Descripción del Descripción general del producto aparato aparato Uso previsto Especificaciones Antes del primer uso Utilización del Utilización del Preparación para su uso aparato aparato Uso del aparato Limpieza Limpieza y Limpieza y Solución de problemas mantenimiento mantenimiento Almacenamiento...
-
Page 42: Descripción Del Aparato
Descripción del aparato Partes Tapa Panel de control Pantalla del MENÚ Estado de funcionamiento del motor Botón Temp. "+" Botón Encendido/INICIO/PAUSA Botón Temp. "-" Pantalla de Temp./Tiempo Estado de funcionamiento del elemento calefactor Botón Tiempo "+" Botón Menú Botón Tiempo "-" Carcasa Rejilla metálica Olla... -
Page 43: Descripción General Del Producto
Use esta freidora de aire para cocinar carnes, verduras y alimentos rebozados (como queso o pollo). Está destinado únicamente a un uso doméstico y no deberá utilizarse para fines comerciales. Cualquier otro uso podría dañar el producto o provocar lesiones. Especificaciones Modelo: 981440 - CL-AF57D Voltaje: 220-240V~ 50/60Hz Potencia: 1700 W... -
Page 44: Utilización Del Aparato
Utilización del aparato Antes del primer uso Retire todos los materiales de embalaje. Retire todas las pegatinas y etiquetas del aparato. Limpie a fondo la rejilla metálica y la olla con agua caliente, un poco de líquido lavavajillas y una esponja no abrasiva. Limpie el interior y el exterior del aparato con un paño húmedo. - Page 45 Utilización del aparato Algunos ingredientes necesitan que se agiten a la mitad del tiempo de preparación (consulte el apartado "Ajustes" de este capítulo). Para agitar los ingredientes, saque la olla del aparato sujetándola por el asa y agítela. A continuación, vuelva a deslizar la olla en la freidora de aire.
- Page 46 Utilización del aparato Instrucciones de uso Coloque la olla y encienda la unidad, se encenderá la luz de encendido del PCB Toque el botón de "Encendido", oirá un tono y la pantalla mostrará "15 MIN" parpadeando. Toque el botón "MENÚ", cambie al modo de preajuste. En la "Pantalla del Menú", toque el botón "MENÚ"...
- Page 47 Utilización del aparato Ajustes La siguiente tabla le ayudará a seleccionar los ajustes básicos para los ingredientes. Nota: Tenga en cuenta que estos ajustes se indican como referencia. Como los ingredientes varían en origen, tamaño, forma y marca, no podemos garantizar el mejor ajuste para sus ingredientes.
- Page 48 Utilización del aparato Carne y aves Filete 100-600 12-18 Chuletas de 100-600 12-18 cerdo Hamburguesa 100-600 10-20 Rollo de 100-600 13-15 salchicha Muslos 100-600 25-30 Pechuga de pollo 100-600 18-25 Snacks Rollitos de 100-600 8-10 Sí primavera Nuggets de pollo 100-600 8-12 Sí...
-
Page 49: Limpieza Y Mantenimiento
Limpieza y mantenimiento Limpieza Limpie el aparato después de cada uso. ¡ADVERTENCIA! • La olla y la rejilla metálica tienen revestimiento antiadherente. No utilice utensilios de cocina metálicos ni materiales de limpieza abrasivos para limpiarlos, ya que podrían dañar su revestimiento antiadherente. 1. -
Page 50: Solución De Problemas
Limpieza y mantenimiento Solución de problemas Problema Posible causa Solución La freidora de • El aparato no está • Conecte el enchufe a una toma de aire caliente no enchufado. corriente con toma de tierra. funciona • No ha pulsado el •... - Page 51 Limpieza y mantenimiento Problema Posible causa Solución Sale humo blanco • Está preparando • Cuando fría ingredientes grasientos del aparato. ingredientes en la freidora de aire, caerá una gran grasientos. cantidad de aceite en la olla. El aceite • La olla aún contiene produce humo blanco y la olla puede restos de grasa de calentarse más de lo normal.
- Page 52 WARRANTY CONDITIONS This product is guaranteed against faults caused by defects in manufacturing or the materials used for a period of two years, starting from the date of purchase.* This warranty does not cover defects or damage caused by failure to install the device correctly, incorrect use of the product, or excessive wear and tear.
Need help?
Do you have a question about the CL-AF57D and is the answer not in the manual?
Questions and answers