Table of Contents

Summary of Contents for OVRC WATT BOX WB-820-IPVM-2
- Page 1 WB-820-IPVM-2 Installation Guide Package contents (1)WB-820-IPVM-2 (1) Removable 2m (6') IEC 21 power cord (1) Documentation QR insert card (2) Mounting brackets (4 ) M3*16mm screws (4) washers (4) 3.5*19.1mm wall anchors...
- Page 2 (4) Press-in mounting pins for attaching to a structured wiring can or versabox. (1) Locking clip for IEC cord...
-
Page 3: Important Safety Instructions
Important Safety Instructions Read and observe the following safety points at all times. Notice For indoor use only. Internal components are not sealed from the environment. The device can only be used in a fixed location such as a telecommunication centre, or a dedicated computer room. - Page 4 Warning — Lithium battery A lithium battery is molded into this device’s real-time clock. The lithium battery is not intended to be replaced; a lithium battery can explode if it is incorrectly replaced. Do not recharge, disassemble, or incinerate a lithium battery. Discard used lithium batteries according to local regulations.
- Page 5 Warning — Liquid: Avoiding electrical shocks Do not operate the WattBox if liquid of any kind is spilled onto or inside the unit. Do not operate it near rain or water, even water that is contained (e.g., bathtub or sink). Warning —...
-
Page 6: Fcc Warning
Caution — Proper cleaning In general, the only cleaning necessary for is a light dusting. Unplug the WattBox from the wall outlet before cleaning it. Do not use liquid or aerosol cleaners. FCC Warning WARNING!! Changes or modifications to this unit not expressly approved by the party responsible for compliance could void the user’s authority to operate the equipment. - Page 7 The manufacturer is not responsible for any radio or TV interference caused Note: -__. by unauthorized modifications to this equipment. Such modifications could void the user’s authority to operate the equipment. The Class B digital apparatus meets all requirements of the Canadian Interference- Causing Equipment Regulation.
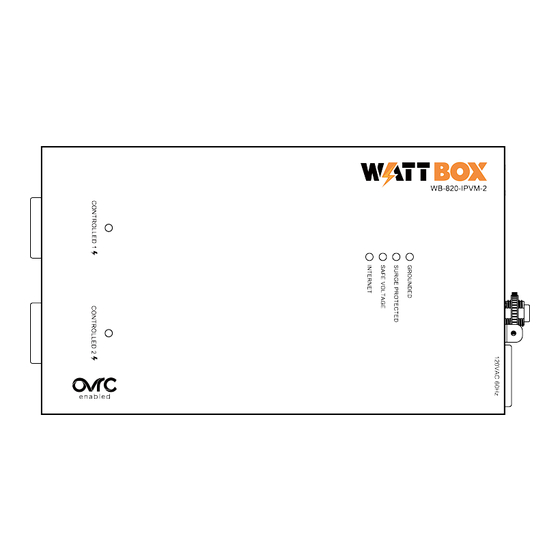
- Page 8 Anatomy A. Power indicators for outlets 1-2 —Illuminates when power is on (˟2 – 1 for each outlet).
- Page 9 Power input — Input for 3-prong IEC 21 power cord, with detachable locking clip. H. Circuit breaker — 20A resettable breaker that trips when overamperage conditions occur. I. UPS Link — For connection to a WB-OVRC-UPS-2000-1. J. ACC port — For use with WattBox 800 Series Accessories (WB-ACC-TRIGGER-800 & WB-800-FP). K.
-
Page 10: Led Indicators
LED indicators The below chart describes each LED status. Blue(Solid) All hosts are communicating with the WattBox. Blue(Flash- At least one (not all) sites / IP addresses are communicating with Internet ing) the WattBox. Red (Solid) None of the hosts are communicating with the WattBox. Safe voltage is enabled. - Page 11 Mounting The WB-820-IPVM-2 can be mounted on a wall or in a structured wiring cabinet. Structured wiring cabinet mounting Use the supplied press-in mounting pins to mount the WattBox to the enclosure.
-
Page 12: Wall Mounting
Wall mounting Use the supplied M3*16mm screws and 3.5*19.1mm anchors to mount the WattBox to the wall. - Page 13 OvrC connectivity, plug a network cable from your router or switch into the network port. 2. For IP control and OvrC connectivity, connect a network cable from your router or switch into the WB-820 Network port. To learn more about OvrC, visit the Tech...
- Page 14 OvrC setup The Details page shows the outlet name, power draw, and provides outlet control to power an outlet on/off or reset it, as well as the Device Details window preset on all OvrC-enabled devices. If an outlet is set to Disabled you cannot control it. If an outlet is set to Reset Note: -__.
-
Page 15: General Settings
General Settings Use the below settings to take advantage of the WattBox's basic functions and notifications. Outlet Options Enter the Outlet Name, Mode, and Power on Delay. When configuring Power on Delay, make sure the first device in the network topology powers on first. -
Page 16: Time Settings
-__. notifications you receive in the User settings. UPS Settings These settings appear if you have an OvrC-enabled UPS connected to the UPS Link of an IP-enabled Wattbox. UPS Alarm on Power Loss Toggle on for the UPS to emit an alarm when you lose power. - Page 17 Voltage Range Settings (800 and 820 series with an OvrC- enabled UPS only) Select the type of Voltage Range you expect at the installed location. Options include: Normal Range — For locations with consistent and reliable input voltage and frequency.
- Page 18 Load shedding configuration Use the dropdown next to each outlet to determine at what battery percentage the UPS turns the outlet off. Load shedding does not work for outlets configured to Reset Only . Note: -__. Safe Voltage Safe Voltage disables all the outlets when the input voltage falls outside of a safe range. Toggle this feature on or off.
- Page 19 Telnet Control (150/250/800/820 series only) Toggle to enable/disable control API communication. Changes require the WattBox to restart. Outlets are not affected. Note: -__. Reset to Factory Default Settings (150/250/800/820 series only) Click the Reset button to return the WattBox to factory default settings. Read the warning statement, then click Yes, Continue.
-
Page 20: Auto-Reboot Settings
Auto-Reboot Settings Use these settings to take advantage of the WattBox's self-healing features. Auto-Reboot Enable to reset specific outlets when the WattBox fails to connect to the hosts configured in Host Settings. Auto-Reboot does not need to be enabled to configure the rest of the Auto- Note: -__. - Page 21 Outlet Reboot Settings Configure which outlets restart when they cannot connect to the selected hosts. Use the Reboot Outlet When dropdown to specify whether the outlet restarts when All selected hosts time-out, Any selected host time-out, or Never. Use the Selected Hosts dropdown to select all the Hosts configured in the Host Settings or specific hosts.
-
Page 22: Time-Out Settings
Time-Out Settings Configure the amount of time and the events that trigger an auto-reboot. Options include: Time-out Interval is the amount of time (between 1 and 60 seconds) the device waits before it considers a host to time out. For example, if the Time-out Interval is set to 30 seconds the host(s) must be unreachable for 30 seconds before it is considered a time-out. - Page 23 Reboot Attempts is the number of times the WattBox will auto-reboot the outlets. Zero means the WattBox will continue restarting outlets until the hosts stop timing out.
- Page 24 Outlet Schedules The Schedule tab allows you to create schedules to turn off, turn on, or reset outlets at specific times. Device Schedules can be toggled on or off. Click a schedule to delete or edit it. How to create a Device Schedule 1.
- Page 25 4. Set a Schedule Frequency. Once allows you to set a Schedule Date and Time. Repeat allows you to select which days and at what time the Outlet Action is taken. Click Save when finished.
-
Page 26: Username And Password
Local web interface You can access the interface by typing the IP address into a web browser or by using OvrC's WebConnect feature. Username and password The default username and password are both wattbox. You must change them after the... -
Page 27: Troubleshooting
Troubleshooting Symptom Possible cause Remedy Make sure the AC power plug is plugged into a properly grounded 120V (nominal) wall outlet. Some wall outlets are controlled by a No power is being supplied. WattBox is not wall switch. Try flipping the switches receiving in the room, especially those near power (the... - Page 28 Symptom Possible cause Remedy outlet. a humming or with equipment that is not Unplug different components from buzzing noise. properly grounded. WattBox one at a time to see if the noise stops. ...
- Page 29 Dimensions...
-
Page 30: Specifications
Specifications EMI/RFI Filtration # of Filters = 1 for 2 outlets Outlets (2) NEMA 5-20 Outlets Peak Impluse Current 45,000A Safe Voltage Yes, (90V ~ 136V) UL 62368-1, UL 1449, UL 1283, FCC 47 CFR Part 15 Subpart Certifications B-Class B Device: 119.30 mm (4.7") W x 206.90 mm (8.1") L x 41.00 mm(1.6") H Dimensions... - Page 31 Snap One, LLC (formerly known as Wirepath Home Systems, LLC), in the United States and/or other countries. 4Store, 4Sight, Control4, Control4 My Home, SnapAV, Araknis Networks, BakPak, Binary, Dragonfly, Episode, Luma, Mockupancy, Nearus, NEEO, Optiview, OvrC, Pakedge, Sense, Strong, Strong Evolve, Strong VersaBox, SunBriteDS, SunBriteTV, Triad, Truvision, Visualint, WattBox, Wirepath, and Wirepath ONE are also registered trademarks or trademarks of Snap One, LLC.
Need help?
Do you have a question about the WATT BOX WB-820-IPVM-2 and is the answer not in the manual?
Questions and answers