Table of Contents
Advertisement
Quick Links
Arivia M3135
Arivia M2130
Arivia M2125
User's Manual
Before using the machine, please read this manual thoroughly. Be sure to keep this manual for future reference.
Read Before Using
Before using the machine, please read "License Agreement" (terms for using the Adobe Inc. software) provided in the "Reference
Guide Main Unit". Reference Guide is available on the official site of our company.
Use the software only after you agree with all applicable terms and conditions. By using the software, you are agreeing to be
bound by the terms and conditions. If you do not agree to "License Agreement", please contact the dealer you purchased the
product.
The manuals for this product may include descriptions about the models, features, and separately-sold accessories that are un-
available depending on the country and/or region. Contact your local representative for more information.
This manual may not be edited, modified or copied in whole or part without the written consent of the publisher.
■
Some parts of this manual are subject to change without prior notice.
■
The screen shots and the illustrations in this manual are used as examples. They may differ from yours depending on the
■
model, the software, or the OS.
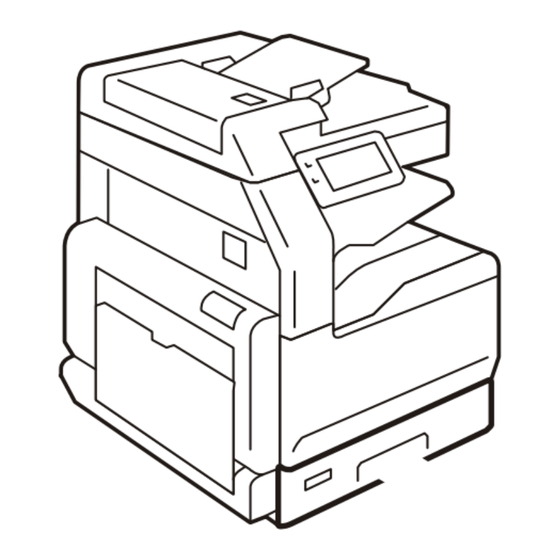
Setup of device
1.
Pull out the packing box upward.
2.
Install the device.
Electronic user manuals are available on the official website.
Please go to the official website
1173
100
100
1567
1095
400
80
(mm)
.
https://support-kbs.katun.com
© 2024 Katun Corporation. April 2024 GM1587E9-2 Edition 1
3.
Remove the packing materials.
Advertisement
Table of Contents

Related Manuals for Katun Arivia M3135

Summary of Contents for Katun Arivia M3135
- Page 1 The screen shots and the illustrations in this manual are used as examples. They may differ from yours depending on the ■ model, the software, or the OS. © 2024 Katun Corporation. April 2024 GM1587E9-2 Edition 1 Remove the packing materials. Setup of device Pull out the packing box upward.
-
Page 2: Connect Power Supply
Set the toner cartridge. Connect power supply. Set [Language] > [Country/Region] accord- ing to the instructions on the screen. Load papers. The device is restarted, and the settings are applied. Note If [Country/Region] is not correctly set, fax line connec- tion, Wi-Fi connection, and other functions may violate the laws of the country or region. -
Page 3: Control Panel
Control Panel Features of Control Panel Pressing the Home button displays the Home screen. [Pins] [Addresses] [Apps] Home Button [Pause] Home Screen Power/Power Saving button The power switches on. Apps/Pins/Address Screens can be displayed. • [Apps]: You can tap on any of the application icons Note and use its functions. -
Page 4: Switching The Power Off
Switching the Power Off Executing the Job from the Pinned Job Direction History When the power is switched off, all the machine functions are stopped. On the [Pins] screen, tap on at the right side Important of the pinned job and tap on [Start Now]. Do not switch the power off when the machine is in the following states. -
Page 5: Loading Paper
Fan a stack of paper, face the print surface Loading Paper up, and then load the paper with edges aligned according to the direction of the ar- Important row. Do not place paper or other objects in the reserved ■ space of the tray. -
Page 6: Document Glass
Copy/Fax/Scan Set the document. Document Glass Multiple 1 sheet sheets Loadable paper Paper size (mm) Width: Up to 297, Length: Up to 432 Open the Document Cover, and wipe off any Document Feeder dirt from the Document Glass. Loadable paper Width 49 to 297 Paper size (mm) - Page 7 On the [Apps] screen, tap on the desired Application icon. Copy Scan Copy As needed, configure the setting items. Enter by the keyboard or by tapping on the Address Book ( ) or Redial ( ) to specify the recipient. Tap on [Start].
-
Page 8: Safety Notes
Electrical Safety Safety Notes Before using this product, read “Safety Notes” carefully for WARNING safety use. This product shall be operated by the power source as indicat- This product and recommended supplies have been tested ed on this product’s data plate label. Consult your local power and found to comply with strict safety requirements includ- company to check if your power source meets the require- ing safety agency approvals and compliance with environ-... -
Page 9: Product Installation
Product Installation Do not incline this product at more than 10° angle. Oth- erwise, it may fall over and cause injuries. WARNING Do not locate this product where people might step on or trip over the power cord. Friction or excessive pres- sure may generate heat and eventually cause electric shock or a fire accident. - Page 10 Fusing Unit, contact your local representa- The full text of the statement of compliance is available at the tive. Otherwise, it may cause injuries. following internet address: https://support-kbs.katun.com USA only To reduce the risk of fire, use only No. 26 American Wire Shielded cables must be used with this equipment to Gauge (AWG) or larger telecommunication line cord.
- Page 11 Environment Disposal of Electrical and Electronic Equip- ment in Professional/Business Equipment (European Union and UK) This symbol on this product, or in the manual and in the warranty, and/or on its packaging indicates that this product shall not be treated as household waste. Instead it should be disposed in compliance with agreed national procedures.
Need help?
Do you have a question about the Arivia M3135 and is the answer not in the manual?
Questions and answers