Advertisement
Quick Links
en
Keep horizontal.
It is forbidden to use the table in
extreme weather conditions
(storm, lightning, under -20 and
above +40 degress Celsius).
For installation steps go to page 38.
2
|47
1101-090-010AA
Do not wear jewellery or
watch during the assembly
It is forbidden to jump,
or playing.
stand, sit, lean on or kick
the table.
Tighten completely (7 Nm)
3+
Do not leave children unsupervised
Do not use in case of
around the table (including setting-up
missing or defective
and storing periods as well). Not
parts.
allowed under age of 3.
(or by fax to +353 (85) 748 5613)
Move the table carefully.
If the security label with
the serial number is
damaged or removed,
the warranty is invalid!
Advertisement

Summary of Contents for TRINTECO FITEQ TEQ ONE
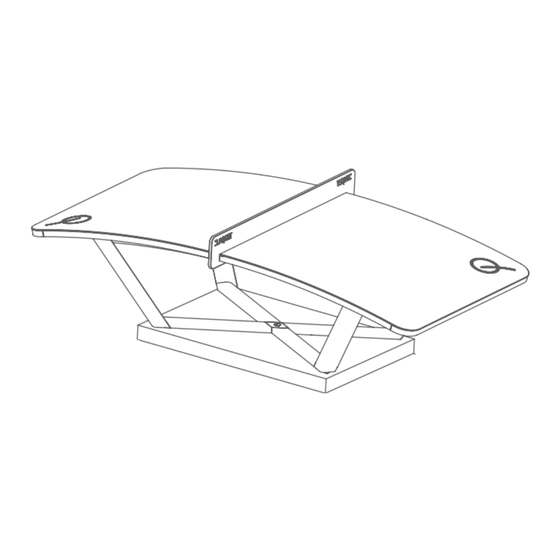
- Page 1 Move the table carefully. Do not leave children unsupervised If the security label with Keep horizontal. It is forbidden to use the table in Do not wear jewellery or Do not use in case of around the table (including setting-up the serial number is extreme weather conditions watch during the assembly...
- Page 2 INFORMACE PRO UŽIVATELE ČESKY (CZ) Před použitím nebo sestavováním výrobku si pečlivě tento dokument přečtěte. Návod si uschovejte pro případné Výrobek mohou používat osoby Výrobek je certifikován podle: další nahlédnutí později. Výrobek chrání mezinárodní patent, ochranná obchodní značka a autorská práva. na invalidním vozíku.
- Page 3 INFORMACIJE ZA UPORABNIKE SLOVENSKI (SI) Pred uporabo ali montažo izdelka natančno preberite dokument. Prosimo, da ohranite Izdelek lahko uporabljajo Certifikat za ta izdelek je izdal: priročnik, saj boste mogoče v prihodnosti potrebovali vsebovane podatke. Izdelek je zaščiten uporabniki invalidski vozičkov. z mednarodnim patentom, blagovno znamko in z avtorskimi pravicami.
- Page 4 52 kg (BOX 3/4 & 4/4) 34 kg (BOX 2/4) 46 kg 148 kg (BOX 1/4) 1500 mm 2 Nm 7 Nm 1101-090-010AA...
- Page 5 green M10x25 yellow M10x35 blue (turquoise) purple M8x75 M8x85 1101-090-010AA...
- Page 6 1101-090-010AA...
- Page 7 C4 x1 1101-090-010AA...
- Page 8 1101-090-010AA...
- Page 9 1101-090-010AA...
- Page 10 10/1 10/2 1101-090-010AA...
- Page 11 C9 x1 F3 x4 1101-090-010AA...
- Page 12 1101-090-010AA...
- Page 13 1101-090-010AA...
- Page 14 INSTALLATION (OPTIONAL) БЕЗОПАСНОСТ И ПРЕДУПРЕЖДЕНИЯ 安装 (可选) INSTALACE (VOLITELNÉ) INSTALLATION (OPTIONAL) MONTERING (VALGFRI) PAIGALDAMINE (VALIKULINE) INSTALACIÓN (OPCIONAL) ASENNUS (VALINNAINEN) INSTALLATION (OPTIONELLE) ΕΓΚΑΤΑΣΤΑΣΗ (ΠΡΟΑΙΡΕΤΙΚΑ) INSTALACIJA (OPCIONALNO) AZ ASZTAL TELEPÍTÉSE (OPCIONÁLIS) INSTALLAZIONE (OPZIONALE) 設置 (オプション) MONTAVIMO INSTRUKCIJA (PARINKTIS) UZSTĀDĪŠANA (PĒC IZVĒLES) INSTALLAZZJONI (FAKULTATTIVA) INSTALLATIE (OPTIONEEL) INSTALACJA (OPCJONALNIE) INSTALAÇÃO (OPCIONAL)
- Page 15 102mm min.1m min.1,5 m ø 15 mm Drill 2 pcs of 15 mm diameter deep hole with the rotary hammer 102 mm far from each other in the middle of the designated area. Пробийте две дълбоки дупки с диаметър 15 mm с перфоратор, на 102 mm разстояние една от друга, в средата на посочената зона. 使用氣動扳手在距離指定位置中間兩側...
- Page 16 Blow out the generated dust from the holes. Издухайте получения при пробиването на дупките прах. 吹出孔中產生的灰塵。 Vzniklý prach z otvorů vyfoukněte. Blasen Sie den entstandenen Staub aus den Löchern. Blæs ud det genererede støv fra hulene. Puhuge puurimistolm aukudest välja. Sople el polvo generado de los orificios.
- Page 17 Strike the anchors into the holes with a hammer so that the top of the anchors are flush with the surface of the concrete. Забийте анкери в отворите с чук, така че горната част на анкерите да се изравни с повърхността на бетона. 用錘子將壁虎打入孔中,...
- Page 18 Use the HILTI HSD-G M12x50 or HSD-M M12x50 setting tool to widen the bottom of the anchors. Използвайте инструмент за монтаж HILTI HSD-G M12x50 или HSD-M M12x50, за да разширите дъното на анкерите. 使用 HILTI HSD-G M12x50 或 HSD-M M12x50 安裝工具擴開壁虎的底部。 Pomocí...
- Page 19 Remove the covering cap from the leg structure of the TEQ One table, then lift the table and move to position the table’s bores above the holes. Свалете покриващата капачка от крака на масата TEQ One, след това повдигнете масата и я придвижете, за да позиционирате дупките на масата...
- Page 20 Position the table right over the holes and then screw in the galvanized hexagon screws. We advise inserting the screws gradually, making sure the table is positioned correctly before tightening. Required torque: max 30 Nm. Поставете масата точно над дупките и след това завинтете поцинкованите винтове с шестограмна глава. Препоръчваме да поставяте винтовете постепенно, както и да...
- Page 21 Put the covering cap back to its proper place. Before using the table, please check if the table is fix and cannot be moved from the installation area. Поставете покриващата капачка обратно на мястото ѝ. Преди да използвате масата, моля, проверете дали масата е фиксирана и не може да...
- Page 22 1101-090-010AA...
- Page 23 Dovozce a distributor pro Českou a Slovenskou republiku Trinteco spol. s r.o. Na Strži 2102/61a, 140 00 Praha 4 – Krč IČ: 052 54 175 DIČ:CZ05254175 Email: info@trinteco.cz Telefon: +420 725 552 257...
Need help?
Do you have a question about the FITEQ TEQ ONE and is the answer not in the manual?
Questions and answers