
Summary of Contents for solar invert SOLARINVERT
- Page 1 MANUAL SOLARINVERT- WINDINVERT - BATTERYINVERT V.200004.8 SolarInvert GmbH - Technical Manual v.200006.4 Page | 1...
- Page 2 The names of use or trade names or product designations used in this manual may also be protected without labeling. SolarInvert GmbH assumes no liability for the use of possibly protected trademarks or brands in the context of this manual.
-
Page 3: Table Of Contents
Mains connection .......................... 16 3.6.2 External battery management system (BMS) ..............16 3.6.3 Charging and discharge end ..................... 16 3.6.4 Deep discharge protection ......................17 3.6.5 Control options..........................18 Mounting instructions ..................21 Site conditions ..............................21 SolarInvert GmbH Page | 2... - Page 4 Communication port ............................ 38 Commissioning ....................40 Procedure ................................40 Troubleshooting ............................. 41 Using the SolarInvert Control Center Program .......... 41 Service, maintenance and cleaning .............. 42 General maintenance instructions ......................42 Accessibility customer service ........................42 Replacement of a defective inverter ....................... 42 Disposal instructions ..................
-
Page 5: General Information
Warnings in the instructions SolarInvert inverters are designed and manufactured according to the current state of the art and gen- erally accepted safety rules. Nonetheless, risks may arise if these instructions are disregarded, which are... -
Page 6: Safety Instructions
SolarInvert customer service if necessary. DANGER! The inverter may only be opened by a qualified specialist authorized by SolarInvert. It electric shock can be fatal and the inverter can be destroyed. Do not operate the device if the safety or function of the device is impaired. Indications that safe oper- ation of the device may no longer be guaranteed: ... -
Page 7: Scope Of Delivery
Special care should be taken when shipping built-in devices that have not been delivered in a SolarIn- vert retail enclosure. If suitable packaging is not available, please contact SolarInvert Customer Service. Vibration and insufficient damping can damage the inverter and render it unusable. -
Page 8: Device Description
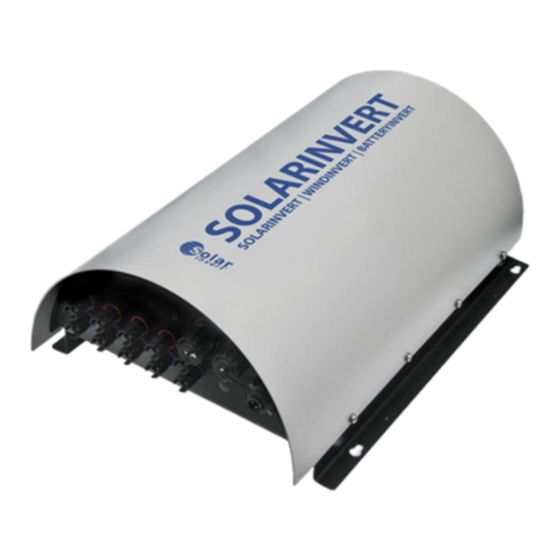
Plus connection for energy source Heat sink (omitted for some devices) Communication port (RJ45) Configuration switch (optional / WIN only) This illustration is exemplary. The type and number of connection options may vary depending on the model and variant. SolarInvert GmbH Page | 7... -
Page 9: Nameplate And Identification
The nameplate with the model designation and serial number (SN) is located on the bottom of the de- vice, for example: NOTE Please always have the model designation and serial number available when contacting customer service. SolarInvert GmbH Page | 8... -
Page 10: Product Benefits And Features
Product benefits and features PPI - Professional Protecting Inverter The PPI technology developed by Solarinvert is a long-standing design principle whose purpose is to make renewable energy technology as manageable as possible for the end user. PPIs offer professional- level technology that is easy and safe to use. - Page 11 IT solutions. Versatile and flexible SolarInvert inverters can be used individually or in groups. This makes it possible to realize small plants as well as large plants with >100kW power and to use different energy sources (wind, solar, hydropower, fuel cells, battery storage, etc.).
-
Page 12: Functional Description
Robust and sustainable The inverters are designed to withstand harsh environmental conditions and temperature fluctuations. Should a defect nevertheless occur, you can rely on SolarInvert's uncomplicated replacement service. In addition, all devices are built in such a way that components susceptible to aging can be easily replaced. -
Page 13: Integrated Mains And System Protection
(fault ride-through). Integrated mains and system protection All SolarInvert inverters with the name extension "-NA" in the type designation have integrated grid and system protection (SolarInvert GridInspector). The integrated NA protection complies with the requirements of the application rule DIN VDE AR N 4105 (German Low Voltage Directive), but can be provided with country settings for other grid areas. -
Page 14: Function Sol Inverter
The output power of the SOL inverters can be throttled via the digital RS485 interface if required. WIN inverter function Wind inverters from SolarInvert are suitable for both AC and DC generators due to the integrated B6- diode-rectifier. They can be operated with any type of electromechanical generator and are therefore also suitable for e.g. -
Page 15: Characteristic Operation
An incorrectly set characteristic curve reduces the yield and can influence the noise development of your wind turbine. For instructions on how to set your wind characteristic, refer to section 7 (Using the SolarInvert Control Center Program). 3.5.3 Short circuit brake and storm protection Every wind inverter has an integrated short-circuit brake as standard. -
Page 16: Configuration Switch
With the power supply switched on, the AC standby consumption of the inverter on the power supply side is approximately 1. 5 watts. 3.5.5 Control options The output power of the WIN inverters can be throttled via the digital RS485 interface if required. SolarInvert GmbH Page | 15... -
Page 17: Function Bat Inverter
3 Functional description Function BAT inverter Battery inverters from SolarInvert are specially designed to meet the requirements of electrochemical energy storage systems, such as accumulators and fuel cells, or electrostatic energy storage systems, such as supercapacitors. Select the inverter according to the voltage range of your power source, basi- cally any cell chemistry is supported (e.g. -
Page 18: Deep Discharge Protection
ATTENTION! Set the voltage limits of the inverter correctly according to the specifications of the battery manufac- turer or send them to SolarInvert when ordering so that the inverter is already delivered with the cor- rect settings. Overcharging could cause the battery to catch fire. Overdischarge could damage the battery or render it unusable. -
Page 19: Control Options
After changing S_CVPMAX and saving with Write EEP, a reset of the inverter is required. The reset can be performed using the SolarInvert Control Center (SICC) software or by issuing the appropriate com- mand via the RS485 interface. Alternatively, you can reset the inverter by disconnecting and reconnect- ing the DC and AC connections for at least 60 sec. - Page 20 NOTE A complete interface documentation of all registers and function codes can be found in the download area at www.solarinvert.de. Voltage and power setting via analog interface (0-10 V) For the inverter to accept control signals via the analog interface, S_CVPMAX must be set to 1 or 2.
-
Page 21: Voltage Control
A side effect of the characteristic curve is that the power gradually decreases as the battery volt- age approaches the set point. By reversing the sign in the U_SOLCOR_KL , a constant artificial internal resistance of the battery can be simulated in order to achieve a power reduction/regulation. SolarInvert GmbH Page | 20... -
Page 22: Power Control
For a recommendation on the maximum distance depending on the selected line cross-sections, refer to chapter 5.1.1. SolarInvert inverters comply with the IP 54 enclosure protection class, which means that they are fully protected against contact and against splashing water from all sides and are suitable for use both in- doors and in protected outdoor areas. -
Page 23: Suspending The Inverter
If the unit is oriented horizontally or lying down (heatsink down or fins horizontal), heat dissipation may not be sufficient. Active ventilation can improve the performance of the device. Overheating due to inadequate heat dissipation will reduce the performance and expected life of your device. SolarInvert GmbH Page | 22... -
Page 24: Hole Spacing
Height x width x 475 x 300 x 157 mm 533 x 372 x 204 mm 653 x 412 x 230 mm depth Hole spacing 330 x 280 mm 400 x 350 mm 500 x 390 mm SolarInvert GmbH Page | 23... -
Page 25: Selection Of Fasteners
The maximum dimensions of the screws vary depending on the device size. The dimensions can be found in the following graphic: Hole and screw dimensions for housing size S (small) Hole and screw dimensions for housing sizes M (medium) / L (large) SolarInvert GmbH Page | 24... -
Page 26: Electrical Connection
For simplification, the energy source is understood as the part of the system that is to be connected to the 230V power grid by the inverter. Although in some cases the energy flow may be reversed (e.g. in the case of accumulators or thermoelectric elements), the term also includes them. SolarInvert GmbH Page | 25... -
Page 27: Connection Cable Selection
Lay plus and minus cables as close together as possible and on as direct a path as possible between the inverter and the energy source. If possible, use twin-core cables to reduce the installation effort. SolarInvert GmbH Page | 26... -
Page 28: Connector Assembly
If you use pre-assembled DC cables with connectors already fitted, you can shorten these cables if nec- essary. First place the cable close to the source and then cut the cable from the other end. Disconnect the connector as shown below and then reassemble it on the bare cable end. SolarInvert GmbH Page | 27... - Page 29 Step 1: Screw on the cable seal. Step 2: Carefully pry open the lock of the connector Step 3: Pull apart the connector Step 4: Open spring clamp with screwdriver and remove conductor *Extract from the original instructions of the manufacturer SolarInvert GmbH Page | 28...
-
Page 30: Solar Generator (Sol)
If you plan to use the generated electricity yourself, it is advantageous for the economic efficiency of your system to connect strings with different orientations in parallel on one inverter. You can then ef- fectively run more modules on the inverter because they reach their peak power at different times. This SolarInvert GmbH Page | 29... -
Page 31: Reverse Current Protection For Solar Modules Connected In Parallel
For this to happen, the voltage difference must be greater than the open circuit voltage of a single PV module. Therefore, SolarInvert generally rates the parallel connection of strings with up to 2 modules as uncritical. -
Page 32: Battery (Bat)
When installing or replacing the device, the inverter cannot brake the generator. Mains connection 230 V The inverter may only be connected to a fault-free electrical installation that has been set up in accord- ance with the recognized rules of technology. SolarInvert GmbH Page | 31... - Page 33 A phase shift load that is too high can lead to an overload of the neutral conductor and impermissible heating. This may result in fire or damage to other electrical equipment. SolarInvert GmbH Page | 32...
-
Page 34: Connection Via Hirschmann "Ca 3 Ld" Connector
934125100 (CA 3 LD). 5.5.2 Connection via Neutrik "PowerCON" connectors Inverters with the abbreviation "WE" in the model designation (e.g. SOL 1300-35-WE-NA-DE) are equipped to replace Würth Solarstar inverters with connectors compatible with this system. SolarInvert GmbH Page | 33... -
Page 35: Connection By Cable Coupling
Different requirements and rules may apply in other regions. If necessary, contact a local electri- cian for more information. SolarInvert inverters with the abbreviation "PI" in the model designation are plug-in capable power generators for connection to end-user circuits according to DIN VDE V 0100-551-1. - Page 36 Operate only 1 device per circuit and never use the device on multiple power strips or extensions, e.g. cable drums. If the connecting cable is overloaded, a short circuit may occur due to accelerated aging of the insulation. There is a risk of fire if the plug contacts are overloaded. SolarInvert GmbH Page | 35...
-
Page 37: Grounding
The AC side of the inverter and the device itself are grounded via the protective earth conductor. The DC side of the system is generally under protective extra-low voltage (max. 120 V ) and does not gen- erate any leakage currents. SolarInvert GmbH Page | 36... -
Page 38: Functional Earthing
Consult a specialist company if necessary. A lightning protection system must be installed profession- ally and checked at regular intervals to maintain its protective function. Incorrectly executed or poorly maintained lightning protection is not effective and can cause a fire. SolarInvert GmbH Page | 37... -
Page 39: Overvoltage Protection
5.6.5 Overvoltage protection To protect against transient overvoltages caused by indirect lightning strikes or switching operations, SolarInvert inverters have high-power varistors at all inputs and outputs. In the event of an overvoltage event, its energy is dissipated via ground. The protection level corresponds to either type II (DC) or type II and III (AC) and can be found in the data sheet of the respective device. - Page 40 Not used RS485 A RS485 B To connect your inverters to a PC, use our USB->RS485 service cable and the "SolarInvert Control Center" (SICC) software. NOTE The SICC software, as well as a detailed description of the communication protocol to be used, the control commands and memory registers can be found in the download area of our website at www.solarinvert.de.
-
Page 41: Commissioning
This password can be requested by emailing service@solarinvert.de. Instructions on how to change the grid settings for your grid area can be found in the SolarInvert Control Center software for Windows PC (see section 7) SolarInvert GmbH... -
Page 42: Troubleshooting
(see 3.6.2). Using the SolarInvert Control Center Program The SolarInvert Control Center (SICC) is a free software for Windows PC. The software allows you to ad- just the operating parameters of your SolarInvert inverter within a certain range, deviating from the factory settings. -
Page 43: Service, Maintenance And Cleaning
Accessibility customer service In the event of a malfunction or defect, we will help you quickly and without complications. The best way to reach our customer service is by e-mail (service@solarinvert.de) or by using the contact form on our website: www.solarinvert.de/kontakt... -
Page 44: Disposal Instructions
If you do not wish to continue using your device, please contact our customer service or your dealer so that we can arrange for the return of your old device. If this is not possible, please contact the public collection points of your local waste disposal authority. SolarInvert GmbH Page | 43...
Need help?
Do you have a question about the SOLARINVERT and is the answer not in the manual?
Questions and answers