Sign In
Upload
Download
Table of Contents
Contents
Add to my manuals
Delete from my manuals
Share
URL of this page:
HTML Link:
Bookmark this page
Add
Manual will be automatically added to "My Manuals"
Print this page
×
Bookmark added
×
Added to my manuals
Manuals
Brands
auna Manuals
Karaoke System
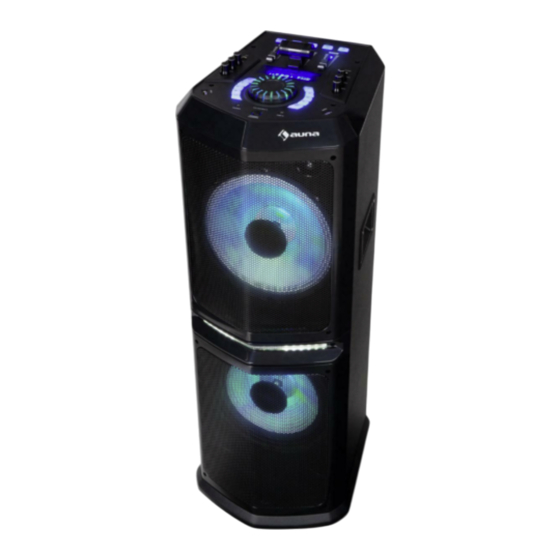
Clubmaster 8000
Instruction manual
auna Clubmaster 8000 Instruction Manual
Party station
Hide thumbs
Also See for Clubmaster 8000
:
Manual
(76 pages)
1
2
3
4
5
6
7
8
9
10
11
12
13
14
15
16
17
18
19
20
21
22
23
24
25
26
27
28
29
30
31
32
33
34
35
36
37
38
39
40
41
42
43
44
45
46
47
48
49
50
51
52
53
54
55
56
57
58
59
60
61
62
63
64
65
66
67
68
69
70
71
72
73
74
75
76
77
78
79
80
81
82
83
84
85
86
87
88
page
of
88
Go
/
88
Contents
Table of Contents
Bookmarks
Table of Contents
Deutsch
Table of Contents
Technische Daten
Sicherheitshinweise
Geräteübersicht
Betrieb
Sound-Effekte
Licht-Farbeffekte
Karaoke- und Gitarrenfunktion
BT-Kopplung und Verbindung
USB-Anschlüsse
Akku
Spezielle Entsorgungshinweise für Verbraucher in Deutschland
Hinweise zur Entsorgung
Konformitätserklärung
English
Technical Data
Safety Instructions
Device Description
Operation
Light Colour Control Function
Sound Effects
BT Pairing and Connection
Karaoke & Guitar Function
Usb Interface
Battery
Declaration of Conformity
Disposal Considerations
Français
Fiche Technique
Consignes de Sécurité
Aperçu de L'appareil
Fonctionnement
Effect Sonores
Fonction Karaoké et Guitarre
Jeux de Lumière en Couleur
Appairage BT et Connection
Ports USB
Batterie
Conseils pour le Recyclage
Déclaration de Conformité
Español
Datós Técnicos
Indicationes de Seguridad
Vista General del Aparato
Efectos de Sonido
Puesta en Funcionamento
Control de la Iluminación
Funciones de Karaoke Guitarra
Conexión BT
Conexión USB
Batería
Declaración de Conformidad
Retirada del Aparato
Italiano
Dati Tecnici
Avvertenzi DI Sicurezza
Descrizione del Dispositivo
Effeti Sonori
Utilizzo
Effetti Cromatici Luminosi
Funzione Karaoke E Chitarra
Accoppiamento Bt E Connessione
Connessioni Usb
Batteria
Dichiarazione DI Conformità
Smaltimento
Advertisement
Quick Links
Download this manual
Table of
Contents
Previous
Page
Next
Page
1
2
3
4
5
Advertisement
Chapters
Deutsch
3
English
21
Français
37
Español
53
Italiano
69
Table of Contents
Need help?
Do you have a question about the Clubmaster 8000 and is the answer not in the manual?
Ask a question
Questions and answers
Related Manuals for auna Clubmaster 8000
Stereo System auna Clubmaster 8000 Manual
Party station (76 pages)
Karaoke System auna Clubmaster TripleBeat Instruction Manual
Party station (88 pages)
Karaoke System auna Microstar Sing Manual
(146 pages)
Karaoke System auna StarMaker Instruction Manual
(44 pages)
Karaoke System auna KaraBig Manual
(24 pages)
Karaoke System auna Karaboom 100 Sing Manual
Karaoke tower (64 pages)
Karaoke System auna Kara Liquida BT Manual
(25 pages)
Karaoke System auna KaraBig Manual
(25 pages)
Karaoke System auna Kara Liquida 10031560 Manual
(76 pages)
Karaoke System auna KTV 10034612 Manual
Karaoke system with wifi and touchscreen (56 pages)
Karaoke System auna Rockstar Plus Manual
(84 pages)
Karaoke System auna Kara Liquida Instruction Manual
(48 pages)
Karaoke System auna RockStage Instruction Manual
(42 pages)
Karaoke System auna DiscoStar 10028848 Instruction Manual
(23 pages)
Karaoke System auna DisGo Box 360 Manual
Party bt system (25 pages)
Karaoke System auna 10029400 Manual
(56 pages)
This manual is also suitable for:
Clubmaster triplebeat
10032821
10034516
Table of Contents
Print
Rename the bookmark
Delete bookmark?
Delete from my manuals?
Login
Sign In
OR
Sign in with Facebook
Sign in with Google
Upload manual
Upload from disk
Upload from URL


Need help?
Do you have a question about the Clubmaster 8000 and is the answer not in the manual?
Questions and answers