Advertisement
Quick Links
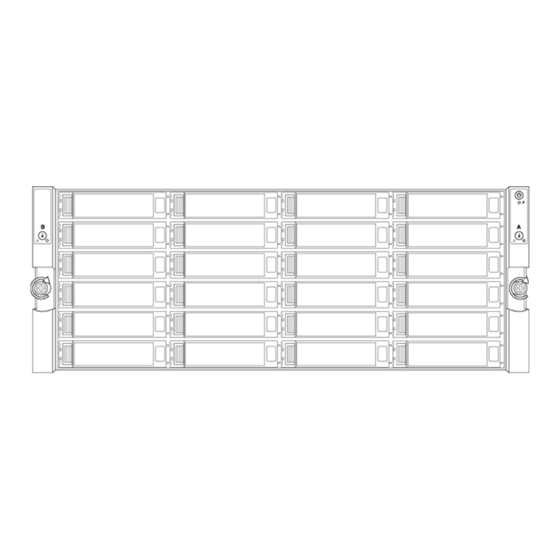
Install the Expansion Shelf
Use this procedure to install and activate up to six HPE Alletra 2120 expansion shelves, depending
on the model of your array. HPE Alletra 5010H arrays can add up to four shelves.
Caution!
When you activate the expansion shelf, there is a momentary pause in data services from the
array. You might need to activate the expansion shelf during a maintenance window.
The chassis weighs over 52 kg (115 lb). Always use at least two people or a server lift when
lifting the chassis.
What you need for each expansion shelf:
19-inch four-post rack. The provided rails fit both round-hole and square-hole racks.
Racks with a depth of 1200 mm best accommodate the length of the array chassis, providing ample
space for cabling and ease of service. Racks with a depth of 1075 mm can be used but may provide
limited space for cables and component access.
Four rack units (4U) of space available in the 19-inch rack
At least two SAS cables, 1 m or 3 m (two 1 m cables are included) rack
Caution! Start-up current draw may exceed 6A. When attaching multiple shelves, attach and
activate the shelves one at a time.
Before beginning, download and read the Release Notes, available on HPE InfoSight
(https://infosight.hpe.com). If you do not have an HPE InfoSight account, click Create Account
and provide the required information.
The power supplies are 220V AC or 110V AC auto-detecting.
This product is intended for installation in restricted-access locations only, such as a dedicated
equipment room or an electrical closet.
1
Unpack and inspect the hardware.
1
Array
2
Outer rails
3 Power cables
Save the original packaging.
2
Install the rail assemblies into the rack.
Note: To ensure that the array thumbscrews align correctly, install the rail assembly in exactly 4U of
rack space. You should insert the bottom stud on the rail kit into the bottom hole of the bottom unit
of the allotted 4U of rack space.
a) Align the bottom stud of the rail at the position you want.
b) Press the keeper latch and position the front studs in the rack. When the studs are engaged, release
the keeper latch to secure the front of the rail in the rack.
c) Align the back of the rail at the same rack position as the front.
d) Position the back studs in the rack and press the keeper latch. When the studs are engaged, release
the keeper latch to secure the back of the rail in the rack.
e) Repeat steps a through d on the other side.
The following diagram shows where the rail assemblies should be correctly installed in a rack.
Note: This equipment has been tested and found to comply with the limits for a Class A digital device, pursuant to Part 15 of the FCC Rules. These limits are designed to provide reasonable protection against harmful interference when the equipment is operated in a commercial environment. This equipment generates, uses, and can radiate radio frequency energy and, if not installed and used in accordance with the instruction manual,
may cause harmful interference to radio communications. Operation of this equipment in a residential area is likely to cause harmful interference in which case the user will be required to correct the interference at his own expense.
Warning: This is a Class A product. In a domestic environment this product may cause radio interference in which case the user may be required to take adequate measures.
See Safety and Compliance Information for Server, Storage, Power, Networking, and Rack Products, available at
*960-0141-001*
1
Left front rack post
2
Left rail assembly
3 Right front rack post
3
Slide the chassis into the rack.
Caution!
The chassis weighs over 52 kg (115 lb). Always use at least two people or a server lift when lifting
the chassis.
a) Insert the chassis into the rack, back side first. Be sure the inner rails insert into the outer rails.
b) Gently slide the chassis into position.
When you hear a click, the inner rails have locked into the rail assembly.
4
Bezel
5
SAS cables
1
Chassis
2
Left rail assembly
4
Secure the chassis to the rack.
The chassis has two handles. Each handle has a thumbscrew that holds the chassis to the rails so it
does not slide out of the rack. Tighten the thumbscrew in each handle until secure.
www.hpe.com/support/Safety-Compliance-EnterpriseProducts
for important safety, environmental, and regulatory information.
Expansion Shelf Installation - HPE Alletra 2120
Connect the Power to the Expansion Shelf
Before you perform this task, you must have already installed the expansion shelf in a rack or enclosure.
1
Plug the power cables into both power supplies on the back of the expansion shelf.
2
Plug the other end of the power cables into the power circuit.
To minimize the risk of both power supplies losing power simultaneously, connect each power cable
to a different circuit.
3
Verify that the SAS LEDs are green after connecting the power cables.
4
If the expansion shelf does not come online automatically, press the power button on the front
of the chassis.
If the expansion shelf still does not turn on, contact HPE Support.
Connect and Activate the Expansion Shelf
4
Right rail assembly
5
Keeper latch
Important!
Fully configure the array before you connect and activate the expansion shelf:
Update the array to the supported operating system. HPE Alletra 5010H requires Alletra
OS 6.1.2.0 or later. Other HPE Alletra 5000 models require Alletra OS 6.1.1.0 or later.
Do not shut down the array while connecting and activating a shelf.
1
Apply power to the expansion shelf.
a) Verify that the SSDs and HDDs are installed and fully seated.
Some slots might be empty.
b) Verify that expansion shelf power is on before connecting the SAS cables.
2
Cable the expansion shelf to the SAS expansion ports on the array.
Cables install into the ports with the retention tabs down.
a) Connect the SAS Out port P1 of controller A on the array to the SAS In port of expander A on
expansion shelf 1.
b) Connect the SAS Out port P1 of controller B on the array to the SAS In port of expander B on
expansion shelf 1.
3
Right front rack post
4
Right rail assembly
1
Array
2
SAS expansion ports
3
Expansion shelf 1
After connecting the expansion shelf, go to Step 5 if you are not connecting an additional shelf.
4
SAS In
5
SAS Out
6
Expansion shelf 2
PN: 960-0141-001 (04/05/2023)
©
2023 Hewlett Packard Enterprise Development LP. All rights reserved.
Page 1 of 2
Advertisement

Related Manuals for HP Alletra 2120

Summary of Contents for HP Alletra 2120
- Page 1 Connect the Power to the Expansion Shelf Use this procedure to install and activate up to six HPE Alletra 2120 expansion shelves, depending Before you perform this task, you must have already installed the expansion shelf in a rack or enclosure.
- Page 2 Expansion Shelf Installation - HPE Alletra 2120 (Optional) Connect a second expansion shelf. a) Connect the SAS Out port P2 of controller A on the array to the SAS In port of expander A on expansion shelf 2. b) Connect the SAS Out port P2 of controller B on the array to the SAS In port of expander B on expansion shelf 2.
Need help?
Do you have a question about the Alletra 2120 and is the answer not in the manual?
Questions and answers