Table of Contents
Advertisement
Available languages
Available languages
Quick Links
Advertisement
Chapters
Table of Contents

Summary of Contents for Royal Vacuums PRO Series
- Page 2 OWNER’S MANUAL Operating and Servicing Instructions ROYAL HOUSEHOLD UPRIGHT IMPORTANT- READ CAREFULLY BEFORE ASSEMBLY AND USE THIS PRODUCT IS INTENDED FOR HOUSEHOLD USE ONLY IF USED COMMERCIALLY, WARRANTY IS VOID. • Let us help you put your vacuum together or answer any questions, call: 1-800-321-1134 (USA &...
-
Page 3: Table Of Contents
CONGRATULATIONS You are now the proud owner of a Royal Upright. We trust your new purchase will bring ® you many years of satisfaction. Our company has designed and developed this product with you in mind. We are very proud of our products and hope that you are equally satisfied with their quality and performance. - Page 6 IMPORTANT SAFETY INSTRUCTIONS SAVE THESE INSTRUCTIONS When using an electrical appliance, basic precautions should always be followed, including the following: READ ALL INSTRUCTIONS bEFORE USING THIS APPLIANCE. WARNING: TO REDUCE THE RISK OF FIRE, ELECTRIC SHOCK OR INJURY: • Fully assemble before operating. •...
- Page 7 CAUTION: TO REDUCE THE RISK OF DAMAGE: • Avoid picking up hard, sharp objects with this product, as they may cause damage. • Store in a dry place. Do not expose machine to freezing temperatures. • Brushroll continues to turn while product is turned on and handle is in upright position.
-
Page 10: Vacuum Assembly
1. VaCuum assembly Carton Contents A. Handle Section B. Cleaner Body C. Hose, Cleaning Tools and Wands D. Hose Rack E. Handle Bolts and Nuts Packet (in bag with owner’s manual) Remove all parts from carton and identify each item shown. Make sure all parts are located before dis- posing of packing materials. -
Page 11: Attach Hose
attaCh hose 1.11 1.12 IMPORTANT Hose must be connected as shown for all operations. 1.11 Align end of hose with projections (A) over slots (B) in dirt duct. 1.12 Slide hose into (B) and twist hose to lock it into place. -
Page 14: How To Use
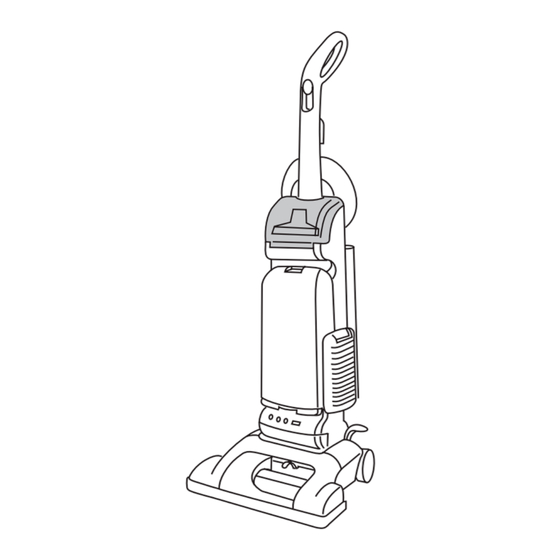
2. hoW to use VaCuum desCription 1. Handle 2. ON/OFF switch 3. Cord Hooks: wrap cord around hooks for storage. The top hook can be rotated right or left for easy cord release. 4. Hose 5. Tool Cover 6. Dusting Brush 7. -
Page 15: Transporting Cleaner
transporting Cleaner Carry handle To move your cleaner The cleaner can also be from room to room, put moved by using the carry handle upright handle. position, tilt cleaner back on rear wheels and push forward. handle positions Cord storage The handle of your Wrap cord on cord hooks for cleaner... -
Page 18: Cleaning Lightweight Flexible Rugs
Cleaning lightWeight settings Flexible rugs For maximum cleaning performance, the following carpet height settings are recommended: Stand on one end of rug 2.11 • Lowest setting: or all types of carpet. Note: If the and move cleaner toward cleaner is difficult to push, slide knob to the next higher other end or edge. -
Page 19: Cleaning Tools
3. tools Cleaning tools IMPORTANT Tools allow for cleaning surfaces above the floor and for Brushroll continues to turn while product is turned on reaching hard to clean areas. and handle is in upright position. To avoid damage to The vacuum is ready for tool use when handle is in carpet, rugs, furniture and flooring, avoid tipping upright position. -
Page 22: Check Bag Indicator
CheCk bag indiCator The indicator (L) will begin to show red as the filter bag fills with dirt. There are three conditions that will cause the indicator to become completely red: 1. If the bag is full; change the bag. 2. -
Page 23: Filters
Filter bag: how to replace CAUTION To reduce the risk of personal injury, unplug vacuum before servicing. 4.1 To change filter bag, push down at top of bag door and pull door forward. Remove door. 4.2 Grasp filter bag collar (A) and pull collar from tube (B). -
Page 26: Headlight
Check agitator shield Because your cleaner picks up so well, we strongly recommend you check for debris accumulation under the agitator shield each time you clean the filters. Removing debris under the shield will help maintain your cleaner’s excellent pick up and suction. Remove debris as follows: 1. -
Page 27: Agitator Brushroll
4.12 With lettering on outside of belt and positioned as 4.12 4.13 shown in box on (D), slide new belt over motor pulley (B). 4.13 Insert agitator through belt and place belt in belt guide (C) on agitator. Should the agitator shield (D) become dislodged while replacing the belt or the agitator, reposition it as shown noting the placement of its belt guide (E). -
Page 30: Edge Groomers
edge groomers: how to replace installing groomers When to replace 4.17 Lift off both old edge The edge groomers, located on both sides of the nozzle, 4.17 groomers and slide new should be replaced when they appear worn. edge groomers into how to replace position as shown. -
Page 31: Troubleshooting
5. troubleshooting If a minor problem occurs, it usually can be solved quite easily when the cause is found by using the checklist below. Any other servicing should be done by an authorized service representative. WARNING To reduce risk of personal injury - unplug vacuum before servicing. problem possible reason possible solution... - Page 33 BLANK...
- Page 34 BLANK...
-
Page 35: Garantía
MANUAL DEL PROPIETARIO Instrucciones de Funcionamiento y Servicio ROYAL VACÍO VERTICAL DEL HOGAR IMPORTANTE: LEA ATENTAMENTE ANTES DE ENSAMbLAR Y USAR ESTE PRODUCTO ESTÁ DISEÑADO SÓLO PARA USO DOMÉSTICO. EL USO COMERCIAL DE ESTE PRODUCTO ANULA LA GARANTIA. • Permítanos ayudarle a ensamblar su aspiradora o a contestar sus preguntas, llame al: 1-800-321-1134... - Page 38 FELICITACIONES Usted es ahora el orgulloso propietario de una aspiradora vertical de Royal . Confiamos en que su nueva adquisición le ofrecerá muchos años ® de satisfacción. Nuestra compañía diseñó y desarrolló este producto teniéndolo a usted en mente. Estamos muy orgullosos de nuestros productos y esperamos que usted esté...
-
Page 39: Salvaguardias Importantes
¡ SALVAGUARDIAS IMPORTANTES ! ¡GUARDE ESTAS INSTRUCCIONES! Al usar un aparato eléctrico, observe siempre las precauciones básicas, incluyendo las siguientes: LEA TODAS LAS INSTRUCCIONES ANTES DE USAR ESTE APARATO ADVERTENCIA: PARA REDUCIR EL RIESGO DE INCENDIOS, CHOQUES ELÉCTRICOS O LESIONES: •... -
Page 40: Solución De Problemas
5. soluCión de problemas Si ocurre un problema menor, generalmente puede resolverse con bastante facilidad cuando se halla la causa, usando esta lista de verificación. Cualquier otra tarea de mantenimiento debe ser realizada por un representante de mantenimiento autorizado. ADVERTENCIA Para reducir el riesgo de lesiones ocasionadas por piezas en movimiento, desenchufe la aspiradora antes de realizar el mantenimiento. -
Page 41: Eliminación De Obstrucciones
los limpiadores de bordes: Cómo reemplazarlos Cuándo reemplazarlos instalación de los limpiadores Los limpiadores de bordes, que se encuentran en ambos lados de la boquilla, deben reemplazarse cuando mues- 4.17 Levante ambos 4.17 tran signos de desgaste. limpiadores de bordes usados deslice Cómo reemplazarlos... - Page 42 • Desenchufe el aparato antes de conectar el accesorio de mano turboaccionado. • No aspire ningún objeto que se esté quemando o que libere humo, como cigarrillos, fósforos o cenizas calientes. • No use este aparato sin la bolsa para polvo ni los filtros colocados en su lugar. •...
-
Page 43: Ensamblado De La Aspiradora
1. ensamblado de la aspiradora Contenido de la Caja A. Sección del mango B. Cuerpo de la aspiradora C. Manguera, accesorios de limpieza y tubos D. Soporte de la manguera E. Paquete de tuercas y pernos para el mango (en una bolsa con el manual del usuario) *Disponible sólo en algunos modelos. - Page 44 4.12 Con las letras en la parte de afuera de la correa y 4.12 4.13 con la correa en la posición que se muestra en el rec- uadro (D), deslice la nueva correa sobre la polea del motor (B). 4.13 Introduzca el agitador a través de la correa y vuelva a colocar la correa en la guía correspondiente (C) del agitador.
- Page 45 examine el protector del agitador Debido a que su aspiradora es tan eficaz, recomendamos mucho que cada vez que limpie los filtros vea si se ha acumulado basura debajo del protector del agitador. El quitar la basura que haya debajo del protector ayudará a mantener su aspiradora en condiciones excelentes para limpiar y aspirar.
- Page 46 para ConeCtar la manguera 1.11 1.12 IMPORTANT La manguera debe estar conectada como se muestra para todas las operaciones. 1.11 Alinee el extremo de la manguera con las proyec- ciones (A) sobre las ranuras (B) en el conducto para el polvo.
-
Page 47: Cómo Usar
2. Cómo usar desCripCión de la aspiradora 1. Mango 2. Interruptor de encender/apagar 3. Ganchos para el cordón: envuelva el cordón alrededor de los ganchos para guardarlo. El gancho superior gira hacia la derecha o la izquierda para soltar el cordón fácilmente. -
Page 48: Bolsa De Filtro
bolsa de Filtro: Como reemplazarla ADVERTENCIA Para reducir el riesgo de lesiones ocasionadas por piezas en movimiento, desenchufe la aspiradora antes de realizar el mantenimiento. 4.1 Para cambiar la bolsa de filtro, presione hacia abajo en la parte de arriba de la puerta de la bolsa y jale la puerta hacia afuera. -
Page 49: Eliminación De Obstrucciones
VeriFiQue el indiCador de la bolsa El indicador (K) se verá rojo a medida que la bolsa de filtro se llena de suciedad. Existen tres condiciones que harán que el indicador se vea completamente rojo: 1. Si la bolsa está llena, cambie la bolsa. 2. -
Page 50: Traslado De La Aspiradora
traslado de la aspiradora transporte de la Para mover su aspiradora aspiradora de una habitación a otra, También posible coloque el mango en mover aspiradora posición vertical, incline utilizando el mango de la aspiradora hacia atrás, transporte. sobre las ruedas traseras empuje hacia adelante. -
Page 51: Limpieza De Escaleras
posiCiones limpieza de alFombras de área liVianas y Flexibles Para obtener el máximo rendimiento de limpieza, se recomiendan las siguientes posiciones, según la altura Párese sobre un extremo 2.11 de la alfombra: de la alfombra y mueva la aspiradora hacia el otro •... -
Page 52: Retiro De La Manguera
3. aCCesorios aCCesorios de limpieza IMPORTANTE Los accesorios le permiten limpiar superfi- cies que están a mayor altura que el piso y El rodillo de cepillos continúa girando mientras el aparato está llegar a áreas encendido y el mango está en posición vertical. Para evitar que difíciles de limpiar.
Need help?
Do you have a question about the PRO Series and is the answer not in the manual?
Questions and answers