Advertisement
Advertisement
Table of Contents

Summary of Contents for Blaupunkt BTV3STB
- Page 1 Instruction Manual Full HD Digital Set Top Box - BTV3STB...
-
Page 3: Table Of Contents
CONTENTS General Safety Product Overview Remote Control First Time Setup EPG (Electronic Program Guide) / Recording Record List Menu Picture Channel Time Option System Troubleshooting Specifications Support Last Page... -
Page 4: General Safety
GENERAL SAFETY Read this manual thoroughly before you start using the Set Top Box. Store this manual, the completed warranty card, your receipt and the product packaging. The safety precautions instructions reduces the risk of fire, electric shock and injury when correctly complied to. - Page 5 GENERAL SAFETY (CONT.) IMPORTANT INFORMATION • Do not expose this appliance to rain or moisture as it may result in fire or an electric shock hazard • Do not temper or change or modify the product in any way. • Only use Accessories outlined and recommended by the manufacturer. •...
- Page 6 GENERAL SAFETY (CONT.) Please make sure upon positioning this product, the place is: • Not wet or damp and Well ventilated • Away from direct sunlight or heaters. • Away from splashes or food. • Protected from excessive dust or grease. •...
-
Page 7: Product Overview
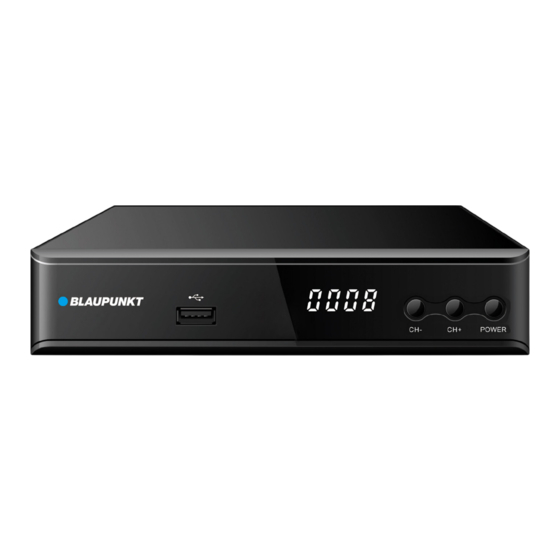
PRODUCT OVERVIEW USB Input RF (ANTENNA) In LED Display RF (ANTENNA) Loop through CHANNEL DOWN Coaxial CHANNEL UP HDMI Power On/Off Composite (Video) Audio L and R... -
Page 8: Remote Control
REMOTE CONTROL Power ON/OFF MUTE/UNMUTE PREVIOUS/REWIND FASTFORWARD/NEXT PREVIOUS CHANNEL REPEAT MULTIMEDIA FILE ZOOM IN/OUT TV UI ADJUST VIDEO FORMAT STOP SCHEDULED RECORDINGS PLAY/PAUSE GOTO TIME IN MULTIMEDIA FILE FAV CHANNELS TELETEXT SUBTITLES ON/OFF AUDIO MODE EXIT MENU DISPLAY MENU SELECT/OK DIRECTION KEYS RETURN/BACK INFORMATION... -
Page 9: First Time Setup
First Time Setup Initial install Australia (1). Select [OSD Language] and press RIGHT/LEFT key to select a language (2). Select [Country] and press RIGHT/LEFT key to select your country of residence. (3). Select [Channel Search] and press RIGHT or OK key to begin Automatic channel search. -
Page 10: Epg (Electronic Program Guide) / Recording
EPG (Electronic Program Guide) / Recording EPG (Electronic Program Guide) is used to view all channel programs and times. Set reminders, schedule or commence recording a TV Program immediately. Press the EPG button on RC to access. NOTE: To allow recording/PVR functions to work, you must have a USB DRIVE inserted into the front of the Set Top Box. -
Page 11: Record List
Record List To access the recorded list, press USB button on the remote control. - Select the MOVIE and the below will display your completed recordings so far. -
Page 12: Usb
To access the Media files on the inserted USB device. Press the USB button located on the remote control. MUSIC - Select MUSIC option to view and access all AUDIO/MUSIC files on your USB device. PHOTO - Select Photo option to view and access all PHOTO/IMAGE files on your USB device. -
Page 13: Picture
MENU - PICTURE To access the Menu, press MENU then select [Picture]. The Menu provides options to adjust the video settings. Press UP/DOWN to select an option and press RIGHT/LEFT to adjust that setting. Press EXIT to exit the menu. (1). -
Page 14: Channel
MENU - CHANNEL CHANNEL SEARCH To access the menu,press MENU and select [Search Channel]. The Menu provides options to adjust the Search Channel settings. Select an option and press RIGHT/LEFT to adjust the settings. Press EXIT to exit the menu. AUTO SEARCH Search and install all channels automatically. - Page 15 MENU - CHANNEL (CONT.) MANUAL SEARCH Install new channels manually. This option adds new channels without changing the current channels list. (1). Select [Manual Search] then press OK or RIGHT. The channel search screen will appear. (2). Press the RIGHT/LEFT key to select the channel frequency. (3).
-
Page 16: Time
MENU - TIME To access the Menu, press MENU then select [Time]. The Menu provides options to adjust the time settings. Press UP/DOWN to select an option and press RIGHT/LEFT to adjust the setting. Press EXIT to exit the menu. (1). - Page 17 MENU - OPTION To access the menu, press MENU and select [Option]. The menu provides options to adjust the OSD Language, Subtitle Language and Audio Language. Select an option and press RIGHT/LEFT to adjust the setting. Press EXIT to exit the Menu. (1).
-
Page 18: System
MENU - SYSTEM To access the Menu, press MENU and select [System].The menu provides options to adjust the system settings. Press the UP/DOWN key to select an option and press RIGHT/LEFT to adjust the setting. Press EXIT to exit the Menu. (1) Parental Guidance - To restrict/lock the channel you will need to enter either the default password ‘000000’... -
Page 19: Usb
MENU - USB To access the Menu, press the MENU button and select [USB]. The menu provides options to playback Music and Photo files, it can support MP3, WMA,JPEG,BMP files, The unit will only support USB device with FAT and FAT3w2 file system. It will not support NTFS file system. (1) Multimedia: if no USB device plug in,a warning message “No USB Device is Found”... -
Page 20: Troubleshooting
TROUBLESHOOTING Problem Potential Reasons What to do No picture Power isn’t connected Connect the power The power switch is Switch on the power not on Screen shows “No DVB-T cable not Plug in the DVB-T Signal” connected cable Incorrect setting Reset setting No sound from No or incorrect... -
Page 21: Specifications
SPECIFICATIONS VHF: 170-230MHz Tuner UHF: 470-860MHz Output: Video 480i/480p/576i/576p/720p/1080i/1080p Audio Coaxial, L & R Audio up to 500GB supported Video: MPEG1,MPEG2,MPEG4,AV1 DIVX Audio: MP3, AAC Photo: JPEG, BMP, PNG Power Supply 100-240V ~ 50/60Hz Power Consumption 7.5W Max. Dimensions 168 (w) x 94 (d) x 36 (h) mm Weight Net: 0.31 kg / Gross: 0.5 kg... - Page 22 This page is left blank deliberately.
- Page 23 This page is left blank deliberately.
- Page 24 CUSTOMER HELPLINE: info@ayonz.com DISTRIBUTED BY: Ayonz Pty Ltd...
Need help?
Do you have a question about the BTV3STB and is the answer not in the manual?
Questions and answers
How do I access the settings menu?
To access the settings menu on the Blaupunkt BTV3STB, press the MENU button on the remote control. From the main menu, you can navigate through different options such as Parental Guidance, Set Password, Restore Factory Default, Information, Software Update, USB, Picture, Channel, Time, Option, and System. Use the arrow keys to select the desired setting and press OK to confirm.
This answer is automatically generated