
Related Manuals for Draminski BLUE

Summary of Contents for Draminski BLUE
- Page 1 Ultrasound Scanner BLUE USER MANUAL ISO 9001 www.medical.draminski.com Version EN 1.8 092022_10477...
- Page 2 The Draminski Company has established and maintains a complete quality control sys- tem according to the requirements of EN ISO 13485:2012/AC:2012. This system and the technical documentation are periodically revised by notifying unit No. 0197 – TUV Rhein- land LGA Products GmbH, Tillystrasse 2, 90431 Nuremberg, Germany, which takes part in compliance assessment.
-
Page 3: Table Of Contents
3. The list of DRAMIŃSKI BLUE ultrasound scanner elements and accessories....... - Page 4 DRAMIŃSKI BLUE – user manual 9.1.4. Vi–Probe ..................30 10.
- Page 5 DRAMIŃSKI BLUE – user manual 10.6.3. Switching between M and B+M modes ........... . . 41 10.7.
- Page 6 DRAMIŃSKI BLUE – user manual 10.15. Presets ..................49 10.15.1.
-
Page 7: Introduction
1.1. Information about user manual Individual chapters of the manual describe construction and accessories, as well as preparation for work, functions and operation of the BLUE ultrasound scanner. In no way this manual will substitute even a basic ultrasonography course. It is recom- mended that the user of the device attend an ultrasonography course organized by the authorized training unit. -
Page 8: Brief Information On Ultrasound Examination
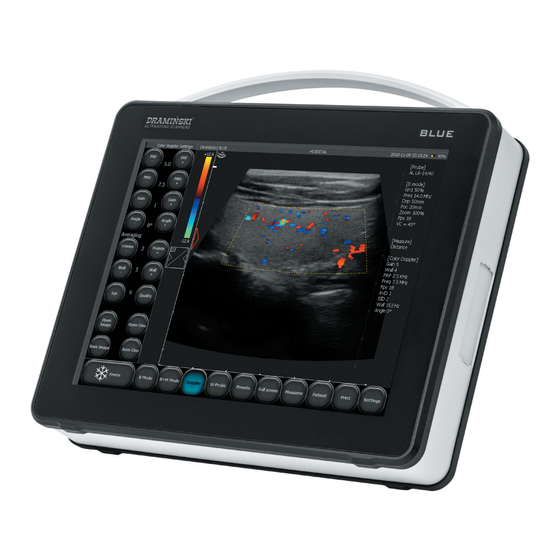
1.4. Basic information about the ultrasound scanner BLUE is a modern device which can be powered from a built-in battery pack or directly from the mains (110- 230 V). The ultrasound scanner is built based on a small-size computer system. The special features of the de- vice are: touch operation, small size and weight as well as a strong aluminium casing which hides technically advanced electronics which guarantees top quality imaging. -
Page 9: User's Safety
The user's and the patient's safety depends on observing the below mentioned instructions! DRAMIŃSKI BLUE should be used for diagnostic purposes and by the trained staff only – erinarians profi- cient in ultrasound diagnostics. It is necessary to disinfect the probe before each use. Other elements of the ultrasound scanner should be disinfected in reasonable situations in which they could have a contact with infectious substances. -
Page 10: The List Of Dramiński Blue Ultrasound Scanner Elements And Accessories
DRAMIŃSKI BLUE – user manual 3. The list of DRAMIŃSKI BLUE ultrasound scanner elements and accessories Name and description Quantity BLUE Body with built-in battery Ultrasound probe AC adapter Support User manual and warranty card Transport case Stand on wheels... -
Page 11: Specification
DRAMIŃSKI BLUE – user manual 4. Specification Application Ultrasound diagnostics B Mode B+B Mode 4B Mode M Mode Imaging Modes B+M Mode Color Doppler Power Doppler Pulse Wave Doppler Frequency of the system 1-14 MHz (depends on the probe) Dynamic focus Yes... - Page 12 DRAMIŃSKI BLUE – user manual PNG for images, Exported data file format AVI, MP4, MOV for cine loops Probe ports One port, automatic probe detection Multimedia connectors 2 x USB, 2 x LAN, 1 x HDMI Medical Device Class Class I Type of applying part BF type 1.
-
Page 13: Construction Of Dramiński Blue Ultrasound Scanner
DRAMIŃSKI BLUE – user manual 5. Construction of DRAMIŃSKI BLUE ultrasound scanner The device consist of: Body of the scanner Ultrasound probe AC adapter Support 5.1. Body of the scanner On the front of the body there is a high quality 12” LCD LED display with a touch screen. It has wide viewing angle and high resolution which guarantees high quality of an ultrasound image. -
Page 14: Elements Of The Casing
DRAMIŃSKI BLUE – user manual Attention! The ultrasound scanner has a strong construction, however it should be operated and transported with due care in order not to expose the device to strong impacts to avoid potential damage. Protect the device from foreign objects getting inside the casing through the ventilation holes. -
Page 15: Ultrasound Probe
Fig. Elements of the casing. Rear view. 5.2. Ultrasound probe List of DRAMIŃSKI ultrasound probes compatible with BLUE: CONVEX 3,5 MHz R50 CONVEX 3,5 MHz R60 LINEAR 10 MHz 40 mm... -
Page 16: Ac Adapter
Class I Medical Device Input: 100-240V ~ 1.2A, 50/60Hz Output: 19V 5,26A The adapter is used to power the DRAMINSKI BLUE device only. The parameters of the adapter guarantee safe operation for the user, the patient and for the device itself. -
Page 17: Support
DRAMIŃSKI BLUE – user manual 5.4. Support The support can be mounted on the rear side of the scanner. It has two fixed-tilt angles – 30o and 60o. After setting up device is positioned at 60o angle to the floor When moving the ultrasound scanner,... -
Page 18: Description Of The User Panel And Available Functions
DRAMIŃSKI BLUE – user manual 6. Description of the user panel and available functions 6.1. Basic user panel (B, B+B, B+M modes) Fig. User panel elements. - Page 19 DRAMIŃSKI BLUE – user manual Tool panel Probe indicator Scale Focus position Gamma setting Clinic name / Preset name Current working parameters Probe’s symbol Date and time 10. Battery indicator 11. Gain control 12. TGC control 13. Frequency control 14. Depth control 15.
-
Page 20: Active Fields
DRAMIŃSKI BLUE – user manual 6.2. Active fields Active fields are zones in the image which serve to change some parameters skipping the buttons on the tool panel. In the image sector there are four periphery active zones which are used to change: –... -
Page 21: Panel In Color Doppler And Power Doppler Mode
DRAMIŃSKI BLUE – user manual 6.3. Panel in Color Doppler and Power Doppler mode Fig. User panel elements in Color Doppler mode 1. Color map / color invert, Color treshold, Color range 2. Doppler frame 3. Current Color Doppler settings information 4. -
Page 22: Panel In Pulse Wave Doppler
DRAMIŃSKI BLUE – user manual 6.4. Panel in Pulse Wave Doppler Fig. User Panel in Pulse Wave Doppler Mode 1. Gate width 2. Gain 3. Insonation angle 4. Gate depth control 5. Invert 6. Update. Switching between B and Pulse Wave Doppler window... -
Page 23: Preliminary Starting Procedure
DRAMIŃSKI BLUE – user manual 7. Preliminary starting procedure Attention! Function control of the ultrasound scanner is performed via the touch panel. Only turning ON and OFF is done by use of the button on the right side of the device. -
Page 24: Connecting The Probe
7.3.1. Switching probes BLUE ultrasound scanner has only one probe port. You do not have to turn the scanner off, if you want to switch between the probes. Turn the probe locking leaver to position and disconnect the connector from the port. -
Page 25: Battery Charge Status Check
DRAMIŃSKI BLUE – user manual „Probe OFF” – probe is unlocked, „Probe ON” – probe is locked, image unfreeze. Fig. Probe port on the rear side of Fig. Connector is correctly fitted in Fig. Connector is correctly fitted in the scanner. The probe locking the port. -
Page 26: Finishing Work
DRAMIŃSKI BLUE – user manual Check if the connected probe is adequate with the symbol on the screen and if there is a response on the image when you touch the head of the probe. 7.7. Finishing work In order to finish work press the power button. When the monitor blanks out it is necessary to carry out clean- ing and disinfection of the device according to the recommendations given in the chapter "Maintenance of... -
Page 27: Preparation To Perform Ultrasound Examination
DRAMIŃSKI BLUE – user manual 8. Preparation to perform ultrasound examination Before starting work it is necessary to prepare the device and the accessories. If you do not have access to electricity, check the battery charge status. Turn on the device. Prepare the pa- tient's skin in which you want to perform the examination. -
Page 28: Selection Of A Patient From The Database
DRAMIŃSKI BLUE – user manual 8.1.2. Selection of a patient from the database To start examining a patient who already exists in the database, press [Patient] and select [Browse database]. Enter partial data in the [Patient Name] field. The system will filter the patient database as you type. As soon as the patient appears on the list, select his card and press [Use selected patient] to start the examination. -
Page 29: Imaging Modes
DRAMIŃSKI BLUE – user manual 9. Imaging modes This chapter describes basic steps on how to switch between imaging modes. Change of each imaging mode settings is described in Chapter 10. 9.1. Choosing the imaging mode 9.1.1. B, B+B and 4B modes Tap B Mode and choose: [B] –... -
Page 30: Doppler Modes: Color Doppler, Power Doppler And Pulse Wave Doppler
DRAMIŃSKI BLUE – user manual 9.1.3. Doppler modes: Color Doppler, Power Doppler and Pulse Wave Doppler To start the Doppler mode tap the [Doppler] button on the mode panel. The Color Doppler mode turns on automatically. To turn Doppler off, press the [Doppler] again. -
Page 31: Description Of The Ultrasound Scanner Functions
TGC curve. 10.1.3. Frequency The wideband probes which work with the BLUE can emit beam of different frequencies. Thanks to this function the probes guarantee a wide range of diagnostic capabilities. The higher the ultrasound frequency, the higher the resolution of an image. -
Page 32: Focus
DRAMIŃSKI BLUE – user manual 10.1.5. Focus These buttons are used to set the focus of the ultrasound beam. The image presented on the screen is the clearest at the level where the beam focuses. The focus level is indicated by a red triangle on the left side of the sector. -
Page 33: D-Curve
DRAMIŃSKI BLUE – user manual 10.1.9. D–Curve D-Curve is a greyscale curve perfectly matched to the human eye perception. To enable tap [B Mode] and mark D-Curve bracket. To disable tap [B Mode] and unmark the D-Curve bracket. Fig. D-Curve disabled and enabled. -
Page 34: Length
DRAMIŃSKI BLUE – user manual Measuring options: 1. [Grid] – approximate measuring on the basis of the grid placed on the object (its resolution is 1 cm). 2. [Stenosis] – measuring which determines the stenosis given in percent 3. [Volume] – measuring of the volume (calculated from 3 measures) 4. -
Page 35: Volume
DRAMIŃSKI BLUE – user manual 10.4.4. Volume In order to measure the volume correctly it is necessary to measure the length, depth and width of the object. For this purpose you should obtain sections in horizontal and vertical planes. In order to obtain two planes in one image you can use B+B mode. -
Page 36: Hc] - Head Circumference
DRAMIŃSKI BLUE – user manual 10.4.8.1. [HC] – head circumference Place the diameter where cross-section of head is at its widest. On this basis the system will calculate the cir- cumference of the head. Result given in mm. Interpretation of the result is possible based on growth curves <10.4.9.>... -
Page 37: Aging Tables]
DRAMIŃSKI BLUE – user manual Fig. Growth curves based on HC measurement. Double click on the graph maximizes it to the full screen. Another double click minimizes the graph to the original size. Moving the finger on the graph marks the area and maximizes it to the window size. -
Page 38: Cardiology
DRAMIŃSKI BLUE – user manual 10.4.9. Cardiology 10.4.9.1. HR (Heart rate) Measurement to be performed in M Mode. Put the distance between the two full cycles of heart function. Hear beat per minute will be calculated automatically. Result is given in b/min. -
Page 39: Left Ventricle Volume - Simpson's Lvam-Lvap Method
DRAMIŃSKI BLUE – user manual 10.4.9.4. Left Ventricle Volume – Simpson’s LVAM-LVAP method Measurement to be performed in 4B Mode. Get three views in three different windows in 4B Mode: Left Ventricle in long axis, Left Ventricle in short axis at the level of Mitral Valve, Left Ventricle in short axis at the level of Papillary Muscles. -
Page 40: Deleting All The Measurements
DRAMIŃSKI BLUE – user manual 10.4.11. Deleting all the measurements When you press the [Clear] button in [Measurements], all the elements of the measuring and the results will be deleted from the screen. Deleting the elements of the measuring also takes place after unfreezing the image in B mode or switching to B mode from other modes. -
Page 41: Optimization Of B+M And M Modes
The blood flow is coded by the color depending on its direction. The red color corresponds to the stream flowing to the head of the probe. Blue color means the reverse direction. Attention! By double click on color bar reverse colors option is activated (stream flowing to the head of the probe will be coded with blue color, red color means the reverse direction). -
Page 42: Doppler Frame Settings
DRAMIŃSKI BLUE – user manual 10.7.3. Doppler frame settings The frame superimposed on the test sector will have a shape depending on the probe used: – convex – the frame resembles a trapezoid – linear – the frame has a rectangular shape... -
Page 43: Color Gain Adjustment
10.7.4.7. Color invert Double click on color bar (Fig 13, no. 1) activates the function of color reversal (the flow towards the head will be coded by blue color and in the reverse direction by red color). 10.7.4.8. Color Threshold Press on color bar (color threshold modification window appears). -
Page 44: Power Doppler
DRAMIŃSKI BLUE – user manual 10.8. Power Doppler In the Power Doppler mode the device sums the flows in a particular place and shows in the picture general vascularization of the organ without showing the speed and direction of the flow. Thanks to this function it is possible to show the vascularization of the organ depicting even very slow flows. -
Page 45: Registration Of Blood Flow Spectrum
DRAMIŃSKI BLUE – user manual 10.9.2. Registration of blood flow spectrum To start recording the blood flow spectrum, select the [Gate Update] check box. A leading line will appear at the bottom window, and then a diagram of hemodynamic blood parameters will appear. -
Page 46: Saving And Loading The Images And Cine Loops
DRAMIŃSKI BLUE – user manual 10.10. Saving and loading the images and cine loops The ultrasound scanner is equipped with 60GB memory, of which 30GB is intended for archiving patient data - video loops and images with measurements and annotations. -
Page 47: Loading Cine Loops
DRAMIŃSKI BLUE – user manual 10.10.4. Loading cine loops You can edit the patient's name and ID, as well as add the date of birth and description to the entire examina- tion or individual images / video loops. To edit data, select chosen examination, image / video loop and click [Edit]. Fill in the appropriate fields and click [Save] to save or [Cancel] to discard changes. -
Page 48: Image Printing
DRAMIŃSKI BLUE – user manual – if you want to export selected images / video loops from a given exmaination, go to the [Examinations and images] tab, double-click the examination to expand the list of files, and select the appropriate images / video loops. -
Page 49: Presets
DRAMIŃSKI BLUE – user manual – freezing of the image, – saving images and cine-loops, – measurements 10.15. Presets Presets are predefined settings of the scanning parameters dedicated to different kinds of examinations. 10.15.1. Presets activation Standard presets are: In order to activate preset, click [Presets]. The list of available presets will appear. Select preset name to activate it. -
Page 50: Advanced Settings
DRAMIŃSKI BLUE – user manual 11. Advanced settings In order to enter the advanced settings menu you should click the [Settings] button. The advanced settings consist of tabs described below. 11.1. Default In the [Default] tab there are tools for modifying the user panel. -
Page 51: Software Update
If the device doesn’t start to download update files, please check Internet connection. 11.3.1.2. Update using USB flash drive In order to update software via USB flash drive please contact DRAMINSKI Representative to acquire file with- newest software version. Create “update_blue” folder on flash drive. Copy received software update file to this folder. -
Page 52: Disabling Remote Access
In section /Display/ brightness and touch panel calibration options are available. 11.5.1. Touch screen calibration BLUE Ultrasound scanner is calibrated. In case of system breakdown, it may be necessary to calibrate the touch panel again. It is when the sensitivity and accuracy of the panel is lower. -
Page 53: Audio
DRAMIŃSKI BLUE – user manual 11.6. Audio You can adjust the volume of sound in Audio tab. To check the sound volume, use the [Test sound] option. 11.6.1. Silent mode Activating silent mode will mute all message sounds. To activate silent mode, go to [Settings] and select the [Audio] tab. -
Page 54: Editing Dicom Server Settings
DRAMIŃSKI BLUE – user manual 11.8.2. Editing DICOM server settings To edit the DICOM server settings, go to [Settings] and select the [DICOM] tab. In the DICOM Record field, select the desired server and press [Edit]. Complete the fields as desired and press [Save]. -
Page 55: Loop
DRAMIŃSKI BLUE – user manual 11.10. Loop 11.10.1. Maximum video loop length To set the maximum number of frames for a video loop, go to [Settings] and select [Loop] In the Maximum Cine Length field you can specify whether one video loop should contain a maximum of 128, 256 or 512 frames. -
Page 56: Charging And Exploitation Of The Batteries
The lifetime of the battery pack depends on the way it is used. It is best when it works full cycles, i.e. full charging – full discharging. The battery is charging while the scanner is plugged to the mains. The blue diode around ON/ OFF button is twinkling during charging process. -
Page 57: Battery Charging
DRAMIŃSKI BLUE – user manual 12.3. Battery charging Warning! The battery can be charged only with a power supply the compliant electrical parameters. Use only the XP Power AHM100PS19 power supply. To charge the battery, connect the ultrasound scanner to the power supply using the XP Power AHM100PS19 power supply. -
Page 58: Maintenance Of The Device
DRAMIŃSKI BLUE – user manual 13. Maintenance of the device When the device is used it becomes dirty, including different infective factors. Directly after work, the device should be cleaned with a damp, wet cloth or paper towel, using a mild detergent. When cleaning, protect slots in the casing from moisture. -
Page 59: Troubleshooting
1. Examine the device and after having contacted the authorized service centre or the its elements of cables producer follow their recommendations. If any of the basic activities do not help or other problems appear contact DRAMINSKI service, call +48 89 675 26 00 or e-mail: ultrasound@draminski.com... -
Page 60: Symbols And Marks Used On The Labels
DRAMIŃSKI BLUE – user manual 15. Symbols and marks used on the labels CE means that the product complies with the valid Directives. 0197 Attention, familiarize yourself with the user manual Warnings regarding user safety Production date 2013 Producer name and address DRAMIŃSKI... -
Page 61: Warranty
DRAMIŃSKI BLUE – user manual 16. Warranty The manufacturer hereby grants the buyer a 24-month warranty for a trouble-free operation of the product (body of scanner and probe) if it is used in accordance with the attached user manual. The battery for the device has a 6-month warranty. - Page 62 DRAMIŃSKI S.A. Wiktora Steffena 21, 11-036 Sząbruk, POLAND tel. +48 89 675 26 00 e-mail: ultrasound@draminski.com www.medical.draminski.pl...
Need help?
Do you have a question about the BLUE and is the answer not in the manual?
Questions and answers