Table of Contents
Advertisement
Quick Links
Advertisement
Chapters
Table of Contents
Troubleshooting

Related Manuals for Daewoo DRT-10


Summary of Contents for Daewoo DRT-10
- Page 1 0817DTBD-LN11PA-AGN(GB) 2006.8.17 4:8 AM ˘ ` A...
-
Page 2: Safety Instructions
0817DTBD-LN11PA-AGN(GB) 2006.8.17 4:8 AM ˘ ` 1 Safety Instructions Safety Instructions Please keep the product’s guarantee sheet and receipt in a safe place. Precautions • Read this booklet carefully. • Make sure the rating of your household electricity supply matches that •... -
Page 3: Important Safeguards
0817DTBD-LN11PA-AGN(GB) 2006.8.17 4:8 AM ˘ ` 2 Important Safeguards Important Safeguards CAUTION RISK OF ELECTRIC SHOCK DO NOT OPEN CAUTION: TO REDUCE THE RISK OF ELECTRIC SHOCK, DO NOT REMOVE COVER (OR BACK). NO USER-SERVICEABLE PARTS INSIDE. REFER SERVICING TO QUALIFIED SERVICE PERSONNEL. - Page 4 0817DTBD-LN11PA-AGN(GB) 2006.8.17 4:8 AM ˘ ` 3 This set has been designed and manufactured to assure personal safety. Improper use can result in electric shock or fire hazard. The safeguards incorporated in this unit will protect you if you observe the following procedures for installation, use and servicing.
- Page 5 0817DTBD-LN11PA-AGN(GB) 2006.8.17 4:8 AM ˘ ` 4 product. 17 DISC Do not use a cracked, deformed or repaired disc. These discs are easily broken and may cause serious personal injury and product malfunction. 18 SERVICING Do not attempt to service this unit yourself as opening or removing covers may expose you to dangerous voltage or other hazards.
-
Page 6: Table Of Contents
0817DTBD-LN11PA-AGN(GB) 2006.8.17 4:8 AM ˘ ` 5 Table of Contents Table of Contents Introduction Safety Instructions ____________________________1 Important Safeguards _________________________2 Table of Contents ______________________________5 Introduction____________________________________6 Overview ______________________________________7 Features _______________________________________11 Identification of Controls ______________________12 Connections Connecting Antenna/Cable ____________________17 Connecting a TV _______________________________17 Connecting an Amplifier/Receiver _____________18 Connecting Optional Equipment ______________19 Connecting a Digital Camcorder ______________19... -
Page 7: Introduction
Introduction Thank you for purchasing the Set-top Box + DVD recoder. Equipped with the latest technology and design, the DRT-10 is a set-top box ideal for digital terrestrial broadcast reception. The simple installation and operation, user-friendly tree dimensional OSD, Digital audio output with Dolby Digital ready, and advanced video clarity made for TV and VCR are all designed to enrich the viewer experience. -
Page 8: Overview
Layer 2, MP3, CD stereo audio, Dolby Digital& DTS digital audio output. Which discs you can use The following discs can be used in your DVB-T DVD Recorder: Playback and recording DVD+RW (Digital Versatile Disc + ReWritable) DVD+R (Digital Versatile Disc + Write-Once) -
Page 9: Disc-Related Terms
DVB-T DVD RECORDER. Once this process is complete, no further recordings can be added. What can I do with my DVB-T DVD RECORDER? Your DVB-T DVD RECORDER is a machine for recording and playing back digital video discs with ‘two-way‘... -
Page 10: About Dvd Recording
The i.LINK interface is also known as IEEE 1394- 1995. ‘i.LINK’ and the ‘i.LINK’ logo are trademarks. • The DVB-T DVD RECORDER is only compatible with DV-format (DVC-SD) camcorders. Digital satellite tuners and Digital VHS video recorders are not compatible. -
Page 11: Notes On Discs
To obtain a clear picture The DVB-T DVD RECORDER is a high-tech, precision device. If the optical pick-up lens and disc drive parts are dirty or worn, the picture quality will be poor. -
Page 12: Features
0817DTBD-LN11PA-AGN(GB) 2006.8.17 4:8 AM ˘ ` 11 Features Features Video Recorder • Fast Forward & Fast Rewind in various speeds • Slow motion or Frame by Frame playback to Forward • Recording live channels and stop • Manual or Timer Recording reservation with setting start time and duration Digital Terrestrial Set-Top Box •... -
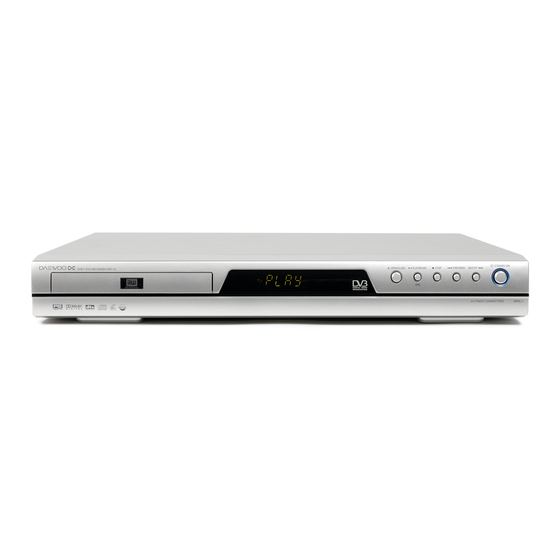
Page 13: Identification Of Controls
Skips to previous chapter. Searches backward. NEXT/FF & Skips to next chapter. Searches forward. STANDBY/ON Turns the DVB-T DVD RECORDER on and off. Starts recording. Press repeatedly to set the recording time. REC MODE Selects Various recording mode (HQ, SP, EP,... -
Page 14: Front Panel Display
FRONT DISPLAY MESSAGE:Indicates clock, channel, current mode, OTR time, etc. Others Indicates the DVD Recorder is in TV mode (set by [TV/DVD] button). Indicates the DVD Recorder is in TV mode (set by [TV/DVD] button). No disc or unreadable disc... -
Page 15: Remote Control
Opens and closes the disc tray. Switches between TV and DVD mode. Shows TV Guide (EPG : Electronic Programme Guide) - Switches the DVB-T DVD Recorder input to RF (Tuner), AV1, AV2, AVF or S-VIDEO. - Selects DV Input mode. - Page 16 Progressive Scan Mode • If your TV supports Progressive Scan, you can view high quality video by setting the DVB-T DVD Recorder to Progressive Scan mode. If your TV does not support Progressive Scan, do NOT change to Progressive Scan mode.
-
Page 17: Rear Panel
ANT OUT Connect to a TV with an RF input. Cooling Fan Caution • Do not touch the inner pins of the jacks on the rear panel. Electrostatic discharge may cause permanent damage to the DVB-T DVD Recorder. Identification of Controls... -
Page 18: Connections
TV and attach it to the RF IN (FROM ANT.) jack on the rear panel of the DVB-T DVD Recorder. Use the supplied RF cable to connect between the DVB-T DVD Recorder’s OUT (TO TV) jack and the antenna input jack on your TV. -
Page 19: S-Video Connection
0817DTBD-LN11PA-AGN(GB) 2006.8.17 4:8 AM ˘ ` 18 S-Video Connection Connect the S-VIDEO OUT jack on the DVB-T DVD Recorder to the S-Video in jack on your TV using an S-Video cable (S). Connect the Left and Right AUDIO OUT jacks... -
Page 20: Connecting Optional Equipment
Use a DV cable (not supplied) to connect the DV In/Out jack of your DV camcorder/video deck to the front panel DV IN jack of the DVB-T DVD Recorder. This jack is for connection to DV equipment only. It is not compatible with digital satellite tuners or D- VHS video decks. -
Page 21: Initial Installation
You must follow the initial installation process to set the time, date, channels, and language preferences for the DVB-T DVD Recorder. An ‘Auto Tune’ message is displayed on the screen. Press [RED] button to start auto tune. The DVB-T DVD Recorder detects channels automatically and stores them in the memory. -
Page 22: Guide To Digital Service
0817DTBD-LN11PA-AGN(GB) 2006.8.17 4:8 AM ˘ ` 21 Guide to Digital Services Guide to Digital Services EPG (Electronic Programme Guide) The EPG provides a quick and easy way to: • View a complete list of all available channels. • View a channel list related to a chosen category. •... - Page 23 0817DTBD-LN11PA-AGN(GB) 2006.8.17 4:8 AM ˘ ` 22 Viewing channels using Category Search This feature allows you to search for channels related to a particular topic. For example, if you select “Sports” from the category search list, then only channels related to Sports will be shown in the EPG.
-
Page 24: Information Service
0817DTBD-LN11PA-AGN(GB) 2006.8.17 4:8 AM ˘ ` 23 Information Service Information Service Many digital TV channels broadcast information via their text service. This digital service includes high quality digital text and graphics along with advanced navigation options. Additionally, this recorder has access to dedicated text channels transmitted by the broadcasters. - Page 25 0817DTBD-LN11PA-AGN(GB) 2006.8.17 4:8 AM ˘ ` 24 Examples of using Information Service MHEG-5 services can use video inset into pages. For example, this could provide a video “preview” of the services on a multiplex. This might result in a channel change, but if the viewer “backs out” they will return to the service they started from.
-
Page 26: Setup Menu
0817DTBD-LN11PA-AGN(GB) 2006.8.17 4:8 AM ˘ ` 25 Setup menu Setup menu Setup Menu Overview The DVB-T DVD Recorder Setup menu includes 7 categories, including: Installation, Recording Options, Languages, Preferences, Parental Settings, System Info, and Update/Restore. Press [SETUP] and [œ/√] on the remote control to view the first and second levels of the Setup menu. -
Page 27: Delete Services
Setup menu Adjust Services After tuning TV or Radio stations into your DVB-T DVD Recorder, you may wish to change the order of the stations you have in your set, as your preference. Follow steps 1-2 as shown under ‘Delete Services’. -
Page 28: Edit Favourites
0817DTBD-LN11PA-AGN(GB) 2006.8.17 4:8 AM ˘ ` 27 Edit Favourites After tuning TV or Radio stations into your recorder, you may store or edit your favourite channels into TV or Radio lists. Follow steps 1-2 as shown under ‘Delete Services’. Use […/†] to select ‘Edit Favourites‘. Installation Auto Tune Delete Services... -
Page 29: Recording Options Settings
Press < > To Change. Setup menu LANGUAGES Settings OSD Language Select a language for the DVB-T DVD Recorder Setup menu and on-screen displays. Press [SETUP]. The Setup menu appears. Use [œ] and [√] to select ‘Languages‘. While ‘Languages‘ is selected, press [†] to select ‘OSD Language‘. -
Page 30: Preferences Settings
0817DTBD-LN11PA-AGN(GB) 2006.8.17 4:8 AM ˘ ` 29 DVB Audio/ DVD Subtitles Language Select a language for the DVB-T DVD Recorder Setup menu and on-screen displays. Follow steps 1-2 as shown under ‘OSD Language’. Use […/†] to select ‘DVB Audio’ or ‘DVD Subtitles’. - Page 31 • Select when connected to a 2 channel digital stereo amplifier. The DVB-T DVD Recorder's digital audio signal will be output in the PCM 2ch format when you play a DVD recorded with a Dolby Digital (only for DVD) or MPEG soundtrack. If the DVD is recorded with a DTS sound track then no sound will be heard.
-
Page 32: Video Output
Video Output Progressive Scan Video provides the highest picture quality with reduced flickering. RGB : If you connect the DVB-T DVD Recorder to an analog television using the SCART jacks, set Video Output to ‘RGB’. Interlace or Progressive : If you connect the DVB-T... -
Page 33: Parental Settings
U (Adult) to Kids (Kid safe): Some discs contain scenes not suitable for children. If you set a rating for the DVB-T DVD Recorder, all scenes with the same rating or lower will be played. Higher rated scenes will not be played unless an alternative scene is available on the disc. -
Page 34: Country Code
0817DTBD-LN11PA-AGN(GB) 2006.8.17 4:8 AM ˘ ` 33 Watershed Time For children, you may also use the watershed time function. When the watershed time function starts, only black screen appears. Follow steps 1-2 as shown under ‘Rating Level. Use […/†] to select ‘Watershed Time. Use [œ/√] to select the desired watershed time. -
Page 35: Change Pin Code
0817DTBD-LN11PA-AGN(GB) 2006.8.17 4:8 AM ˘ ` 34 Change PIN code Follow steps 1-2 as shown under ‘Country Code. Use […/†] to select ‘Change PIN code’. Press [OK] to select the Change PIN code mode. Parental Settings Rating Level Watershed Time Auto Country Code Lock/Unlock Services... -
Page 36: Update/ Restore
Checking for update, please wait... Press < Back> To Cancel. Setup menu Restore Default Settings If you wish, you can reset the DVB-T DVD Recorder to its original factory settings. Press [SETUP]. The Setup menu appears. Use [œ] and [√] to select ‘Update/ Restore‘. -
Page 37: Playback
0817DTBD-LN11PA-AGN(GB) 2006.8.17 4:8 AM ˘ ` 36 On-Screen Display Overview On-Screen Display Overview The On-Screen Display provides feedback on the status of the DVB-T DVD Recorder and/or the currently loaded disc. To access the On-Screen Display (or OSD), press [INFO]. Displaying Disc Information... -
Page 38: Changing Tv Channels
0817DTBD-LN11PA-AGN(GB) 2006.8.17 4:8 AM ˘ ` 37 Angle Shows the current angle number and total number of angles, and changes the angle number. Press [INFO] twice during playback. The on-screen display appears on the TV screen. Use […†] to select the ‘Angle‘ line on the on- screen display. -
Page 39: Dvd Playback
[OK] to start playback. Press [TITLE/PBC] or [MENU] to return to the Disc menu. • The DVB-T DVD Recorder will not play discs with Region codes different from the DVB-T DVD Recorder. The Region code for this DVB-T DVD Recorder is 2 (two). - Page 40 0817DTBD-LN11PA-AGN(GB) 2006.8.17 4:8 AM ˘ ` 39 • The Zoom function may not work on some DVDs (ex. Jpg..) • The Zoom function does not work in PAUSE mode. Repeat To repeat the currently playing chapter, press [REPEAT]. ‘CHAPTER’ appears on the TV screen. To repeat the currently playing title, press [REPEAT] twice.
-
Page 41: Playing A Picture Or Music Files
To stop playback at any time, press [STOP]. MP3 Playback The DVB-T DVD Recorder can play MP3 files on a disc such as CD-R/RW, DVD+R/RW or DVD-R/RW. Prior to playing MP3 files on disc, insert disc and close the tray. -
Page 42: Playing Mp3 Files During A Slide Show
[OK] to start the slide show. The MP3 files you selected continue to play during the JPEG slide show. • The DVB-T DVD Recorder can playback up to 1000 files per disc. • Press [œ/ √] to move up and down per 10 files in DVD Pictures (Music) Browser. -
Page 43: Basic Recording
You can start recording to DVD pressing the [REC] button. (The unit must have a recordable media in the tray.) Turn on the DVB-T DVD Recorder and load a recordable disc . Make sure your TV input is set to view the DVB-T DVD Recorder. -
Page 44: Timer Recording
Timer indicator will light on. Timer Recording can be done automatically although you power off the DVB-T DVD recorder. • The DVB-T DVD Recorder will automatically power off when the Timer Recording ends. • There is a short delay when a timer recording finishes to confirm the recorded program. -
Page 45: Canceling A Timer Recording
0817DTBD-LN11PA-AGN(GB) 2006.8.17 4:8 AM ˘ ` 44 Cancelling a Timer Recording You can clear a Timer Recording any time before the recording actually starts. • Use […†] to select the program you want to erase on the Timer Recorder List, then press [GREEN] to cancel it. -
Page 46: Canceling A Timer Recording (Epg)
0817DTBD-LN11PA-AGN(GB) 2006.8.17 4:8 AM ˘ ` 45 Press [RED] to record. The selected bar becomes red. It means that a timer recording is associated to that programme. Your recorder will automatically begin recording when the programme starts. Press [RED] once more to edit the program. The Timer Record List will appear. -
Page 47: Recording From An External Input
You can record from an external component, such as a camcorder, VCR or Digital Camera, connected to any of the DVB-T DVD Recorder’s external inputs. Make sure the component you want to record from is connected properly to the DVB-T DVD Recorder;... -
Page 48: Disc Manager
Press [OK] twice to playback it. To exit playback mode, press [MENU]. Title Edit When you insert a DVD±R or DVD±RW disc already recorded by your DVD recorder, you can edit the titles and chapters in a variety of ways. … †... -
Page 49: Title Name
0817DTBD-LN11PA-AGN(GB) 2006.8.17 4:8 AM ˘ ` 48 Overwrite Disc and Overwrite Title Press [MENU] to go to ‘Disc Menu’ mode. … † œ √ Use [ ] to select the desired title you wish to re-write. … † Press [OK]. Use [ ] to highlight the Overwrite Disc or Overwrite Title icon and press [OK] again. - Page 50 0817DTBD-LN11PA-AGN(GB) 2006.8.17 4:8 AM ˘ ` 49 Erase the disc (DVD±RW) Press [DISC OP] to go to ‘Disc Operation’ mode. Use [œ/√] to select ‘Erase Disc‘ menu. Then press […] or [†]. If you want to erase the whole disc, select ‘Yes’...
-
Page 51: Make Compatible
0817DTBD-LN11PA-AGN(GB) 2006.8.17 4:8 AM ˘ ` 50 If ‘Lock Disc’ is set to ‘Yes’ in the DISC Operation menu, you cannot rename your disc; see page 49. Finalise Disc (DVD-RW, DVD±R) Finalising a DVD±R (or DVD-RW) ‘locks’ its recordings permanently so the disc can be played on most standard DVD players or computers equipped with DVD-ROM drives. -
Page 52: Troubleshooting
DVB-T DVD Recorder Setup menu. Camcorder image not Camcorder is off. shown. Camcorder image via A/V The DVB-T DVD Recorder’s source is input to DVB-T DVD not set to AV, AVF, or DV. Recorder is not shown on TV screen. -
Page 53: Moisture Condensation
In locations where moisture condensation may occur: Keep the DVB-T DVD Recorder plugged into an AC power outlet with the power on. This will help prevent condensation. When condensation has occurred, wait a few hours for the DVB-T DVD Recorder to dry before using it. -
Page 54: Technical Specifications
0817DTBD-LN11PA-AGN(GB) 2006.8.17 4:8 AM ˘ ` 53 Technical Specifications Technical Specifications General Power requirements 220–240V~, 50/60 Hz Power consumption Dimensions(approx.) 435 x 55 x 353 mm (w x h x d) Mass (approx.) Net : 3.6kg Gross : 4.9kg Operating temperature 41°F to 95°F (5°C to 35°C) Operating humidity 5% to 90%... - Page 55 0817DTBD-LN11PA-AGN(GB) 2006.8.17 4:8 AM ˘ ` 54 -MEMO-...
-
Page 56: Warranty Card
0817DTBD-LN11PA-AGN(GB) 2006.8.17 4:8 AM ˘ ` 55... - Page 57 0817DTBD-LN11PA-AGN(GB) 2006.8.17 4:8 AM ˘ ` 56...
Need help?
Do you have a question about the DRT-10 and is the answer not in the manual?
Questions and answers