
Related Manuals for EPG ER-PACE G

Summary of Contents for EPG ER-PACE G
- Page 1 Remote Electric Golf Trolley, ER-PACE G User Manual EPG Golf www.epggolf.com Tel: +1 416-666-9509...
-
Page 2: Table Of Contents
CONTENTS Page Packing List and Parts Glossary Assembly Instructions Operating Instructions Important Safety Instructions Electronic System General Maintenance Technical Specifications Trouble Shooting Frequently Asked Questions Limited Warranty... -
Page 3: Packing List And Parts Glossary
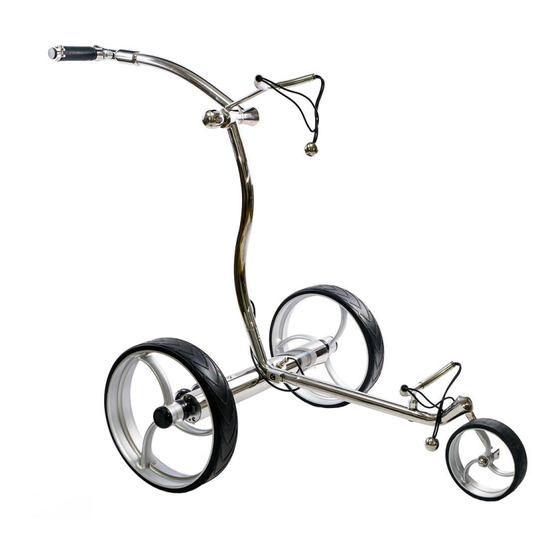
With the fully remote-controlled EPG eR-PACE G, there’s no need to carry your bag or even push it. All your golf equipment will always be in the right place at the right time. The eR-Pace G is one of the best remote control golf trolleys on the market. - Page 4 Pic1 Handle 11. Tracking Adjustment Ass. Upper Frame 12. Front Wheel Upper Folding Locking Knob 13. Lower Frame & Bag Support Middle Frame 14. Lower Bag Holder Anti-tip Wheel 15. Lower Bag Strap Dual Motors/Gearbox Ass. 16. Battery Rear Wheels 17.
-
Page 5: Assembly Instructions
There is a free-wheel position as (Pic 4). Both left and right wheels at free-wheel position make the cart un-engage to motors. The eR-Pace G can be pushed or pulled effortlessly at free-wheel position, even without battery power. - Page 6 3. Attach the Lower Frame: Attach the lower frame by pushing locking pin ball (Pic 5) while inserting the lower frame into the base frame holding hole. Make sure the pin ball located at pin ball locking hole secured (pic 6). Push the lower bag holder bottom end (pic 7) and rotate the bag holder to position (pic 8).
- Page 7 4. Attach the Middle Frame: Attach the middle frame by pushing locking pin ball (Pic 9) while inserting the middle frame into the base frame holding hole. Make sure the pin ball located at pin ball locking hole secured (pic 10). Connect control cable by plug the main clable connector ito base frame main cable socket (Pic 11).
- Page 8 5. Left handle (pic 13) to place the upper frame at position you preferred. Adjust the upper bag holder (pic 14) position. Tighten the upper folding locking knob (pic 15) Pic 13 Pic 14 Pic 15 Pic 16 6. Insert anti-tip wheel into frame and secure with built-in ball pin (pic 17, Pic 18).
- Page 9 Pic 17 Pic 18 7. Fits the clamp style scorecard holder at upper frame (pic 19, Pic 20) Pic 19 Pic 20 Pic 21 Pic 22...
- Page 10 Pic 23 Pic 24 8. To install umbrella holder: remove umbrella holder station screw (pic 21). Screw in the umbrella holder to umbrella holder station (pic 22, pic 23). Install beverage holder at frame (pic 24). 9. Place battery pack on battery tray and fasten Velcro strap around battery tightly. Insert battery plug into caddy outlet.
-
Page 11: Operating Instructions
3. Operating Instructions 3.1. Handle Function Pic 28 3.1.1. Power ON/OFF. Power/Stop-Go Combo button controls the caddy’s power supply. Press and hold for 2-5 seconds to turn the caddy ON or OFF. LED Battery/Power indicator will light up when power is ON. 3.1.2. - Page 12 The cart will remember its last setting when you stop, and travel at that speed automatically when you start again, except when you change the speed knob position. 3.1.6. Timer (Distance Function) The Timer button works as 10, 20, 30 Seconds moving control (about 10, 20, 30 yard/meter distance) Increase 10 seconds (10 yards) each press.
- Page 13 seconds (10 yards) each press. 30 seconds (30 yards) max. Important Notes: • Change remote control batteries once the indicator LED gets weak or dim. The remote control uses 2 x 1.5V AAA batteries. • The maximum range of the remote control varies between 80-100 yards, depending on the battery charge, obstacles, atmospheric conditions, power lines and topography of the course.
- Page 14 3.4. Test Caddy Test caddy power supply by pressing POWER button on handle. All power indicators should come on and caddy should be operable by both the manual control on the handle and remote control. Note: Familiarize yourself with the handle control and remote-control functions. Before you start operating the caddy.
- Page 15 Please download Battery manual and Charging Instruction from our website at https://www.epggolf.com/pages/battery-manuals-and-care 3.5.1. Safety Instructions for Battery Use, Store and Charging Please OBEY These Precautions for Battery use and Charging o Always wear protective gear when handling batteries o Avoid shorting the positive and negative output terminals of the battery pack o Use a wrench with a rubber coated handle.
- Page 16 3.5.2.2. Charging Temperature Lithium Iron Phosphate batteries generate a fraction of the heat of other lithium chemistries when charging, making them very safe. LiFePO4 batteries can safely charge between 0°C to 45°C (32°F to 113°F). LiFePO4 batteries do not require temperature compensation for voltage when charging at hot or cold temperatures.
-
Page 17: Important Safety Instructions
100% and store them in that fully charged state. • Replacement batteries are available from your authorized EPG Golf dealer, or from EPG Golf directly. You can also order online at: http://www.EPGGolf.com... -
Page 18: Electronic System
Illustrations on our website, brochures and manuals may slightly vary from the actual product shipped. However, EPG Golf guarantees that specifications and functionality will always be equal to or better from the advertised product. Promotional accessories may also vary from illustrations shown on our website and other publications. - Page 19 problems. • Always disconnect the battery when you store the caddy, and always reassemble your caddy before reconnecting the battery. If you are not planning to play for at least a month, store the battery in a cool and dry place (not on concrete floor or metal surface) DO NEVER leave battery on charger. All these recommendations will help keep your trolley in top condition and ensure that it remains your reliable partner, both on and off the course.
-
Page 20: Technical Specifications
7. Technical Specification Remote control up to 80-100 yards. Forward, Backward, Left Turn, Right Turn, Stop. 9 speed Control adjustment. Timed advance function: 10, 20 and 30 meter/yard Automatic forward cruise. Motor 2 x 200W (400W) 24V DC Deep Cycle motor Rear Wheel Drive, Dual Stainless Steel Gears &... -
Page 21: Trouble Shooting
8. Trouble Shooting SYMPTOM ACTION • Make Sure battery is plugged correctly onto cart plug. Caddy does not have power • Check battery charge level. • Check all wiring connections and plugs. • Depress and hold down power button for at least 5 seconds. - Page 22 Question 3: The caddy’s main power is on, and battery indicator light is on, but the caddy does not run or one motor does not run. Reply: Please check the motor connectors on the controller box and if connector pins are in the correct position.
-
Page 23: Limited Warranty
10. 1-2 Year Limited Warranty Your EPG Golf product is warranted to be defects in materials and workmanship for 1-2 year (dependent on part, listed below) after the date of purchase. If your caddy or any parts thereof are defective under the terms and definitions of this warranty, EPG Golf will send you replacement parts, repair it or, at our discretion, replace it at no charge to you.
Need help?
Do you have a question about the ER-PACE G and is the answer not in the manual?
Questions and answers