Advertisement
Advertisement
Table of Contents

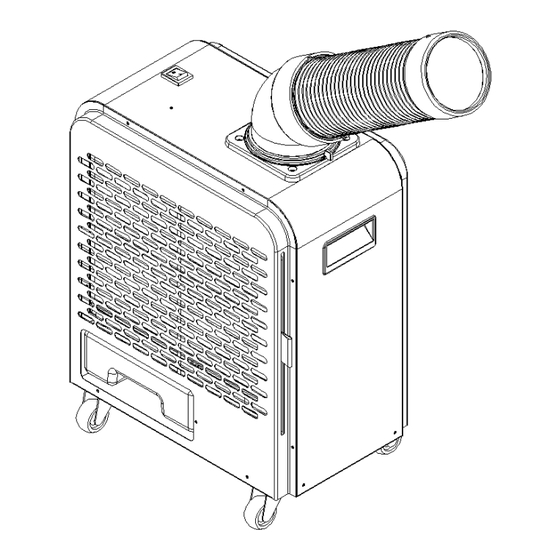
Summary of Contents for Lavor AC 20
- Page 1 User Manual Model: AC 20...
-
Page 2: Table Of Contents
Contents I. Safety Signs and Precautions………………………….... II. Technical Parameters………………………………....III. Electrical Schematic Diagram……………………………… IV. Product Structure………………………………………..V. Installation Method……………………………………..VI. Operation Method……………………………………..VII. Water Tank………………………………………………..VIII. Requirement for Machine Operating Site………………… IX. Maintenance and Check……………………………………. X. Faults and Resolution…………...………………………….. -
Page 3: Safety Signs And Precautions
I. Safety Signs and Precautions Meaning and identification of signs Please read the safety signs and precautions carefully before using the machine. Incorrect use while ignoring this sign may cause physical injury, fire or other property losses. Danger Incorrect use while ignoring this sign may cause physical injury, fire or other property losses. - Page 4 Matters prompted in the following column may possibly have severe consequences due to differing situations. All records are important. Please read them carefully and observe. If the supply cord is damaged, it must be replaced by an electrician or are available from the manufacturer or its service agents.
- Page 5 Disconnect the appliance from its power source during service and when replacing parts. Please do not use the applicance in places that use or store volatile substances (diluents, gasoline, kerosene, liquefied gas and other volatile liquids; magnesium, aluminum, lead and other volatile dusts and vapors) to avoid possible ignition, explosion, fire and incidents.
- Page 6 Please use the appliance with 220-240V~ 50Hz power supply. Otherwise this may cause machine breakdown or a safety accident. Please use a separate socket of rated current. Using the appliance with other electrical appliances (double adapters or power boards) may cause and electrical issue. Please do assign professionals to operate according to equipment standard and wiring upon installation;...
- Page 7 Please immediately stop using it in case of error (stopped rotation, strange noise, improper vibration and unusual odor). To prevent disaster and damage, the appliance should not be used in the following places: Vibrating floor Gradient floor Stairway, emergency exit and house exit and entrance, etc.
- Page 8 To prevent electrocution, please pull the power plug out of the socket upon installation and maintenance. Please use dry and clean cloth to rub down the dust on power plug regularly. A dusty or moist plug may cause poor contact or electric leakage, leading to a safety accident.
-
Page 9: Technical Parameters
II. Technical Parameters Model AC-20 Power 220-240V/50Hz Refrigerating Capacity 2000W Rated Power 700W Rated Current 3.2A Blast Capacity 950W Working Pressure on 4.3A Suction/Exhaust Side Max Working Pressure of Heat 230m Exchanger Refrigerant/Charge Quantity 2.0/4.5MPa Service Environment 4.5MPa Net Weight R410a/330g Gross Weight 20℃~43℃... -
Page 10: Electrical Schematic Diagram
III. Electrical Schematic Diagram Model: BGK1901-20 Elementary Wiring Diagram... - Page 11 IV. Product Layout Power Switch Cold Exhaust Pipe Filter Screen Handle Water Tank Wheels Handle Hot Exhaust Port...
-
Page 12: Installation Method
V. Installation Method Installation of the Cooling Exhaust Pipe: 1. Point the base of the elbow to the dent of the detachable elbow base on the machine, insert it in and rotate it anticlockwise. Click the elbow in to place as shown in Fig. 1. Point the turning end of the cold exhaust pipe to the dent of the cold exhaust pipe, insert it in and rotate it to the left to click it in to place as shown in Fig. - Page 13 VI. Operating Instructions 1. Press the power switch to the "I" position on the top part of the machine to turn on. The compressor will immediately start at the same time start the fan. 2. Press the power switch to the“O”position to turn the machine off. ** NOTE ** 1.
- Page 14 • Adjustment range and operation of the air direction The cold air duct can rotate around 360 degrees. The cold air duct can be moved up and down by about 150 degrees. ** NOTE ** When adjusting the air outlet angle of the cold air duct, please hold the elbow while adjusting.
-
Page 15: Water Tank
VII. Water Tank When the water level in the water tank is about 2.5cm from the top of the water tank, please turn off the appliance first, then pull out the water tank. Empty the tank, re-install it and wait for the shutdown time of 3 minutes before restarting again. The humidity affects how quickly the tank will fill. - Page 16 VIII Requirements of the use of the machine • When using the machine, the air inlet and the cold air duct should be more than 30cm away from a wall or solid surface. The hot air outlet should be more than 80cm away from a wall or solid surface.
-
Page 17: Maintenance And Check
IX. Maintenance and Check • Please clean the filter screen on a regular basis. Dust and dirt on the filter screen may affect the air supply and cause frosting of the heat exchanger, leading to a machine breakdown. • For filter screen cleaning, please use a vacuum cleaner to suck the dust out of the filter screen and then use clean water to wash it. - Page 18 X. Fault Cause and Countermeasure • If the Air Conditioner fails, please immediately cut the power off and pull the power plug out from the socket and check the following: Fault Cause Analysis Troubleshooting If the power plug is loose or falls Please insert the power plug firmly in the power out of the socket socket...
- Page 19 XI. Correct Disposal of this product This marking indicates that this product should not be disposed with other household wastes throughout the EU. To prevent possible harm to the environment or human health from uncontrolled waste disposal, recycle it responsibly to promote the sustainable reuse of material resources.

Need help?
Do you have a question about the AC 20 and is the answer not in the manual?
Questions and answers