Table of Contents
Advertisement
Quick Links
Advertisement
Table of Contents

Subscribe to Our Youtube Channel
Related Manuals for Euronda Pro System E6

Summary of Contents for Euronda Pro System E6
- Page 1 Instruction manual...
- Page 2 Manufacturer. The Manufacturer is in no way responsible for the consequences resulting from any incorrect operations carried out by the user. Revision:: SSU\E18L2018_00 Edition:: 04/2024 COPYRIGHT © 2024 Euronda...
-
Page 3: Table Of Contents
Instruction manual TABLE OF CONTENTS DEVICE IDENTIFICATION ..............................8 1.1. MANUFACTURER IDENTIFICATION ...................................8 1.2. DEVICE IDENTIFICATION ........................................8 1.3. NAMEPLATE LOCATION ........................................8 1.4. REFERENCE STANDARDS ........................................9 1.5. WARRANTY ..............................................9 SAFETY ....................................10 2.1. GENERAL SAFETY WARNINGS .....................................10 2.2. OBLIGATIONS AND PROHIBITIONS ..................................11 2.2.1. - Page 4 INSTALLATION AND COMMISSIONING ........................25 5.1. INSTALLATION............................................25 5.1.1. PRELIMINARY CHECKS ...........................................25 5.1.2. POSITIONING ................................................25 5.2. CONNECTIONS ............................................26 5.2.1. ELECTRICAL CONNECTION ........................................26 5.2.2. CONTINUOUS USED WATER DRAINAGE CONNECTION ............................26 5.3. COMMISSIONING ..........................................26 5.3.1. FIRST START-UP ..............................................26 5.3.2. MANUAL WATER FILLING AND DRAINING..................................27 5.3.2.1.
- Page 5 Instruction manual SETTINGS ....................................38 8.1. SETTINGS MENU ............................................. 38 8.1.1. LANGUAGE SET-UP ............................................39 8.1.2. DATE AND TIME SET-UP ..........................................39 8.1.3. USER SET-UP................................................39 8.1.4. UNITS OF MEASURE SET-UP........................................40 8.1.5. DRYING TIME SET-UP ............................................40 8.1.6. PLANNING SET-UP ............................................40 8.1.6.1. DELAYED START ..........................................40 8.1.6.2. TEST REMINDER ..........................................40 8.1.7. STANDBY SET-UP ..............................................41 8.1.8.
- Page 6 It must be kept intact (in all its parts). If it is lost or damaged, a copy should be immediately requested. • It must follow the machine until scrapping (also in case it is moved, sold, rent, leased, etc.). I.V. UPDATES Euronda reserves the right to make modifications or improvements to the manual or device without prior notice and withoutbeing obliged to update the previous manuals.
- Page 7 I.VII. HOW TO OBTAIN A NEW COPY OF THE MANUAL If the manual is lost or destroyed, request a new electronic copy of the same from Euronda via e-mail to info@euronda.com. Provide the following information: •...
-
Page 8: Device Identification
50/60 Hz 2300 W Max 250kPa (2,5bar) EURONDA S.P.A. - Via dell’ A rtigianato, 7 36030 Montecchio Precalcino (VI), Italy MADE IN ITALY Note: the information present in the plates above is to be considered as examples and is subject to change. -
Page 9: Reference Standards
PED Directive 2014/68/EU of 15/05/2014 - Category II-D1 - 1.5. WARRANTY Euronda guarantees the quality of its equipment when used in accordance with the instructions provided by this manual, according to the conditions stated on the warranty certificate. The warranty is valid from the date of sale of the device to the user customer, and the details can be found by registering on: http://myeuronda.com... -
Page 10: Safety
Candidate List and is present in quantities above 0.1%, Euronda informs that the list of complex products with SVHC components included in the Candidate List and the related SCIP Numbers is available at www.euronda.com/reach... -
Page 11: Obligations And Prohibitions
It is absolutely forbidden to remove the safety pictograms and information labels present on the device. Euronda disclaims any responsibility for the safety of the device in case of failure to comply with this prohibition. It is absolutely forbidden to remove or render ineffective the safety devices. -
Page 12: Digital Safety Requirements
2.5. DIGITAL SAFETY REQUIREMENTS • The steriliser is protected by level password (admin and technical access) and user password. • Before installing the steriliser, Euronda suggests using PCs and networks covered by antivirus and firewall systems. • The SD card can be used to back up files and exchange data between the device and computer. 2.6. SAFETY PICTOGRAMS AND INFORMATION LABELS The device has been equipped with a series of safety pictograms warning the operator of the presence of residual risks. -
Page 13: Residual Risks
Instruction manual 2.7. RESIDUAL RISKS The device has been designed in such a way as to ensure essential safety requirements for the operator. Safety, as far as possible, has been integrated into the design and construction of the device, yet there are residual risks from which operators must be protected. -
Page 14: Device Overview
3. DEVICE OVERVIEW 3.1. INTENDED USE Small sterilisers designed to steam sterilise invasive and non-invasive medical devices. The use of the device is strictly restricted to qualified personnel trained on the reprocessing of medical devices. Under no circumstances should it be used or handled by persons who are inexperienced and/or not authorised by the responsible organization. -
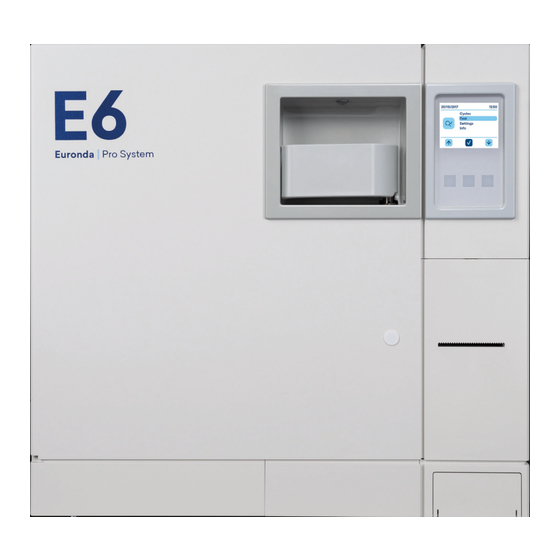
Page 15: Main Components
Instruction manual 3.3. MAIN COMPONENTS POS. ELEMENT POS. ELEMENT Display with soft touch buttons Used water tank Door Clean water tank Door opening handle Filters SD card slot Level sensor Minimum clean water level/conductivity meter Magnetic front door sensor Switch door Extraction tool Trays Drain cover... -
Page 17: Optional Components
Aquafilter 1 to 1 Device for producing deionised water. Aquaosmo Device for producing deionised water by reverse osmosis process. Device allowing Euronda sterilisers to be connected to an external water source Aquabox that has already been treated. Print Set 1 Internal thermal paper printer. -
Page 18: Water Characteristics
CHARACTERISTICS E6 18L * The first characteristic figure indicates that: • The casing provides protection of the equipment against the penetration of solid foreign objects; and at the same time • The casing provides protection for people against the access to hazardous parts by preventing or limiting the insertion into the casing of a body part or a tool held by a person. -
Page 19: Dimensions
Instruction manual 3.6. DIMENSIONS DEVICE WEIGHT Maximum weight with full E6 18L Empty = 44 Kg tank and maximum load = 58 Kg... -
Page 20: Sterilisation Chamber Usable Space
3.6.1. STERILISATION CHAMBER USABLE SPACE STERILISATION CHAMBER USABLE SPACE* E6 18L 180 x 160 x 380 mm (WxHxD) *Usable space: it is the internal volume of the sterilisation chamber available for the material to be sterilised 3.7. DESCRIPTION OF CONTROL PANEL The steriliser features a display user interface (1) with 3 soft touch keys. - Page 21 Instruction manual The device is capable of performing five sterilisation cycles; the parameters of each cycle are summarised in the following table: B134 RAPIDO/ B134 CYCLE PARAMETERS B134 B134 PRION B121 PRION RAPIDO Temperature 134°C 134°C 121°C 134°C Pressure 2,05 bar 2,05 bar 1,05 bar 2,05 bar Sterilisation phase duration 4’ 18’ 20’ 3,5’ / 18’ (plateau period) Drying time (Auto) 15’...
-
Page 22: Cycle Validation
PROGRAM NAME DESCRIPTION It allows sterilising both solid instruments and porous materials (cotton, fabrics, etc.) in open trays, or special perforated trays. Hollow instruments and dental instruments such as tubes and similar Program B134 objects can also be sterilised, after making sure that they have been previously cleaned. Pouched (single or double pouching) and non-pouched items can be sterilised. -
Page 23: Packaging, Handling And Storage
There are no obvious signs of damage. Note: in case of damage or missing parts, immediately inform the carrier, wholesaler or Euronda, providing all details. Using the special straps, have the device lifted by two people at the same time, taking care to keep it horizontal at all times. -
Page 24: Handling
In case of wrong delivery, missing parts or damage of any kind, immediately inform Euronda, providing all details. 4.2. HANDLING Before carrying out any transport and handling operations of the device, empty the water filling and drain tanks. Use the provided drain hose and follow the drain instructions. -
Page 25: Installation And Commissioning
5.1. INSTALLATION Installation is a key operation for the subsequent use and correct operation of the device. Installation must be performed by technical personnel authorised by Euronda. 5.1.1. PRELIMINARY CHECKS Before positioning and installing the device, make sure that: •... -
Page 26: Connections
The Manufacturer is not liable for damage caused by installing the device with inadequate and/or ungrounded electrical systems.. 5.2.2. CONTINUOUS USED WATER DRAINAGE CONNECTION If an Euronda water treatment system has been connected to the device (refer to paragraph “8.1.8 Water treatment system set-up”), the continuous used water drainage connection must be used. The drain fitting on the back of the device can be used for water drainage, so that it can be drained continuously. -
Page 27: Manual Water Filling And Draining
Take care not to spill water on the device; if you do, switch off the autoclave, dry it promptly and do not switch on the power until the machine is completely dry. Water can be filled through a water treatment system that enables automatic water filling. To install this option, contact the Euronda authorised technician. 5.3.2.2. WATER DRAIN To perform tank emptying:... - Page 28 DANGER OF CONTAMINATION! The water in the discharge tank may contain some contaminated residues. Wear protective gloves when performing draining operations. Do not reuse used water. Continuous draining of used water can be conveniently carried out using the drain fitting on the back of the device (see paragraph “5.2.2 Continuous used water drainage connection”).
-
Page 29: Operations For Proper Functioning
Scroll down the list and select the icon to return to the HOME screen. Note: if no command is selected within 1 minute, the screensaver screen is displayed. 01/04/2021 15:00 Cycle Euronda Test 06/11/2022 ® Settings 16:22 Info Do not open tank doors while the cycle is running to avoid possible water spillage. -
Page 30: Sterilisation
• Mirrors should be placed with the glass facing down. • It is necessary to leave a space between the trays to allow steam to circulate during the sterilisation phase and thus facilitate • drying. • If pouched instruments are sterilised, do not overlap the pouches on the trays. Prevent pouches from coming into contact with the walls of the chamber. -
Page 31: Sterilisation Cycle Screen Description
Instruction manual 6.3.1.1. STERILISATION CYCLE SCREEN DESCRIPTION POS. ELEMENT Cycle name Maximum admissible solid load 134PR 0,6 Kg 18’ Maximum admissible porous load 0,2 Kg 45’ Number of pre-vacuums required by the cycle for air removal Sterilisation time Average cycle time 6.3.2. -
Page 32: Unlocking Personal Cycles
6.3.3. UNLOCKING PERSONAL CYCLES To receive the password and unlock personal Light and Light&Stock cycles, contact the support service. These sterilisation programs can only be used for solid loads. Do not use for hollow and double-pouched loads. Please read carefully paragraph “3.8 Description of sterilisation programs”. 6.3.4. -
Page 33: Cycle End - Errore
Instruction manual 6.3.4.3. CYCLE END - ERROR ERROR SCREEN - LOAD NOT STERILE End cycle If a cycle is stopped due to an error before the sterilisation phase is completed, the load in the boiler is to be considered non sterile. Then this screen appears showing the cycle name and the error code. -
Page 34: Material Extraction
6.4. MATERIAL EXTRACTION Danger of burns from escaping steam. When opening the door, do not lean over or stand in front of it. Danger of burns from contact with hot metal surfaces.e. In any case of failed sterilisation cycle, pay attention to the presence of hot and/or potentially contaminated liquids. Always wait for the cycle end signal on the display before opening the door. -
Page 35: Stop
Instruction manual 6.7. STOP When stopping the steriliser, make sure the door is: • open, or • completely closed. Avoid the situation where the door is closed but the handle is not fully hooked. 6.7.1. POWER BLACKOUTS In the event of power cuts (blackouts) during a sterilisation cycle, any attempt to open the door is strictly forbidden; any residual pressure could cause burns due to escaping steam. -
Page 36: Test Programs
TEST PROGRAMS It is important to periodically check the performance of the device by carrying out appropriate tests; the device can perform three different types of tests: • Vacuum Bowie & Dick • • Helix The parameters of the respective cycles are: VACUUM BOWIE &... -
Page 37: Selecting A Test Program
Instruction manual PROGRAM NAME DESCRIPTION The Helix test represents a hollow A-type load, which is the load with the most critical characteristics. The Helix test simulates the performance of the device with respect to sterilisation of hollow loads, specifically: • The efficiency of the preliminary vacuum, and thus the penetration of steam inside the Helix cavities. -
Page 38: Settings
• Press to enter the selected setting. • Select to go back to the screen. 06/11/2022 16:20 06/11/2022 16:20 Language Units of measure Euronda Euronda Registration Drying ® ® Date/Time Planning Operators Buzzer Load validation 06/11/2022 16:20... -
Page 39: Language Set-Up
Instruction manual 8.1.1. LANGUAGE SET-UP To set the language shown on the display, proceed as follows: STEP ACTION Select LANGUAGE from the settings menu. Select the desired language by pressing the icon. 8.1.2. DATE AND TIME SET-UP To change the date and time of the device: STEP ACTION Select DATE AND TIME from the settings menu. -
Page 40: Units Of Measure Set-Up
8.1.4. UNITS OF MEASURE SET-UP To change the unit of measure of the device: STEP ACTION Select UNITS OF MEASURE from the settings menu. Select the desired unit of measure from those suggested. Press the icon to confirm changes and exit the specific screen. 8.1.5. DRYING TIME SET-UP If necessary for certain loads or specific requirements, the drying time can be increased: STEP ACTION... -
Page 41: Standby Set-Up
If an Euronda water treatment system is connected to the device, the continuous waste water drainage connection must be used (refer to paragraph “5.2.2 Continuous used water drainage connection”). If an Euronda water treatment system (allowing you to obtain water automatically) has been connected to the device, proceed as follows:... -
Page 42: Printing Options Set-Up
STEP ACTION Select the PRINT OPTIONS from the settings menu. Select/touch the CYCLES field. Select the number of the involved category. Use the arrows to indicate the number of cycles to be printed. Select the printer icon of the involved category to proceed with printing. Press the icon to confirm changes and exit the specific screen. -
Page 43: Label Reprinting Management
Instruction manual 8.1.11. LABEL REPRINTING MANAGEMENT In case you run out of label roll during printing, the device gives the possibility to reprint them. The cycle will end normally without finishing printing. To reprint the last print cycle, proceed as follows: STEP ACTION Select PRINT LAST CYCLE from the settings menu. Set the number of labels to be printed in the first line. -
Page 44: Maintenance
All the described maintenance operations must only be performed by the responsible authority or technicians authorised by Euronda. It is important to periodically check the efficiency of safety devices. Unauthorised people must stay at a safe distance from the device during maintenance operations. -
Page 45: Safety Valve Check
Instruction manual 9.2.2. SAFETY VALVE CHECK The operation should be performed only when the device is cold. To perform the safety valve check, proceed as follows: STEP ACTION IMAGE Access the safety valve fitted on the back of the device. Loosen the plug, located on top of the valve, anti- clockwise until it reaches the end of the thread and turns loose Take the plug back to its original position, screw it back on. -
Page 46: Door Gasket Cleaning
9.2.4. DOOR GASKET CLEANING Such cleaning must be performed to remove any impurities that may cause the sterilisation chamber to lose pressure and possibly cut the gasket. To perform door gasket cleaning, proceed as follows: STEP ACTION IMAGE Clean the door gasket with a soft cloth, dampened with water or citric acid, to remove scale deposits Gasket must be kept clean. -
Page 47: Cleaning Tanks And Air Filters
Instruction manual 9.2.7. CLEANING TANKS AND AIR FILTERS When cleaning the tanks, be careful not to damage the floating level sensors inside the tanks. Perform tank cleaning operations only after emptying the tanks (refer to paragraph “5.3.2.2 Water drain”). To perform tank and air filter cleaning, proceed as follows: STEP ACTION Lift the top cover to 45°... -
Page 48: Bacteriological Filter Replacement
9.2.9. BACTERIOLOGICAL FILTER REPLACEMENT Use only Euronda original components. To replace the bacteriological filter, proceed as follows: STEP ACTION Manually unscrew the filter anti-clockwise and remove it. Insert the new filter by turning it clockwise all the way down. Note: replace it with a new filter having the same characteristics. Reset meters. 9.2.10. DOOR GASKET REPLACEMENT Use only Euronda original components. To replace the door gasket, proceed as follows: STEP ACTION Clean the gasket seat using a cloth moistened with alcohol. -
Page 49: Extraordinary Maintenance
Instruction manual 9.3. EXTRAORDINARY MAINTENANCE Any work that is not part of the maintenance described in the previous paragraph is considered as extraordinary maintenance. Extraordinary maintenance operations must be performed by qualified personnel authorised by Euronda. 9.3.1. GENERAL OVERHAUL When the maintenance message M3 appears, a general overhaul should be performed, which can only be carried out by... -
Page 50: Troubleshooting
10. TROUBLESHOOTING 10.1. ALARM TABLE The table below shows all alarm messages with possible causes of failure; if the device shows any of the following error codes, perform the checks indicated in the table before contacting the support service. CODE DESCRIPTION REMEDY Make sure the device is connected to a suitable mains power... - Page 51 Instruction manual CODE DESCRIPTION REMEDY Minimum vacuum not reached during Vacuum test Maximum vacuum not reached during Vacuum test Perform the Vacuum test again. If the problem persists, contact Leak during the balancing phase of the the technical support service. Vacuum test Leak during the maintenance phase of the Vacuum test...
- Page 52 CODE DESCRIPTION REMEDY Steam generator temperature too high Upper band temperature too high Turn off the steriliser and let it cool a few hours, then try running a sterilisation cycle. If the problem persists, contact the technical support service. Lower band temperature too high Lower band heater temperature too high in the pressure maintenance cycle Condensate battery temperature too high...
-
Page 53: Table Of Warning Symbols / Codes
Instruction manual 10.2. TABLE OF WARNING SYMBOLS / CODES The following table shows the warning messages given by the device using symbols or codes when it detects a problem that prevents a cycle from starting. SYMBOL DESCRIPTION REMEDY Clean water tank empty Fill water as described in paragraph “5.3.2.1 Manual water filling”. - Page 54 SYMBOL DESCRIPTION REMEDY Used water level at the maximum Empty the used water tank. Clean water level below the minimum Refill the clean water tank with distilled or deionised water. An attempt was made to launch a cycle with Before launching a cycle, close the door. the door open The steriliser temperature is too high to start a Vacuum test.
-
Page 55: Scrapping, Disposal And Resale
If the device is sold, hand over all technical documentation to the new purchaser, inform him/her about any work carried out and how to use and service the unit. Also inform Euronda of the sale and provide the details of the new purchaser.
Need help?
Do you have a question about the Pro System E6 and is the answer not in the manual?
Questions and answers