
Summary of Contents for ROSIERES RCC46MIN
- Page 1 USINES DE ROSIERÈS 30, RUE Y. LACELLE - Rosierès 18400 - Lunery France 5713210471/03.08...
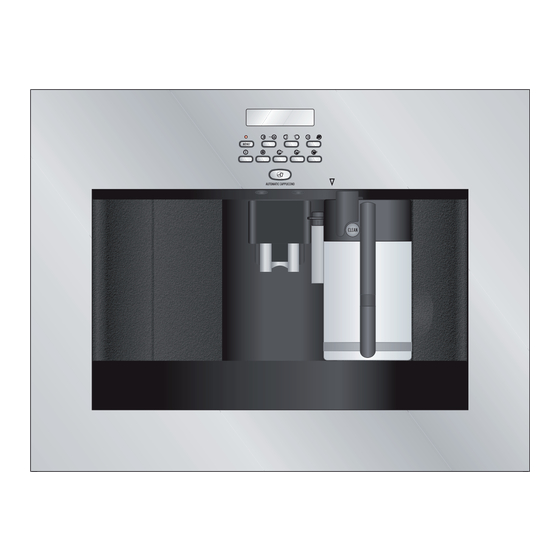
- Page 2 COFFEE AND CAPPUCCINO MAKER MACHINE À CAFÉ ET À CAPPUCCINO RCC46MIN...
- Page 7 INDEX CHANGING THE QUANTITY OF COFFEE AND MILK FOR CAPPUCCINO..17 INTRODUCTION........7 CLEANING AND MAINTENANCE ..17 Symbols used in these instructions ...7 Cleaning the coffee maker .......17 Letters in brackets........7 Cleaning the infuser ........17 Troubleshooting and repairs ......7 Cleaning the milk container .....18 SAFETY..........7 MODIFICA E IMPOSTAZIONE DEI Fundamental safety warnings.....8...
- Page 8 INTRODUCTION (a 21 character code which befins with the numer 3); this can be found on the guarantee certificate Thank you for choosing the automatic coffee and or on the data plate located on the appliance. It cappuccino maker. will help to avoid waster journeys to technicians, We hope you enjoy using your new appliance.
- Page 9 Do not rest recipients containing liquids or inflam- DESCRIPTION mable or corrosive materials on top of the appliance. Place the accessories required to pre- Description pare the coffee (the measure for example) in the (page 3 - special holder. Cup tray Do not rest large objects which could obstruct Service door movement or unstable objects on the appliance.
-
Page 10: Preliminary Checks
(When you access the MENU: press the table type by a qualified professional. button to modify menu parameters). To comply with safety directives, an omnipolar Hot water button. switch with a minimum contact distance of 3 mm (When you access the MENU: press the must be installed. -
Page 11: Built-In Installation
BUILT-IN INSTALLATION Verify the minimum measurements required for correct installation of the appliance. The coffee maker must be installed in a column and the column must be firmly fixed to the wall with commercially available brackets. Important: • Important: all installation or maintenance operations must be performed with the appliance disconnected from the mains elec- tricity supply. - Page 12 Rest the rails on the surface of the cabinet. Fix with the screws, then extract them comple- tely. If the coffee maker is installed over a warmer drawer, use the top surface of this as a reference to position the rails. In this case, there will be no surface to rest the Position the appliance on the rails, making sure the rails on.
-
Page 13: Using The Appliance For The First Time
USING THE APPLIANCE FOR and push the appliance in. Important: To prevent malfunction, never THE FIRST TIME introduce pre-ground coffee, freeze dried coffee, caramelised beans or any other substance which NB! The first time the appliance is turned could damage the appliance. on and each time it is plugged in, when the The coffee maker is now ready for normal use. -
Page 14: Preparing Coffee Using Coffee Beans
PREPARING COFFEE USING NOTE 3: Tips for a hotter coffee: • When you turn the appliance on, if you want COFFEE BEANS to make a short coffee (less than 60 cc), rinse the cups with hot water to preheat the cups. 1. -
Page 15: Changing The Quantity Of Coffee In The Cup
To clean, open the service door on the front of the To change these quantities, proceed as follows: appliance by pulling the handle (fig. 14), extract press the button corresponding to the quan- the drip tray (fig. 15), empty and clean. tity you want to change ( ) for at least 3 seconds then release until the mes-... -
Page 16: Preparing Espresso Coffee With Ground Coffee (Instead Of Beans)
PREPARING ESPRESSO HOT WATER DELIVERY COFFEE WITH GROUND • Always make sure the appliance is ready. • Make sure the water spout is in place (fig. 4); COFFEE (INSTEAD OF • Position a container under the spout (fig. 3). • Press the button (fig. - Page 17 printed on the milk container lid cover. rator for more than 15 minutes. The quantity of froth can be adjusted by NOTE 4: To change the quantity of coffee or fro- moving the regulator towards the word CAF- thed milk the appliance delivers automatically FELATTE for a denser froth.
-
Page 18: Changing The Quantity Of Coffee And Milk For Cappuccinos
CHANGING THE QUANTITY Check that the holes in the coffee spout are not blocked. OF COFFEE AND MILK FOR Unblock by scraping the remains of dry coffee accumulated with a needle (fig. 26). CAPPUCCINOS Clean the nozzle regularly with a sponge as shown The appliance is factory preset to automatically in fig. -
Page 19: Changing And Setting Menu Parameters
• close the service door. and the groove on the fine end of NOTE 1: If the infuser is Hole the pointer. not inserted cor- 5. Check that the Hole rectly until it clicks in intake tube and place and the red spout are not buttons snap out, clogged with milk residues. - Page 20 Setting auto-start time • press the button. Descaler is delivered from the hot water spout into the container This function programmes the time the machine below. will come on automatically to be ready for use. The appliance displays "DESCALING UNDER- •...
-
Page 21: Changing The Language
Changing the length of time the Resetting factory default values appliance remains on (reset) The appliance is factory preset to go off automati- If you change the original values, the factory cally one hour after the last coffee has been made. default values can be reset as follows: To increase the number of hours the machine •... -
Page 22: Displayed Messages
DISPLAYED MESSAGES DISPLAYED MESSAGE POSSIBLE CAUSE REMEDY FILL TANK • The water tank is empty or • Fill the tank with water positioned incorrectly. and/or insert it correctly, pushing it as far as it will go until it clicks into place. GROUND TOO FINE ADJUST •... - Page 23 DISPLAYED MESSAGE POSSIBLE CAUSE REMEDY • This indicates the presence • The descaling procedure DESCALE of limescale in the machine. described in the "Descaling" section needs to be perfor- med as soon as possible. • The ground coffee funnel is •...
-
Page 24: Troubleshooting
TROUBLESHOOTING Below is a list of some of the possible malfunctions. If the problem cannot be resolved as described, contact a technical service centre. PROBLEM POSSIBLE CAUSE REMEDY The coffee is not hot • The cups have not been • Rinse cups with hot water. - Page 25 PROBLEM POSSIBLE CAUSE REMEDY Coffee does not come out of • The spouts are blocked. • If necessary, remove coffee one of the spouts. deposits with a toothpick (fig. 26), sponge or stiff bristled kitchen brush. The coffee does not come out •...
-
Page 26: Technical Specification
TECHNICAL SPECIFICATION DISPOSAL Voltage: 220-240 V~ 50/60 Hz max. 10A Electrical appliances must not be disposed Absorbed power: 1350W of as household waste. Pressure: 15 bar Appliances with this symbol are covered by Water tank capacity: 1.7 litres European Directive 2002/96/EC. Size: LxHxD: 560x 450x550 mm All unused electric and electronic appliances must Weight: 26 kg...
Need help?
Do you have a question about the RCC46MIN and is the answer not in the manual?
Questions and answers