Table of Contents
Advertisement
Quick Links
Advertisement
Table of Contents

Related Manuals for Rapido Trains Alco-GE 44-Tonner


Summary of Contents for Rapido Trains Alco-GE 44-Tonner
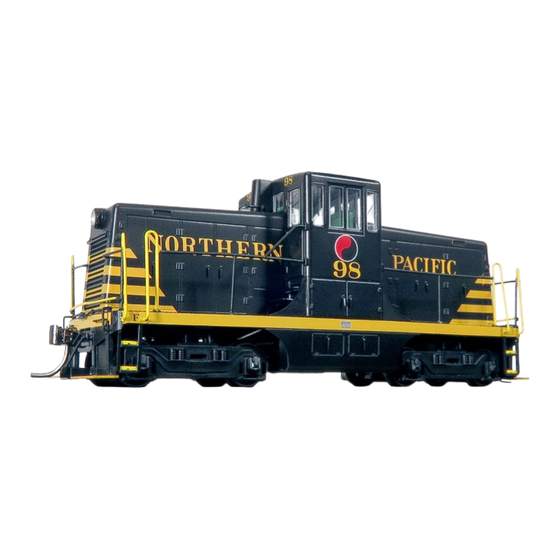
- Page 2 GE 44-TON LOCOMOTIVE PRODUCT GUIDELINES Thank you for purchasing this model of our tiny-yet-mighty diesel-electric locomotive, the General Electric 44-Tonner! If this is your first Rapido locomotive, we must ask – why is this your first Rapido locomotive? No, seriously, we’ve been around for 20 years now and we’re not just a Canadian company, eh? We’ve produced a US customary ton of American products, like the EMD E8s, ALCO PAs, GE B36-7s, Horizon coaches, SW1200s, FL9s, PRR X31A boxcars, AutoFlood III hoppers, etc.
-
Page 3: Table Of Contents
TABLE OF CONTENTS Prototype History....................4 Break-In ......................4 How to Hold Your Locomotive ................4 Checking and Adjusting Your Locomotive .............. 5 Missing or Damaged Parts .................. 6 Removing the Couplers ..................6 Removing the Shell .................... 6 Operation – DC (Silent) ..................8 Installing a DCC Decoder .................. -
Page 4: Prototype History
PROTOTYPE HISTORY Commonly called “44-Tonners,” these locomotive’s compact design was driven by a 1937 labor agreement with the railroad unions that specified that all locomotives over 90,000 pounds required the use of a fireman. At a target weight of 44 tons (88,000 pounds), these diesels allowed the railroads to use only an engineer, thus saving crew costs. -
Page 5: Checking And Adjusting Your Locomotive
greasy fingerprints on the sides and you also won’t stress any of the delicate parts. Always make sure your hands are free of shmutz before touching your engine, otherwise you’ll shmutz up your locomotive. Hey – if your hands have enough oil on them that could be realistic. -
Page 6: Missing Or Damaged Parts
• Make sure that the trucks swivel freely and without binding. If they catch on anything, try gently moving or even bending the smaller parts aside. MISSING OR DAMAGED PARTS If you open your 44-Tonner box and discover that something has obviously been bumped in transit and is damaged, please contact us. - Page 7 • Next, carefully remove the handrails from where they enter the end walls of the cab and also where they attach to the ends of the hoods. There are ten such connections, so don't miss any! • There is a body clip at the end of each hood that is hidden by the coupler box.
-
Page 8: Operation - Dc (Silent)
• If you wish to change out the decoder, then just follow the previous steps about removing the shell. It will expose all the wonders that lie within. At this point you should have the entire shell off the frame, as long as you followed our super simple instructions. -
Page 9: Installing A Dcc Decoder
INSTALLING A DCC DECODER The 44-Tonner contains a motherboard specially designed for our decoders. This is connected to the track, motor and lighting outputs. A blind plug is attached to the motherboard using a low-profile 18-pin connector. To install a decoder, remove the blind plug and install a NEXT18-pin decoder. -
Page 10: Operation - Dc (Sound)
OPERATION – DC (SOUND) To operate your sound-equipped 44-Tonner locomotive on a DC layout, just give the throttle some juice. The engine will start up once sufficient voltage has been reached (around seven volts). See the note above (in Operation – DC (Silent)) about using train-set or large-scale throttles. -
Page 11: Operation - Dcc (Sound)
potentiometers. As long as we can keep reminding him of this event, he’ll be nice to DC modelers. Not that we’re calling DC modelers Luddites -- No, sir, not us! OPERATION – DCC (SOUND) We go to extreme lengths for accuracy, in sounds as well as in looks. Our sound decoders are LokSound V5 decoders by ESU, with Full Throttle functionality. -
Page 12: Functions
we turned this feature off. Refer to a full ESU LokSound V5 decoder manual for more information. You can now download it from www.esu.eu/en/downloads. The feature is called the “Prime Mover Startup Delay” and is Section 13.2 on Page 89 of the ESU LokSound V5 manual (as of this writing). - Page 13 a little variety to your huge fleet of Rapido 44-Tonners. You DO have a huge fleet of Rapido 44-Tonners, don’t you? You can choose between the bells by changing CV164 from a value of 0 through 2. Refer to the “Custom Sound Settings” section below.
- Page 14 F9 Drive Hold ESU’s “Full Throttle” feature allows you to play the prime mover of your 44-Tonner like a musical instrument. When you press F9, you turn on “drive hold.” This keeps the speed of the engine constant at whatever speed step your throttle happens to be on.
- Page 15 F14 Hand Brake Apply/Release As every engineer knows, you can’t leave a loco unattended without tying them down with the handbrake. Hit F14 to apply it, hit it again to release it. F15 Isolation Switch To save on diesel fuel, some locomotives can be put into low idle. To do so on our model, press F15 when stopped.
-
Page 16: Custom Sound Settings
F23 Engine Compartment Doors Our engine compartment doors don't actually open, but you can hear the doors by pressing F22. No, not The Doors, but if you press F22 and hear Jim Morrison singing "Light my Fire," please make an appointment with a mental health professional. F24 Reverser Center When pressing F24 while not moving, the motor will lock so you can throttle through the notches like the prototype in neutral. -
Page 17: Mo-Power
important decisions. They can all be changed by adjusting the value of their respective CVs. Bells Horns • CV 164=0 GE Steel Bell #1 (Default) • CV163=0 Hancock Air Whistle • CV 164=1 GE Steel Bell #2 • CV163=1 Leslie A-125 •... -
Page 18: Sound Volume Settings Chart
soft in another. Fortunately, the sound levels can be easily adjusted to best suit your own requirements and we recommend that you experiment with different settings if you don’t care for the default levels. To set the volume levels go into the program mode on your DCC system (refer to your system’s manual for instructions on how to do this as each system is slightly different);... -
Page 19: Factory Reset
We strongly recommend that you keep notes on which settings you have changed, and which values were used. If you ever need to do a reset on the decoder (see “Factory Reset” below) then having good notes will allow you to easily re-enter any changes that you wish to keep. -
Page 20: Acknowledgements
A special thank you to Richard Longpre for the French translation of this manual. Merci beaucoup! 4-2024 CONTACT US! CONTACTEZ NOUS! Tel. Télé. (905) 474-3314 Rapido Trains Inc. Toll Free Sans Frais 1-855-LRC-6917 500 Alden Road, Unit 21 Fax. Téléc. (905) 474-3325 Markham, Ontario Email. Courriel. trains@rapidotrains.com L3R 5H5 Canada service@rapidotrains.com...
Need help?
Do you have a question about the Alco-GE 44-Tonner and is the answer not in the manual?
Questions and answers