Table of Contents
Advertisement
Advertisement
Table of Contents

Summary of Contents for Verint Nextiva EdgeVR Series
- Page 1 Nextiva EdgeVR Series User Guide For: Firmware Version 14.2 November 2011...
- Page 2 The entire risk as to the use, results and performance of information, links, tools and materials provided or referenced herein is assumed by the user. Verint Systems Inc. shall not be liable for damages resulting from the use, misuse or unlawful use of the information, links, tools, and materials contained or referenced herein.
-
Page 3: Table Of Contents
New Features ........... . .xi Chapter 1: Overview of the Nextiva EdgeVR Series ....1 Hardware Overview . - Page 4 Managing the License ..........35 www.verint.com/video_solutions...
- Page 5 Discovering Verint Devices ........
-
Page 6: Safety
The operating temperature is 32°F to 122°F (0°C to 50°C), with maximum humidity at 95% non-condensing. ● Only use the supplied power cable for powering the Nextiva EdgeVR series. ● Do not install the Nextiva EdgeVR series in an enclosed cabinet or other small area without ventilation. Verint Video Intelligence Solutions... -
Page 7: Preface
Today our solutions are used by more than 10,000 organizations in 150 countries. Verint is headquartered in Melville, New York, with offices worldwide and 2500 dedicated professionals around the globe. -
Page 8: Contacting Service And Support
Verint Video Intelligence Solutions partner extranet. To register, go to https://ve5.verint.com. If you encounter any type of problem after reading this guide, contact your local distributor or Verint representative. For the main service and support page on the Verint web page, visit www.verint.com/videoservice. -
Page 9: Related Documentation
Download the documentation and SConfigurator at www.verint.com/manuals Download the latest firmware from the extranet: http://vvs.verint.com Send your questions or comments on the current document, or any other Nextiva user documentation, to our documentation feedback team at documentationfeedback@verint.com Verint Video Intelligence Solutions... -
Page 11: Summary Of Changes
Vid-Center. ● Support for the following ADT camera models: NC-B130-DN, NC-D120-VD and NC-D110- ● Support for the following Axis camera models: M3113-R, M3114-R, M3204, P3301 ● Support for the following Arecont camera model: AV5115 Verint Video Intelligence Solutions... -
Page 12: Revision 4 - August 2011
● New Nextiva EdgeVR 200A model with up to 48 cameras support. Revision 2 - March 2011 This is the second edition of the Nextiva EdgeVR User Guide. New Features ● Support for the Nextiva S1801e and S1802e encoders. www.verint.com/video_solutions... -
Page 13: Revision 1 - December 2010
Surveillance” on page 117. ● Support for APC Backup E650 - USB Uninterruptible Power Supply (UPS). For more information see “Configuring an Uninterruptible Power Supply (UPS)” on page 123. ● Support for RAID 5 hard disks. Verint Video Intelligence Solutions... -
Page 15: Chapter 1: Overview Of The Nextiva Edgevr Series
● Op-Center Enterprise software for remote and centralized management of video recorders. Op-Center allows managers and system administrators to monitor, manage, and troubleshoot all of their Verint network video recorders from a central location. The following topics are discussed: Hardware Overview ............2... -
Page 16: Hardware Overview
Hardware Overview Hardware Overview The Nextiva EdgeVR series are available in two models: EdgeVR 100 and the EdgeVR 200. Depending on which model you buy, the front and rear panels vary. Hardware Overview of the EdgeVR 100 The EdgeVR 100 has the following components: ●... - Page 17 1: Overview of the Nextiva EdgeVR Series Shuttle Knob 1 or 2 Removable Hard Disks HDD 2 HDD 1 1-16 Locked fault Menu Mode USB 1 USB 2 Export 10 11 12 13 14 15 17-32 Error Connect Export pqrs...
-
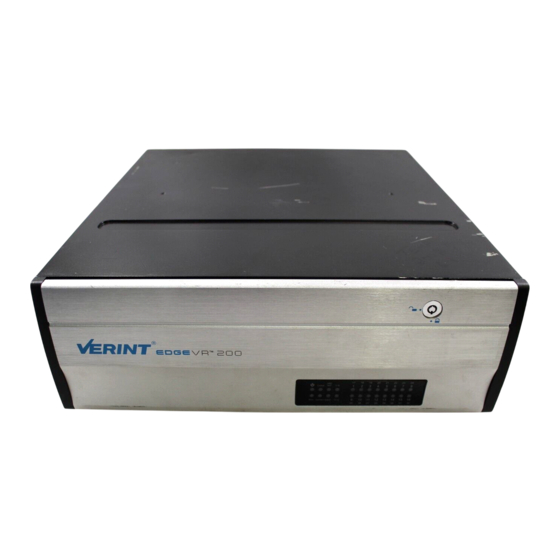
Page 18: Hardware Overview Of The Edgevr 200 And Edgevr 200A
UL certified with a selv output 9-30VDC. ● Three Audio connectors (Line In, Line Out, Mic In) ● RS232 Input ● RS422/485 Input www.verint.com/video_solutions... - Page 19 1: Overview of the Nextiva EdgeVR Series Shuttle Knob 1 to 4 Removable Hard Disks HDD 3 HDD 4 HDD 1 HDD 2 Locked fault 1-16 Menu Mode USB 1 USB 2 Export 10 11 12 13 14 15 Error...
-
Page 20: Product Dimension And Weight
The EdgeVR 100, EdgeVR 200 and EdgeVR 200A are shipped with a lockable front cover, which protects the front control menu, hard drives, and LEDs from tampering or from other unwanted activities. Two keys are shipped with the Nextiva EdgeVR series, with which you can lock or unlock the front cover. -
Page 21: Understanding The Led Indicators
1: Overview of the Nextiva EdgeVR Series Understanding the LED Indicators This sections describes the LEDs on the Nextiva EdgeVR series, along with the meaning of the front panel LED colors and their blink behavior. The Nextiva EdgeVR has several sets of LEDs, whose function is to inform you of the current status of the Nextiva EdgeVR. -
Page 23: Chapter 2: Installing And Configuring The Nextiva Edgevr
Chapter Installing and Configuring the Nextiva EdgeVR Installing a Nextiva EdgeVR is a straight-forward operation, and can be completed with ease and within a short amount of time. This chapter focuses on the physical installation of an Nextiva EdgeVR. See Chapter 3, “Using the Nextiva EdgeVR” for information on configuring the Nextiva EdgeVR. -
Page 24: Contents Of The Package
IP cameras, IP Encoders, Analog cameras, or Megapixel cameras ● Monitor: Analog, VGA, DVI (EdgeVR 200 and EdgeVR 200A only), and the corresponding cables ● Mounting screws (for rack mounting) ● Serial cables for the serial connections ● One or two RJ-45 Ethernet cables ● Screwdrivers www.verint.com/video_solutions... -
Page 25: Installing The Nextiva Edgevr
Nextiva EdgeVR for ventilation. NOTE: The EdgeVR 100 requires two rack units (3.47 in/88.1 mm), and the EdgeVR 200 and EdgeVR 200A require three rack units (5.22 in/132.5 mm). Verint Video Intelligence Solutions... - Page 26 Align the rack-mount brackets with the holes on the side of the Nextiva EdgeVR. Screw the rack-mount brackets to the Nextiva EdgeVR using 5 in-lb (0.56 N-m) force with M3 screws. (EdgeVR 100: 3 screws per side, EdgeVR 200: 5 screws per side). www.verint.com/video_solutions...
- Page 27 Secure the Nextiva EdgeVR to the rack cabinet using two 10-32 screws (not provided) on each side of the Nextiva EdgeVR. ► To install the Nextiva EdgeVR on a wall using a wall-mount rack: Align the wall-mount rack on the wall so that the open U space faces right. Verint Video Intelligence Solutions...
- Page 28 NOTE: You can also use regular square nuts in place of the rack-mount clips. Secure the Nextiva EdgeVR to the wall-mount rack using two screws on each side of the Nextiva EdgeVR. The front of the Nextiva EdgeVR should face left and the connectors www.verint.com/video_solutions...
-
Page 29: Starting And Shutting Down The Nextiva Edgevr
Press the power switch. The Power LED on the front panel of the Nextiva EdgeVR lights up. ► To turn off the Nextiva EdgeVR: Press the power switch. The LEDs and ventilation fans will turn off when the shutdown sequences is complete. Verint Video Intelligence Solutions... -
Page 30: Connecting The Network Cables
EdgeVR 100 (with Network card RJ-45 IP Cameras/Encoders only Auxiliary Ethernet option) connector and EdgeVR RJ-45 Main network (DVR Access Main Ethernet EdgeVR 200 and IP Cameras/Encoders) connector 200A and EdgeVR RJ-45 IP Cameras/Encoders only Auxiliary Ethernet EdgeVR 200 connector 200A www.verint.com/video_solutions... -
Page 31: Connecting Monitors
TN_506 Integrating a Panasonic IP Camera with Nextiva EdgeVR. NOTE: All Nextiva EdgeVR systems contain a license for two third party IP cameras. If you require support for additional third party IP cameras, contact your Verint sales representative. Use Vid-Center to integrate the IP camera or edge device to the Nextiva EdgeVR; refer to the Vid-Center 5.3 User Guide. -
Page 32: Supported Nextiva Edge Devices
S2750ePs: Fixed dome IP Camera (PAL), smoked cover ● S2750eNc: Fixed dome IP Camera (NTSC), clear cover ● S2750eNs: Fixed dome IP Camera (NTSC), smoked cover S2800 Series ● S2800: High-performance, MPEG-4 IP camera with 35x zoom, 4CIF resolution, and true day/night functionality www.verint.com/video_solutions... -
Page 33: Connecting The Nextiva Edgevr To A Nextiva S1800E Series Encoder
You cannot mix protocols on a single Nextiva EdgeVR. If several different PTZ cameras are being used, you can group the PTZ cameras by Nextiva EdgeVRs. For example, if you have three Nextiva EdgeVRs and three different types of PTZ cameras, group the PTZ Verint Video Intelligence Solutions... - Page 34 To connect RS-422 4-wire PTZ cameras to the Nextiva EdgeVR: Remove the terminal block plug from the rear of the Nextiva EdgeVR. Connect a twisted pair cable to the terminal block plug. The connector gives access to the Tx+, Tx- and ground signals. www.verint.com/video_solutions...
- Page 35 NOTE: On some equipment, signal terminology may vary. Refer to the peripheral documentation to find the equivalent terms. Nextiva EdgeVR Peripheral Figure 2.1: Four-wire Configuration Connect the terminal block plug to the on the rear of the Nextiva EdgeVR. Verint Video Intelligence Solutions...
- Page 36 Data- Data- ground ground Remove the terminal block plug from the rear of the Nextiva EdgeVR. Connect a twisted pair cable to the terminal block plug. The connector gives access to the Tx+, Tx-, Rx+, Rx-, and ground signals. www.verint.com/video_solutions...
-
Page 37: Connecting Alarm Inputs
For equipments using the RS-422 and RS-485 asynchronous protocols, the Nextiva EdgeVR has pluggable screw-terminal for PTZ (pan/tilt/zoom) cameras. This section explains how to connect a RS-232, RS-422 or RS-485 serial device to the Nextiva EdgeVR. Verint Video Intelligence Solutions... -
Page 38: Inserting And Removing The Hard Disks
(3.5in), and the EdgeVR 200 and EdgeVR 200A can hold up to four removable hard drives. All hard disks on the Nextiva EdgeVR series are removable. However, they are not hot swappable. Hard disks must be supported by Verint. -
Page 39: Adding The Nextiva Edgevr To Vid-Center
Click Connection String, then enter one of the following: ■ Either the IP address of the Nextiva EdgeVR, or its DNS name (case sensitive) if DHCP is used. For information on the default IP address of the Nextiva EdgeVR, Verint Video Intelligence Solutions... -
Page 40: Configuring The Nextiva Edgevr
All set- up options that are available through Nextiva Vid-Center can also be performed through the front panel. NOTE: Verint recommends that you connect a mouse and keyboard to the Nextiva EdgeVR to easily navigate the menu. Configuring the Language When configuring the Nextiva EdgeVR, you can choose the language of the menu. -
Page 41: Configuring The Date And Time
In the Set Time window, use the drop-down arrows to set the time and select time zone for the Nextiva EdgeVR. Click Save to save the configuration. NOTE: Changing the time zone requires that you reboot the Nextiva EdgeVR for the change to take effect. Verint Video Intelligence Solutions... -
Page 42: Configuring The Nextiva Edgevr
NOTE: If you change the time zone, the DVR will reboot after you save the properties. To restrict the use of live viewing to administrators only, check Live Mode requires administrator privileges. To restrict the access to recorded video to administrators only, check View recorded requires administrator privileges. www.verint.com/video_solutions... -
Page 43: Configuring Network Settings
To configure network settings: Press Menu on the front control panel. Select EdgeVR Setup and press Enter to display the EdgeVR Setup dialog box. NOTE: Select the Back to Main option to return to the home menu. Verint Video Intelligence Solutions... - Page 44 In the NetMask fields, enter the subnet mask for the Nextiva EdgeVR. Optionally, enter the IP address of the gateway for the Nextiva EdgeVR in the Gateway field. The gateway is the network point that acts as an entrance to another network. www.verint.com/video_solutions...
- Page 45 Click Enable Packet Throttling to allows you to regulate the network bandwidth usage by setting the maximum bit rate. Click OK. NOTE: The above steps can also be followed for the Network 2 tab, which can be configured for the Nextiva EdgeVR to communicate with IP cameras. Verint Video Intelligence Solutions...
-
Page 46: Setting The Password
In the User area, type a new password in the New Password box and retype the password in the Retype New Password box. In the Admin area, type a new password in the New Password box and retype the password in the Retype New Password box. Click OK to save the new passwords. www.verint.com/video_solutions... -
Page 47: Setting The Ssl Password
Select the SSL Passwords to display the SSL Password dialog box. Select Enable Secure Socket Layer (SSL) Authentication. Type a password in the Password box and retype the password in the Retype Password box. Click OK. Verint Video Intelligence Solutions... -
Page 48: Configuring An Uninterruptible Power Supply (Ups)
NOTE: If the UPS Device in the list box has USB in the name, then you need a USB serial adaptor with the UPS device. Select Use Power Failure Shutdown Timer and set the time in minutes after which the DVR will shutdown. Click OK. www.verint.com/video_solutions... -
Page 49: Managing The License
Managing the License Each Nextiva EdgeVR is shipped with a license key that turns on the features you have ordered. If you purchase another feature later on, Verint will send you a new license key that will activate it. ►... -
Page 51: Chapter 3: Using The Nextiva Edgevr
Discovering Verint Devices ........ -
Page 52: Accessing The Nextiva Edgevr Menu
To select the cameras to be displayed on a connected monitor: Press Menu on the front control panel. Select EdgeVR Setup and press Enter to display the EdgeVR Setup dialog box. Select the Primary Monitor or Secondary Monitor to display the Monitor Output dialog box. www.verint.com/video_solutions... -
Page 53: Discovering Verint Devices
Verint SConfigurator User Guide. Use the Auto Config Camera option. ► To discover Verint device using the Auto Config Camera option: Press Menu on the front control panel. Select EdgeVR Setup and press Enter to display the EdgeVR Setup dialog box. -
Page 54: Associating An Ip Camera With Nextiva Edgevr
To configure Nextiva EdgeVR for IP Cameras: Press Menu on the front control panel. Select EdgeVR Setup and press Enter to display the EdgeVR Setup dialog box. Press the right arrow key on the front panel to go page two. www.verint.com/video_solutions... - Page 55 In the Address boxes, enter the IP address of the device. In the Port box, enter the VSIP port to use to communicate with the device. For Verint IP cameras, this value should always be 5510. Supported third-party cameras may use port 80.
-
Page 56: Associating A Ptz Camera
► To configure the PTZ port: Press Menu on the front control panel. Select EdgeVR Setup and press Enter to display the EdgeVR Setup dialog box. Press the right arrow key on the front panel to go page three. www.verint.com/video_solutions... - Page 57 Eight data bits are universally used in most applications. 10. In the Stop bits list, select the stop bits used by the serial equipment. Stop bits let the receiver know that the byte being transmitted has ended. 11. Click OK. Verint Video Intelligence Solutions...
-
Page 58: Configuring Recording Properties For Events And Surveillance
To set up a simple surveillance or event: Press Menu on the front control panel. Select EdgeVR Setup and press Enter to display the EdgeVR Setup dialog box. Press the right arrow key on the front panel to go page two. www.verint.com/video_solutions... - Page 59 10. In the Pre-Alarm box, set the amount of video to include in seconds or minutes prior to the event occurring. NOTE: The camera must be recording prior to the event in order to record pre-alarm video. Verint Video Intelligence Solutions...
- Page 60 Configuring Recording Properties for Events and Surveillance 11. Click Edit Simple to display the Camera Rates dialog box to create the settings for the simple surveillance or event. www.verint.com/video_solutions...
-
Page 61: Defining A Custom Surveillance Or Event
To set up a custom surveillance or event: Press Menu on the front control panel. Select EdgeVR Setup and press Enter to display the EdgeVR Setup dialog box. Press the right arrow key on the front panel to go page two. Verint Video Intelligence Solutions... - Page 62 10. In the Pre-Alarm box, set the amount of video to include in seconds or minutes prior to the event occurring. NOTE: The camera must be recording prior to the event in order to record pre-alarm video. www.verint.com/video_solutions...
- Page 63 Double-click On/Off to enable or disable the recording event for the camera. Double-click Quality to set the recording quality of the video for the camera. Double-click Rate (fps) to set the recording speed in frames per second for the camera. Verint Video Intelligence Solutions...
-
Page 64: Configuring The Quality Of Live Video
Select Live Profiles to display the Live Profiles dialog box. Select the cameras to update, and set the Quality and Rate settings. NOTE: Megapixel cameras appears in red, and the Quality options changes to the values supported by the camera. Click OK. www.verint.com/video_solutions... -
Page 65: Defining The Properties Of A Mechanical Switch
30 seconds has gone by without motion. This means that Trips 2 and 3 will not generate events but will reset the duration. After a quiet 30-second period, a new event (Event 2, with Trip 4) can be logged on the same sensor. Verint Video Intelligence Solutions... - Page 66 Type a description for the switch in the Name box. Select the Polarity of the switch: Normally Open or Normally Closed. Select the Active State of the switch: Momentary or Continuous. Repeat step 5 to step 8 for all switches. 10. Click OK to save the properties. www.verint.com/video_solutions...
-
Page 67: Configuring The Storage Option
To reduce the size of stored event images, check Limit event storage to one frame every, then specify the storage frequency of a video frame (in seconds). NOTE: Reducing the frame rate of events preserves space on the hard disk of the DVR. Click OK to save the properties. Verint Video Intelligence Solutions... -
Page 68: Configuring The Storage Option For Motion Detection
Select Everything, then remove images without motion after to record everything, then remove video without motion or events after a specific number of days. To reduce the frame rate, check Reduce motion storage to one frame every, then specify the frequency (in seconds). Click OK to save the properties. www.verint.com/video_solutions... -
Page 69: Configuring Motion Detection
To set up the motion areas: Press Menu on the front control panel. Select EdgeVR Setup and press Enter to display the EdgeVR Setup dialog box. Press the right arrow key on the front panel to go page two. Verint Video Intelligence Solutions... - Page 70 99; the default value is 65. The higher the sensitivity is, the higher the chances to have false motion images. 10. Clear the Show Grid check box to remove the grid. 11. Click Clear All to remove all active motion areas. 12. Click Select All to enable motion on the entire image. 13. Click Close. www.verint.com/video_solutions...
-
Page 71: Configuring Motion Detection For Axis Cameras
NOTE: You can create a maximum of ten motion detection area for an Axis IP Camera. You can set the selected region to be excluded from the motion detection area, by selecting Exclude this area from recognizing motion. Verint Video Intelligence Solutions... -
Page 72: Configuring Privacy Mask
► To set up privacy mask: Press Menu on the front control panel. Select EdgeVR Setup and press Enter to display the EdgeVR Setup dialog box. Press the right arrow key on the front panel to go page two. www.verint.com/video_solutions... - Page 73 You can set the selected region to be excluded from the motion detection area, by selecting Exclude this area from recognizing motion. Select the region, and click Delete Window to deactivate the motion detection area. Click Close. Verint Video Intelligence Solutions...
-
Page 74: Locking The Dvr Front Panel
Press the right arrow key on the front panel to go page three. Select Lock Front Panel to display the Lock Front Panel dialog box. Select Lock Front Panel. Click OK. The Locked status LED on the front panel of the device is now lit. www.verint.com/video_solutions... -
Page 75: Setting An Event For Instant Alerts
In the Server Address box, enter the IP address and port number used by the Op-Center Server with the Instant Alert feature. From the Events list, select the events that will act as the trigger for an instant alert notification. Click OK. Verint Video Intelligence Solutions... -
Page 76: Creating Custom Camera Settings
In the Resolution list, select a resolution for the setting. In the Min Quantizer, enter a value to set the minimum level. 10. In the Max Quantizer, enter a value to set the maximum level. 11. Click OK. www.verint.com/video_solutions... -
Page 77: Exporting Video
Select EdgeVR Setup and press Enter to display the EdgeVR Setup dialog box. Select Save Video to USB-DVD. Specify the start and stop date and time of the recording in the Record From and Record To fields. Select either the CD/DVD Drive or USB Device options. Verint Video Intelligence Solutions... - Page 78 A viewer appears and the video begins to play. .exe ■ If you did not select the Wrap Video option, launch Vid-Center to access the exported files. For more information, refer to the Vid-Center 5.3 User Guide. www.verint.com/video_solutions...
-
Page 79: Using The Local Playback Feature
Use the playback controls on the front panel to play, stop, rewind, fast-rewind, forward and fast-forward the displayed video. NOTE: You can also use the shuttle knob to playback video forward or backward up to 4x the normal speed. Verint Video Intelligence Solutions... -
Page 80: Using The Help
Using the Help The Help option describes the function control buttons. ► To use the Help option: On the front control panel, press Menu. Select Help to display the Help dialog box. Select the option that corresponds to your needs. www.verint.com/video_solutions... -
Page 81: Chapter 4: Maintenance And Troubleshooting
Chapter Maintenance and Troubleshooting This sections helps you troubleshoot connection, hard drive, and monitor problems on a Nextiva EdgeVR recorder. To troubleshoot a Nextiva EdgeVR recorder, you need: ● A laptop computer with Vid-Center installed ● A straight-through serial cable ●... -
Page 82: Verifying The Connection To The Nextiva Edgevr
NETWORK 1 connector must be lit. Change the IP settings of the computer: Use the same subnet as the Nextiva EdgeVR and an IP address that is incremented by 1 compared to the address used in the recorder. www.verint.com/video_solutions... -
Page 83: Verifying The Hard Drives
Monitor 2 only supports single camera view and must be enabled in Vid-Center. It also supports the on-screen display interface that is accessed by pressing the Select button on the Nextiva EdgeVR front panel. Verint Video Intelligence Solutions... -
Page 85: Appendix A: Technical Specifications
Appendix Technical Specifications Nextiva EdgeVR Specifications ..........72... -
Page 86: Nextiva Edgevr Specifications
Nextiva EdgeVR Specifications Nextiva EdgeVR Specifications The following table presents the technical specifications for the Nextiva EdgeVR series. Nextiva EdgeVR 200 and Nextiva EdgeVR 100 EdgeVR 200A Video Video Input (IP/Analog) 16 cameras 32 cameras Analog Input (NTSC/PAL) 0, 4, or 8; BNC, 1 Vpp, 0, 8 or 16 composite;... - Page 87 DVR logs for system operation, events and status Programmability Programmable events and scheduling; settings for general, motion, and event-recording Functionality Simultaneous recording and live viewing, event storage, or image retrieval PTZ Support Specific PTZ devices via serial communications port Verint Video Intelligence Solutions...
-
Page 89: Index
Motion Detection Axis Cameras Setup motion detection setting up areas Detecting Motion Axis Cameras Discover Devices, Verint Devices Discovering Network Settings adding a feature Configuring Nextiva EdgeVR Installing non-event storage normally open EdgeVR Configuring... - Page 90 PTZ properties S1800e Encoders Connecting sensitivity level serial port Setting Event for Instant Alerts Setup Motion Detection Setup Privacy Mask short term storage SSL password properties storage long term short term surveillance, custom switch event trigger properties Configuring user password www.verint.com/video_solutions...
- Page 91 For more information, please visit us at www.verint.com/video_solutions Americas: info@verint.com EMEA: marketing.emea@verint.com APAC: marketing.apac@verint.com All other trademarks and product names are the property of their respective owners. The information in this document may be superseded by subsequent documents. Revision 2...
Need help?
Do you have a question about the Nextiva EdgeVR Series and is the answer not in the manual?
Questions and answers
How is the air flow of the EdEdgeVR 300 NVRgeVR 300 NVR