Table of Contents

Summary of Contents for RPower PV-HYWR-4KW-3P-02-WIFI
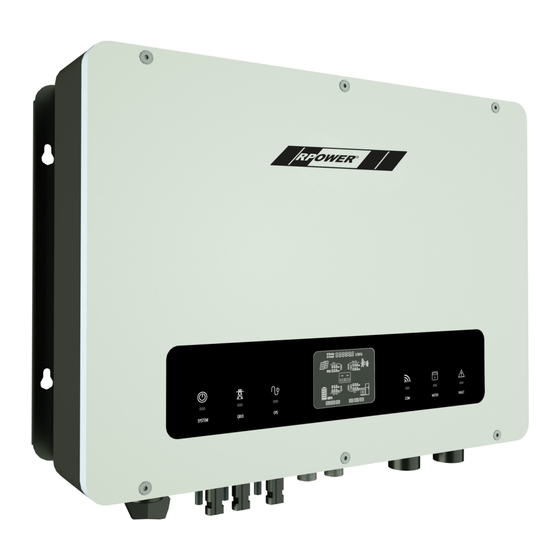
- Page 1 User Manual ■ Installation ■ Operation ■ Maintenance Three Phase Hybrid Inverter ● PV-HYWR-4KW-3P-02-WIFI ● PV-HYWR-5KW-3P-02-WIFI ● PV-HYWR-6KW-3P-02-WIFI ● PV-HYWR-8KW-3P-02-WIFI ● PV-HYWR-10KW-3P-02-WIFI ● PV-HYWR-12KW-3P-02-WIFI...
-
Page 2: Table Of Contents
Inhaltsverzeichnis Contents 1 Introduction ......................1 1.1 Safety symbols and Warnings ................1 1.1.1 Symbols Explanation ................... 1 1.1.2 Safety Warning .................... 2 1.2 System diagram ....................3 1.3 Operation Modes Introduction ................3 1.3.1 General mode (Default) ................3 1.3.2 Battery backup mode ................... -
Page 3: Introduction
Introduction 1 Introduction 1.1 Safety symbols and Warnings Hybrid inverters of PV-HYWR-series are designed, manufactured, and tested as per international safety standards. However, as an electrical and electric product, it must be installed, operated, and maintained strictly according to related safety notices. If you have any problems, please contact the nearest service center or authorized dealer. -
Page 4: Safety Warning
Introduction 1.1.2 Safety Warning The inverter must be installed according to the local standard and Warning related standard for an electrical enterprise. Please follow the instructions in this manual to use and operate the inverter. Keep the PV array covered and the DC circuit breaker OFF. High voltage Danger will be generated by PV array exposed under sunshine. -
Page 5: System Diagram
Introduction 1.2 System diagram Cloud Smart Meter PV-Module 100% Unbalance Output Grid Hybrid Inverter Battery Backup Loads On Grid Loads Fig. 1.2 1.3 Operation Modes Introduction PV-HYWR Hybrid Inverter normally has the following operation modes based on your configuration and layout conditions. 1.3.1 General mode (Default) The default is General mode, and there are mainly two common application scenarios as shown below:... -
Page 6: Battery Backup Mode
Introduction 1.3.2 Battery backup mode In this mode, it is necessary to ensure that the battery is charged regardless of whether there is photovoltaic or not. Fig. 1.3.2 (A) Fig. 1.3.2 (B) A) When there is sufficient sunlight, it will give priority to supply power to battery, supply power to loads, and then merge the excess into the grid. -
Page 7: Peak Shaving And Valley Filling Mode
Introduction 1.3.4 Peak shaving and valley filling mode According to the difference of electricity price, a day can be divided into three periods: peak, flat and valley. 1.3.4.1) In the valley level, the grid and PV charge the batteries (Fig. 1.3.4.1) Fig. -
Page 8: Installation
Installation 2 Installation 2.1 Unpacking and Checking On receiving the inverter, please check before installation to make sure all the components as below are not missing or damaged. Smart Meter x 1 Negative PV Positive PV Positive Bat Negative Bat with 3 CT (Optional) Inverter x 1 connector x 2... -
Page 9: Mounting
Installation 2.3 Mounting 2.3.1 Requirements for Mounting ø The installation of the inverter should be protected under shelter from direct sunshine or any bad weather conditions as shown below: Exposure to Rain and Snow No direct sunlight No Exposure to Rain and Snow Direct Sunlight Fig. -
Page 10: Mounting The Inverter
Installation ø Leave enough space around the inverter as shown below: 40 cm Position Min. Size (cm) 40 cm 40 cm Front 40 cm Lateral 40 cm 40 cm Bottom 50 cm 50 cm Fig. 2.3 2.3.2 Mounting the Inverter Step 1: Use the positioning cardboard as template to drill 4 holes on walls. -
Page 11: Electrical Connection
Installation Step 3: Lift and hang the inverter on the wall, lock the nuts, and fix the machine. Fig. 2.6 2.4 Electrical Connection 2.4.1 System Wiring Diagram General wiring diagram of PV-HYWR series inverter. Meter Battery WIFI Back-up On Grid DRED Power Grid... -
Page 12: Overview Of The Electrical Connecting Part
Installation 2.4.2 Overview of the Electrical Connecting Part Meter Battery WIFI Back-up On Grid DRED Power Fig. 2.8 2.4.3 PV Connection Before connecting panels/strings to inverter, please make sure: 1) Use the right PV connectors in the accessory box. 2) The voltage, current and power ratings of the PV strings are within the allowable range of the inverter. -
Page 13: Battery Connection
Installation 2.5 Battery Connection Battery connection diagram Meter Battery WIFI Back-up On Grid DRED Power BMS/PDU Battery Power Fig. 2.11 1) Use the right BAT connectors in the accessory box. 2) Choose 4 to 6 mm (AWG 10) tin-plated cable to connect the battery and the inverter. 3) Make sure battery switch is off and battery nominal voltage meets PV-HYWR Hybrid Inverter’s specification before connecting battery to inverter. - Page 14 Installation STEP 1: Assemble the battery connectors from the accessory box. (Battery cable must be firmly crimped into connectors) Fig. 2.12 STEP 2: Connect the battery connectors to the inverter. There will be a click sound if connectors are inserted correctly into battery plugs.
-
Page 15: Grid & Eps Connection
Installation 2.6 Grid & EPS Connection Use the AC connectors from accessory box for grid and EPS connection. An external AC breaker (32A) is needed for on-grid connection to isolate from grid when necessary. STEP 1: Assemble the grid connector. Follow the markings on the connectors, make sure 3L/N/PE lines are connected correctly. -
Page 16: Smart Meter Connection
Installation Accepted loads as below: ø Inductive load: a non-frequency conversion air conditioner within 1.5P can be connected to EPS side. Two or more may cause EPS output unstable. Do not connect 3-phase inductive load (like motor) without Neutral line to EPS side. ø... -
Page 17: Operation Of The Inverter
Operation of the Inverter 3 Operation of the Inverter 3.1 LED and LCD Display The LED indicators are shown as below: Status Explanation System is powered up SYSTEM System is not powered up Grid is normal GRID Grid loss FLASH Grid is abnormal Inverter in offline mode, EPS is active Inverter is not in offline mode... - Page 18 Operation of the Inverter The LCD display shows the detailed information of the inverter. Position Description It indicates the power output amount of total and today alternately. Unit: kWh or MWh PV panels indicator PV1, PV2 panels parameters. Voltage and current are displayed alternately. Total PV power Battery parameters.
-
Page 19: Monitoring System
Operation of the Inverter 3.2 Monitoring System PowerView monitoring platform support both APP and web monitoring, user can monitor detailed running information like generating capacity, system data, and send command, set parameters at same time. 3.2.1 Software acquisition APP: Download APP by searching „PVPro“ in Google Play or Apple App Store. Web: https://pv.inteless.com 3.2.2 WiFi Configuration... -
Page 20: Monitoring And Setting
Operation of the Inverter STEP 3 STEP 4 Choose „Find device“, then click WiFi Select corresponding router module signal. signal, fill in password of the router, click „Confirm“, WiFi module green LED will turn on. 3.2.3 Monitoring and Setting Both web and APP are available, this part shows monitoring and setting on web page. The default setting is the most common, and user generally do not need additional settings. -
Page 21: Ess Working Modes Setting Instruction
Operation of the Inverter On the plant information page, click „Equipment“ > „Parameter Setting“, Users can set the inverter according to their needs. 3.2.4 ESS Working Modes Setting Instruction ● Working mode selection The energy storage inverter provides four working modes to meet the needs of users in different applications, namely. - Page 22 Operation of the Inverter Automatic mode: the automatic mode can maximize the self-use rate of photovoltaic power generation and achieve the goal of not consuming grid power as much as possible within the regulation range of the energy storage system. The load at any time is the first priority, and charging is the second priority.
- Page 23 Operation of the Inverter ● Power limit setting Anti-backflow On-grid power limit (0 to 100 %) Users can choose whether to turn on the on-grid power limit function after the battery is fully charged according to whether the local power grid company allows the photovoltaic power being exported to the power grid.
- Page 24 Operation of the Inverter ● Valley time charging Valley time charging Valley time charging SOC (20-100%) Valley time charging power (500-10000W) This function is only effective when the user selects the peak shaving and valley filling mode, and it is generally not recommended to start it. Valley period &...
- Page 25 Operation of the Inverter ● Peak time discharge Peak time discharge mode Automatic power regulation Peak time discharge power (500-10000W) The peak time discharge setting is only effective when the user selects the peak shaving and valley filling mode. During the peak time, the default setting is that the system automatically adjusts the discharge power according to the household power detected by the smart meter;...
-
Page 26: Trouble Shooting
Trouble Shooting 4 Trouble Shooting This part introduces the common fault and solving steps, provides troubleshooting methods and skills to the user, and helps the user identify and solve some common faults of the inverter. Protection code Description Recommended solution P001 PV over voltage protection Check the configuration of the PV panels. - Page 27 Trouble Shooting P022 Battery open circuit Check the connection of battery and set right battery SOC in each mode. Check the battery P023 Battery SOC deadly low for parameter settings. Check the BMS communication cable and P024 BMS communication fault BMS protocol setting No time interval setting for Peak P025...
- Page 28 Trouble Shooting Р049 EPS output voltage high Р050 EPS output voltage low Check if EPS overload, press power key more Р051 EPS mode bus soft start fault than 3 seconds to clear alarm. Р052 Inv soft start fault Р053 EPS load short circuit P059 Battery current limited P060...
-
Page 29: Technical Data
Technical Data 5 Technical Data HYWR8KW HYWR4KW- HYWR5KW- HYWR6KW- HYWR10KW HYWR12KW Model -3P-02- 3P-02-WIFI 3P-02-WIFI 3P-02-WIFI -3P-02-WIFI -3P-02-WIFI WIFI Input (DC) Max. DC Power 6000 W 7500 W 9000 W 12000 W 15000 W 15000 W Max. DC Voltage 1000 V DC MPPT voltage range 200 to 850 V DC Max. - Page 30 Technical Data Efficiency Max. conversion efficiency 98,0 % 98,0 % 98,2 % 98,2 % 98,2 % 98,2 % European efficiency 97,3 % 97,3 % 97,5 % 97,5 % 97,5 % 97,5 % MPPT efficiency 99,9 % 99,9 % 99,9 % 99,9 % 99,9 % 99,9 %...
- Page 31 Technical Data RP-Technik GmbH Hermann-Staudinger-Straße 10-16 63110 Rodgau Telefon: +49 6106 66028 0 E-Mail: info@rp-group.com Web: www.rp-group.com Subject to technical changes – As of 01/2023...
Need help?
Do you have a question about the PV-HYWR-4KW-3P-02-WIFI and is the answer not in the manual?
Questions and answers