Table of Contents
Advertisement
Quick Links
Advertisement
Table of Contents

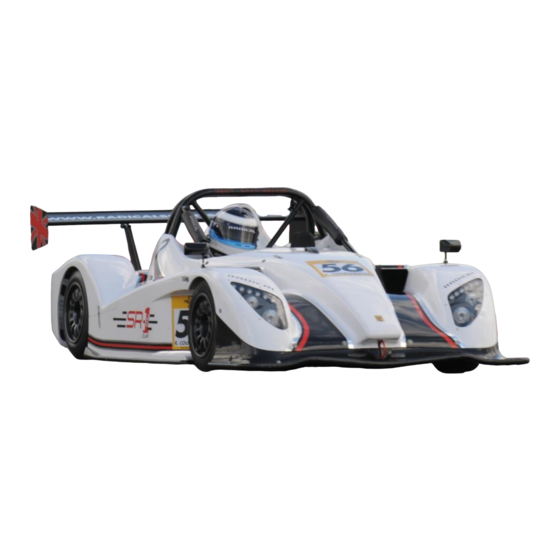
Related Manuals for RADICAL SR1


Summary of Contents for RADICAL SR1
- Page 1 V 1.15...
- Page 2 QD134-15...
-
Page 3: Table Of Contents
CONTENTS 1. Introduction To Your Car ....................... 6 1.1 Dashboard Layout ......................6 1.2 Dash Configurations ....................... 7 1.3 Engine Bay Layout ......................7 1.4 Front Suspension Layout ....................8 1.5 Rear Suspension Layout ....................8 1.6 ECU Location ......................... 9 1.7 Reverse Lever Location .................... - Page 4 9.12 Repacking Driveshaft Grease ..................43 9.13 Replacing Caliper Seals ....................44 9.14 Standard Pre-Race/Test Check Sheet ................45 SR1 Dunlop Setup Sheet ...................... 49 SR1 2018 Hankook Setup Sheet ..................50 SR1 2019 Hankook Setup SHeet ..................51 10. Version History ........................ 53 QD134-15...
- Page 5 If properly maintained your SR1 will give you an amazing driving experience, every time you head down the pit lane. Although your car has been built and thoroughly inspected at the Peterborough factory prior to you reading this, please take the time to read through this manual to expand your knowledge of the car.
-
Page 6: Introduction To Your Car
1. INTRODUCTION TO YOUR CAR Dash Neutral Button Master Switch Up Paddle Fire Extinguisher Lights Aim Data Port Down Paddle Life Data Port Brake Bias adjuster 1.1 DASHBOARD LAYOUT Water Temp Light Oil Temp Light Fuel Pressure Light Oil Pressure Light Battery Light Warning Light Current Gear... -
Page 7: Dash Configurations
1.2 DASH CONFIGURATIONS Page 1 General Running Page Page 2 Additional Parameters Page Page 3 Calibration Page Page 4 Predictive Time Page 1.3 ENGINE BAY LAYOUT Air Box/Filter Water Tank Light Plug 12V Fuel Drain Out Plug Fuel Rail Compressor Oil Tank Catch Tank QD134-15... -
Page 8: Front Suspension Layout
1.4 FRONT SUSPENSION LAYOUT Rocker Top Wishbone Track Rod Upright Spring/Damper Pushrod Roll Bar Lower Wishbone 1.5 REAR SUSPENSION LAYOUT Roll Bar Rocker Spring/Damper Top Wishbone Pushrod Driveshaft Upright Lower Wishbone QD134-15... -
Page 9: Ecu Location
1.6 ECU LOCATION The ECU is located on the right-hand side of the cockpit. The ECU has been made accessible so that it can be easily removed when the engine is rebuilt for example. To remove the ECU, pull the silver clip away and fold to an upright position, then the ECU should rotate around on the inside edge until it releases on the opposing side. -
Page 10: Running Your Car
To ensure the reliability of your car and engine we would strongly recommend following this procedure every time you start running your SR1. Dr y cr a n k in g - Before starting the car ensure the oiling engine in neutral, by pressing the starter button for a few seconds before turning the ignition on, ensure the car is in neutral before doing this. -
Page 11: Pre-Session Checks
(remember the engine is from a motorbike). Once you have pulled away in first gear you can then shift up as normal all the way to 6 The SR1 is fitted with an automatic blipper and ignition cut controls. This allows you to flat shift up the gearbox and means you have to blip the throttle on the way down. - Page 12 IMP OR TANT: Remember the engine is not designed to run backwards, if you have a spin make sure you depress the clutch. If the engine runs backwards without the clutch depressed it will damage the starter motor. Nev er r es t a r t t h e car if y ou d id n o t d epr es s t h e clu t ch .
-
Page 13: Adjusting The Seat And Pedals
2.3 ADJUSTING THE SEAT AND PEDALS The pedals and seat can be adjusted to suit the driver. Sea t Ad ju s t m en t : The seat is fitted on sliding rails which can be adjusted by loosening the 6 bolts on the seat. There are two M6 nylocs, one either side at the top of the seat between the chassis, two M6 button heads at the base of the seat and two M6 cap heads at the front lip of the seat. -
Page 14: New Car Shakedown
However, it is not possible to replicate the forces exerted driving around a race track. The first time you drive your new SR1 around a track is the first time the car has experienced the G-force you feel through the seat of the car. -
Page 15: Bedding In The Brakes
RUN 3 (5 LAP RUN) Driver: o During this run build up to full brake pressure, and use the full rev range before shifting (9,250rpm). Technician: up sufficiently. o Check the tyre pressures o Check for play in the wheel bearings o Re-check wheel nut torque for a final time (80ft/lbs) RUN 4 (NORMAL SESSION) The car can now be run as normal. -
Page 16: Tyre Management
4. TYRE MANAGEMENT The table below shows the suggested running pressures and pressures for race tyres: Treaded Wets Treaded Wets Please note that the starting pressures are to only be used as a guide; conditions on the day will alter where you should start your pressures. -
Page 17: Workshop Car Maintenance
5. WORKSHOP CAR MAINTENANCE After every day the car has run the car should be inspected thoroughly in a workshop environment. J A CK I N G P OI N T S The front jacking point is in the centre of the front diffuser, just under the front chassis rail. As shown in the picture. -
Page 18: Setting Up The Car
6.1 HOW TO SET UP THE CAR Setting up the Radical may seem a daunting task at first; however, adjustments are incredibly simple with everything being of easy access allowing for fast setup changes whenever you feel the need to adjust certain areas. -
Page 19: Dunlop Setup Sheet
6.3 DUNLOP SETUP SHEET Camber Toes -2.5 -2.5 -2.0 -2.0 Avo Dampers Springs/Preload Avo Dampers Corner weights (Est) / Drop Height FARB Front diffuser H 65mm 50mm 65mm Soft 15.8mm 7" Medium 19mm 7" 300lbs 300lbs Hard 22.2mm Weight Cross% Weight Estimate Estimate... -
Page 20: 2018 Hankook Setup Sheet
6.4 2018 HANKOOK SETUP SHEET QD134-15... -
Page 21: 2019 Hankook Setup Sheet
6.5 2019 HANKOOK SETUP SHEET QD134-15... -
Page 22: Wet Weather Set-Up
6.6 WET WEATHER SET-UP When you venture into the wet conditions, the car setup can be altered in order to give the driver the best chance of staying on the circuit. Shown below is a guide to the changes to make to the car in the wet. Camber Do NOT Do NOT... -
Page 23: Dunlop Drop Heights
6.7 DUNLOP DROP HEIGHTS inverted for the front, as shown in the picture, front on the left, rear on the right. Fr on t R id e Heigh t R ea r R id e Heigh t Dr op Ch a s s is Dr op Ch a s s is (m m ) -
Page 24: 2018 Hankook Drop Heights
6.8 2018 HANKOOK DROP HEIGHTS The drop heights are measured with a 2 on the front, as shown in the picture, front on the left, rear on the right. The rear will need to be measured with an extra 4 Fr on t R id e Heigh t R ea r R id e Heigh t Dr op... -
Page 25: 2019 Hankook Drop Heights
6.9 2019 HANKOOK DROP HEIGHTS The drop heights are measured with a 2 on the front, as shown in the picture. The rear will need to be Fr on t R id e Heigh t R ea r R id e Heigh t Dr op Ch a s s is Dr op... -
Page 26: Car Servicing
Along with checking the tension of the chain, it is also important to ensure the chain is well lubricated with dry chain lube o The differential on the SR1 should be greased through the grease nipples after every 6 hours of running... -
Page 27: Adjusting The Chain Tension
7.3 ADJUSTING THE CHAIN TENSION 1. To adjust the chain the top differential bolts must be loosened on both sides. 2. Next loosen the large 24mm nuts on both sides. to increase or reduce the slack in the chain. 4. When tightening the bolts ensure the differential is pushed all the way forward 24mm nuts on both sides. -
Page 28: Changing The Front Sprocket
Wheel Sensor Gauge (2mm). The pickup point is the end of the brake disc bolts on an SR1. When fitted, check the sensor is working by ensuring it is plugged in, then turn the power on and spin the disc, the sensor should light up when it sees each disc bolt, be sure to check the gap on all bolts. -
Page 29: Balancing The Throttle Bodies
7.8 BALANCING THE THROTTLE BODIES To set up the individual throttle bodies, please follow these rules: When the engine is idling at around 1600rpm, the Syncrometer reading needs to be equal on each of the individual throttle bodes and the TPS should be 4.0% the TPS value can be seen on a computer connected to the ECU, or on the dashboard. -
Page 30: Checking The Starter Motor After A Spin
7.10 CHECKING THE STARTER MOTOR AFTER A SPIN In the event of a spin, if the clutch is not depressed and the engine spins backwards, there is a chance that the starter and opposing gears can get damaged. If there are any doubts over whether the engine is damaged after a spin, it should not be started again prior to inspecting the starter motor. -
Page 31: Troubleshooting
8. TROUBLESHOOTING 8.1 NON STARTING Check life data- likely to be Does the engine run for Contact Radical engine trip (Refer to Data 5 seconds? Analysis Manual) Less than 11V Recharge/Replace Check rear battery Does the Dash Power on? Battery... -
Page 32: Charging Issues
8.2 CHARGING ISSUES The SR1 should be charging between 13.5-14.5 V when running on circuit. If you see it running below this, harging voltage in this section. Follow the below guide on how to diagnose the problem and deciding on the solution. When checking the car is charging, hold the RPM above 3000rpm. -
Page 33: Gearshift Issues
Is it shifting through all gears? Or just having trouble with one specific gear? If one specific gear this suggests it may be a mechanical issue and it is strongly advised to contact an authorised Radical engine shop for more advice on what to do. If you have carried out the first two steps and are still having issues shifting through all gears, take a look below for more help. -
Page 34: Reference Material
9. REFERENCE MATERIAL 9.1 OILING SYSTEM (DRY SUMP) Engine Breather Pot Catch Tank Oil Tank Oil Screen Sump Bung Main Oil Feed Oil Screen Oil Cooler Scavenge Pump QD134-15... -
Page 35: Wet Sump Layout
9.2 WET SUMP LAYOUT QD134-15... -
Page 36: Engine Control Parameters
9.3 ENGINE CONTROL PARAMETERS Fea t u r e P a r a m et er High Coolant Temperature Trip Low Fuel Pressure Trip 2.2bar Low Oil Pressure Trip 50psi @ 9500rpm (RPM Dependant) Rev Limit 9725rpm Fan On Fan Off Fuel Pressure Target 3.0 Bar 9.4 COMMON PARTS... -
Page 37: Fluids
9.5 FLUIDS Below is a list of all the fluids that you will need to run your SR1, including part numbers and quantities required: Radical recommends the use of Motul engine oil. Type Part Number Capacity Brand Viscosity/Type Required Engine Oil... -
Page 38: Torque Guide
180 Ft/Lbs Rear Sprocket Loctite/Locking Tab 50 Ft/Lbs S U S P EN S I ON Wh e el B ea r in g/H u b Front SR1 Nyloc 180 Ft/Lbs Wh e el Nu t s 4 Stud 80 Ft/Lbs... - Page 39 Advisory generalized bolt torques: B olt s ize/Th r ea d p it ch Gr a d e 2 Gr a d e 5 Gr a d e 8 1/4-20 1/4-28 5/16-18 5/16-24 3/8-16 3/8-24 7/16-14 7/16-20 1/2-13 1/2-20 9/16-12 9/16-18 5/8-11 5/8-18...
-
Page 40: Gear Ratios
9.8 GEAR RATIOS Gea r R a t io P a r t Nu m b er Final Drive Sprocket 43T TC0053 Final Drive Sprocket 44T TC0054 Final Drive Sprocket 45T TC0033 Final Drive Sprocket 46T TC0034 Final Drive Sprocket 47T TC0035 Final Drive Sprocket 48T TC0036... -
Page 41: Roll Bar Sizes
9.9 ROLL BAR SIZES Fr o n t Soft Gold SN0012 Medium Gold SN0011 Hard Gold SN0010 R ea r Soft Gold SN0021 Medium Gold SN0020 Hard Gold SN0019 QD134-15... -
Page 42: Component Lifing
The recommended life expectancies in no way represent a parts warranty, due to the unpredictable and uncontrolled use of these racing car components Radical will not be held responsible or accountable for any parts failure. This information is provided solely as a guide to increase the safety of the cars. -
Page 43: Repacking Driveshaft Grease
New clips should be fitted to the CV boots to prevent them from coming off. SR1 Driveshaft Grease (Per Joint): 70g Shaftec 70g Driveshaft Grease Part Number: TO0004... -
Page 44: Replacing Caliper Seals
9.13 REPLACING CALIPER SEALS The following guide is the recommendation for replacing the seals in their calipers: Extend pistons for easy removal unbolt callipers, take out brake pads and place a block in the caliper to prevent pistons from falling out. Then pump the pedal until all pistons are extended 10- 15mm (or carefully use an airline in the fluid inlet if the callipers are off the vehicle). -
Page 45: Standard Pre-Race/Test Check Sheet
9.14 STANDARD PRE-RACE/TEST CHECK SHEET The below checklist is intended as a guide only. This checklist is an expansion of the prep sheet which is on page 46. 1. Bodywork Check all bodywork for damage Check all the lights function Check the underside of the sidepods, diffuser and front splitter skid blocks Put the car on a stand Disarm the fire extinguisher... - Page 46 Check exhaust primary bolts Drain the catch tank Clean the air filter and check the airbox bolts Check the throttle cable, full throttle, tension. Check all coolant pipes 11. Wiring Check wiring in the engine bay for chaffing and signs of heat Check HT leads Check the condition of all connectors Check the wheel speed sensor, gap (all four lights)
- Page 47 QD134-15...
- Page 48 QD134-15...
-
Page 49: Sr1 Dunlop Setup Sheet
SR1 DUNLOP SETUP SHEET Camber Toes -2.5 -2.5 -2.0 -2.0 Avo Dampers Springs/Preload Avo Dampers Corner weights (Est) / Drop Height FARB Front diffuser H 65mm 50mm 65mm Soft 15.8mm Medium 19mm 7" 7" 300lbs 300lbs Hard 22.2mm Weight Cross%... -
Page 50: Sr1 2018 Hankook Setup Sheet
SR1 2018 HANKOOK SETUP SHEET QD134-15... -
Page 51: Sr1 2019 Hankook Setup Sheet
SR1 2019 Hankook Setup SHeet QD134-15... - Page 52 QD134-15...
-
Page 53: Version History
10. VERSION HISTORY 2018-01-?? V1.0 Initial public release. 2018-02-01 V1.1 Chain and sprocket lifing added. Motul part numbers. 2018-02-20 V1.2 Hankook information added. Drop heights. 2018-04-04 V1.4 Sprocket part numbers updated. 2018-06-13 V1.5 Differential update. 2018-07-17 V1.6 Pushrod lengths added. Torque setting units added. 2018-08-29 V1.7 Checking chain tension added. - Page 54 QD134-15...
- Page 55 QD134-15...
Need help?
Do you have a question about the SR1 and is the answer not in the manual?
Questions and answers