Table of Contents
Advertisement
Advertisement
Table of Contents

Summary of Contents for HELI JS07N
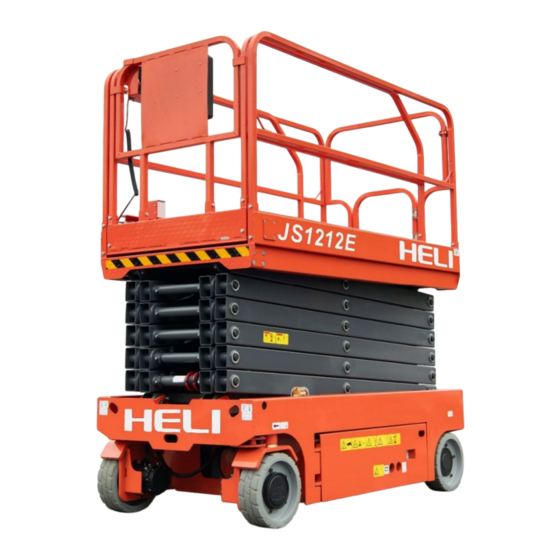
- Page 1 Operator’s and Service Manual Self propelled scissor type aerial work platform...
-
Page 2: Table Of Contents
Attention Owners Users and Operators: Thank you for choosing our company and use You should read, understand and follow these our machines. Our number one priority is user safety rules and operating instructions before safety, which is best achieved by our joint ef- operating this machine. -
Page 3: Safety Rules
Do not use solvent-based cleaners because they may damage the safety sign mater. ployer’s safety rules and workplace rules. √ You should read, understand and obey all applicable governmental regulations. √ You are properly trained to safely operate the machine. JS07N·JS07·JS08·JS12·JS14... -
Page 4: Decals
Manual Force, Only In- A11000144 door400N(JS1212,JS1414, 35 A11000112 Chassis logo JS0808) 36 A11000156 Non-Insulated A11000080 Manual Force,400N(JS0612) 37 A11000045 Charging indicator (JS07N) A11000003 Tip-over Hazard A11000142 Refer to Operator's Manual A11000112 LOGO A11000048 Model A11000010 CE Warning Reflective 10 A11000009... - Page 5 浙 江 长 兴 虹 星 桥 长 和 公 路 1 0 00号 EQ U I PM E N T C O . , LT D A 1 1000 019 A 1 1000 019 21 22 23 32 33 JS07N·JS07·JS08·JS12·JS14...
-
Page 6: Personal Safety
Personnel on the ground or in the platform must not touch or operate the machine until energized power lines are shut off. Do not operate the machine during lightning or storms. Do not use the machine as a ground for weld- JS07N·JS07·JS08·JS12·JS14... - Page 7 120 kg JS1212E, JS1212ELi JS1414, JS1414Li, Only indoor- 320 kg 120 kg JS1414E, JS1414ELi Maximum occupants Platform retracted Do not drive the machine on or near uneven terrain, unstable surfaces or other hazardous conditions with the platform raised. Platform only JS07N·JS07·JS08·JS12·JS14...
- Page 8 Do not use the machine on a moving or mobile JS0808Li, 400N Only indoor-2P surface or vehicle. JS0808E, JS0808ELi Be sure all tires are in good condition, castle JS0612, Indoor nuts are properly tightened and cotter pins are 400N Outdoor-2P JS0612Li, properly installed. JS07N·JS07·JS08·JS12·JS14...
- Page 9 JS1414, JS1414Li 25% (14°) 25% (14°) sonal protective equipment. JS1414E, JS1414ELi 30% (17°) 30% (17°) Check the work area for overhead obstructions or other possible hazards. Note: Slope rating is subject to ground condi- tions and adequate traction. JS07N·JS07·JS08·JS12·JS14...
- Page 10 Do not operate the machine in hazardous loca- tions or locations where potentially flammable or explosive gases or particles may be present. JS07N·JS07·JS08·JS12·JS14...
- Page 11 Batteries are used as counterweight and are 4. Chock the wheels. critical to machine stability. Do not use batter- 5. Charge the batteries. ies that weigh less than the original equipment. Each battery must weigh 28kg(JS1212 battery is 36kg), Battery tray including batteries must JS07N·JS07·JS08·JS12·JS14...
-
Page 12: Legend
Platform-socket and air pipes(optional) Scissor arm Transport tie-down Steering wheel Pothole guard 11 Timer Ground controls Non-steering wheel Brake release pump Entry ladder Emergency lowering line Lift cylinder Safety arm Platform entry chain or gate Platform extension release pedal JS07N·JS07·JS08·JS12·JS14... -
Page 13: Controls
Press the Enter key on the professionally trained and authorized by ECU panel while powering up the machine to HELI cannot disassemble their housings, enter the ECU menu selection mode. Select otherwise moisture and dust will enter the... - Page 14 Voltage Output 电压型输出型 Current Output 电流型输出型 Pothole Guard 坑洞保护 Descent Delay 下降延迟 Motion Alarm 动作报警 Load Sensing 超载感应 High Torque 高速阀 Batt Drain Alarm 电池耗尽报警 Drain Alarm Time 电量耗尽报警 Drain Shut Time 休眠时间 BMS功能 Foot Switch 脚踏开关 Anti Collision 防撞开关 JS07N·JS07·JS08·JS12·JS14...
- Page 15 Note: Updating the program will restore all Ensure the joystick is in neutral position system settings debugged by the original ma- before poweron. chine owner/user/ HELI to the original settings Calibrate weight and height set by the control system manufacturer. NOTICE Therefore, it is prohibited to update the pro- •...
- Page 16 Complete! ground controller. After pressing the Enter key for 5s, Return to the main interface through the the system will return to the previous Return key, and power off the machine as interface. Then the OL descent height needed. JS07N·JS07·JS08·JS12·JS14...
- Page 17 Lifting and Guard Fault the pothole limit switches. Check wires to the switches, Driving check the down limit switch and connections. BMS commu- Disables Lithium battery communication error: check the lithium nication Fault All Motion battery communication cable JS07N·JS07·JS08·JS12·JS14...
- Page 18 You can also check that the correct ma- Sensor2 Fault All Motion chine option with overload detection is selected. Lift Slow to Battery Drain Drive Limp Mode: Battery voltage is low, charge the battery. Alarm Speed Battery Drain Disables Battery Drain Shutdown:Recharge. Shutdown All Motion JS07N·JS07·JS08·JS12·JS14...
- Page 19 Brake coil error of right travel motor: check the connec- Disable Left Brake tion of brake coil and confirm there is no problem. If Lifting and Coil Fault there is no problem, check whether the coil itself is short Driving circuited or open circuited. JS07N·JS07·JS08·JS12·JS14...
- Page 20 If it still Motion fault fails, contact the manufacturer. Charging Lithium battery discharge current too high error: check Disable All overcurrent whether the whole vehicle operates normally. If it still Motion fault fails, contact the manufacturer. JS07N·JS07·JS08·JS12·JS14...
- Page 21 Machine commu- CAN equipment is offline Inspect whether all pins of the Deutsch nication fault plugs for the platform controller and ground controller connecting cables are wired according to the drawing. JS07N·JS07·JS08·JS12·JS14...
- Page 22 Change the setting of the travel the machine has correct switch no load and is in- doors The platform re- fuses to rise fur- The travel switch setting is in- ther after reach- Reset the travel switch. correct ing a certain po- sition JS07N·JS07·JS08·JS12·JS14...
- Page 23 After setting, the parameters The parameters cross the line. could not be The storage is abnormal The lower platform controller is mal- saved success- functioning. fully after several trials. JS07N·JS07·JS08·JS12·JS14...
-
Page 24: Pre-Operation Inspection
● Hydraulic hoses, fittings, cylinders and specified in this manual may be performed by manifolds the operator. ● Battery pack and connections Refer to the list on the next page and check each of the items. ● Drive motors ● Wear pads JS07N·JS07·JS08·JS12·JS14... -
Page 25: Function Test
2.Be sure the batteries are connected. 3.Pull out the platform and ground red Emer- gency Stop button to the on position. 4.Turn the key switch to ground control. 5.Observe the diagnostic LED readout on the platform controls.。 ⊙ Result: The LED should display “CH”. JS07N·JS07·JS08·JS12·JS14... - Page 26 27.Press and hold the function enable switch At the platform controls on the control handle. 28.Press the switch on top of the control han- Emergency stop dle in the direction indicated by the left tri- angle on the control panel. JS07N·JS07·JS08·JS12·JS14...
- Page 27 20 cm/s. the drive should not operate. If the drive speed with the platform raised 46.Lower the platform and remove the 2x4 or exceeds 20 cm/s, immediately tag and re- similar piece of wood. move the machine from service. JS07N·JS07·JS08·JS12·JS14...
-
Page 28: Workplace Inspection
- wind and weather conditions Push in the red Emergency Stop button to the - the presence of unauthorized personnel off position at the ground controls or the plat- - other possible unsafe conditions form controls to stop all functions. JS07N·JS07·JS08·JS12·JS14... - Page 29 Press the drive function button. Position Press and hold the unction enable switch on the control handle. Side Slope at Stowed Position Turn the steer wheels with the thumb rocker switch located on the top of the control handle. JS07N·JS07·JS08·JS12·JS14...
- Page 30 8.3 % From the middle of the extension deck railing, fold down the extension deck rail If the slope exceeds the maximum uphill, assembly toward the rear of the unit. downhill or side slope rating, then the machine JS07N·JS07·JS08·JS12·JS14...
- Page 31 The charger will indicate when the battery you try to extend the platform. is fully charged. Check the battery acid level when the charging cycle is complete. Replenish with distilled water to the bottom of the fill tube. Do not overfill. JS07N·JS07·JS08·JS12·JS14...
- Page 32 After every using: Select a security place which can be a sturdy surface, without obstacles and avoiding heavy transport. Lower the platform. Turn off the machine and remove the key to avoid unauthorized use. Lock the wheels of the machine. JS07N·JS07·JS08·JS12·JS14...
-
Page 33: Transporting And Lifting Instructions
Press the break release switch to on po- lease operation. sition. Press and hold lift switch to “down” posit- ing in ground control, meanwhile turn on the key switch to the “ground” position. The break will be released after Alarm alerts. JS07N·JS07·JS08·JS12·JS14... - Page 34 If the guardrails had be folded down, use the Be sure the machine is level when lowering the straps to fix before transport. forks. Lifting the machine from the side can result in component damage. JS07N·JS07·JS08·JS12·JS14...
- Page 35 52.7cm JS0607WE 65.7cm 52.6cm JS0607WELi 65.7cm 52.6cm JS0808 96.2cm 46.4cm JS0808Li 96.2cm 46.4cm JS0808E 96.2cm 46.4cm Chassis JS0808ELi 96.2cm 46.4cm Lifting Chassis Points(2) Lifting JS0612 90.6cm 62.7cm Points(2) Y-Axis JS0612Li 90.6cm 62.7cm X-Axis JS0612E 90.6cm 62.7cm JS0612ELi 90.6cm 62.7cm JS07N·JS07·JS08·JS12·JS14...
-
Page 36: Specifications
(Li Battery 25.6V 150Ah) Tyres size Tyres size Φ230×80 Φ323×100 Max.work slop(forward Max.work slop(forward 3°/1.5° 3°/1.5° backward/left and right) backward/left and right) Drive speed(retracted state) 4.0km/h Drive speed(retracted state) 4.0km/h Drive speed(lifting state) 0.8km/h Drive speed(lifting state) 0.8km/h notes:○ JS0607W 0.81m JS07N·JS07·JS08·JS12·JS14... - Page 37 450kg JS1012 JS1012 320kg JS0612 JS0612 1980kg ○ ○ JS0812 JS0812 2460kg JS1012 JS1012 2820kg JS0612 2.21m JS0612 ○ ○ JS0812 2.3m JS0812 JS1012 2.46m JS1012 4*6V 180Ah ○ JS0612 1.55m Li Battery25.6V 220 Ah JS0812 1.71m JS1012 1.84m JS07N·JS07·JS08·JS12·JS14...
- Page 38 Ground clearance(retracted 100mm state) Ground clearance(lifting state) 20mm Overall weight(Different configura- 2200kg tions) Battery 4 Battery 6V 200Ah (Li Battery 25.6V 150Ah) Tyres size Φ381×129 Max.work slop(forward 3°/1.5° backward/left and right) Drive speed(retracted state) 3.2km/h Drive speed(lifting state) 0.8km/h JS07N·JS07·JS08·JS12·JS14...
-
Page 39: Maintenance
In case of ab- could result in death or serious injury. Re- normal conditions such as peculiar smell and move all rings, watches and other jewelry. heating, the battery must be stopped and our after-sales personnel must be notified. JS07N·JS07·JS08·JS12·JS14... - Page 40 Scheduled maintenance inspections shall be the following chart to determine which group(s) performed by qualified service technicians, of procedures are required to perform a according to the manufacturer's specifications scheduled inspection. and the requirements listed in the responsibili- ties manual. JS07N·JS07·JS08·JS12·JS14...
- Page 41 After repair, place a check in the Inspected by (print) "R" box. Inspector signature Legend Inspector title Y = yes, acceptable Inspector company N = no, remove from service R – repaired JS07N·JS07·JS08·JS12·JS14...
- Page 42 ¤Result: The machine is not equipped with all required decals, or one or more decals are illegible or in poor condition. Remove the ma- Checklist E Y N R chine from service until the decals are re- E-1 Hydraulic oil placed. JS07N·JS07·JS08·JS12·JS14...
- Page 43 2. Find filling the hole of the grease at the top of the steering yoke. 3. Pump multipurpose grease into the steer yoke until the steer yoke is full and grease is being forced past the bearings. 4. Put back the lid JS07N·JS07·JS08·JS12·JS14...
- Page 44 10° / 5.5° C above 80° F / 26.7° C. a Batteries b Quick disconnect • Subtract 0.004 from the reading of each cell c 300A fuse d Charger for every 10° / 5.5° C below 80° F / 26.7° C. Suitable for all models: JS07N·JS07·JS08·JS12·JS14...
- Page 45 • Inside ground control panel wires 1. Check the tire surface and sidewalls for cuts, cracks, punctures and unusual • Hydraulic power unit module tray wires wear. • Battery tray(s) wires • Platform control wires 2. Check each wheel for damage, bends and cracks. JS07N·JS07·JS08·JS12·JS14...
- Page 46 ⊙ Result: The horn should sound. Test the Drive Brakes Test the Key Switch This procedure should be performed every 250 hours or quarterly, whichever comes first. JS07N·JS07·JS08·JS12·JS14...
- Page 47 Refer to specification. specified the braking distance. Note: The brakes must be able to hold the machine on any slope it is able to climb. Replace the brake, repeat the process from step1. JS07N·JS07·JS08·JS12·JS14...
- Page 48 Stowed, Slow service life. Dirty oil may cause the machine to perform poorly and continued use may cause component damage. Extremely dirty condi- tions may require oil changes to be performed more often. JS07N·JS07·JS08·JS12·JS14...
- Page 49 Tag and disconnect the platform control box at the platform. Open the battery tray, tag and disconnect the connector from the ECU to the plat- This procedure should be performed every 250 form control cable. hours or quarterly, whichever comes first. JS07N·JS07·JS08·JS12·JS14...
- Page 50 32. Lower the platform to the stowed posi- 2.5m. tion, move the machine onto a firm, level surface. 18. Lift the safety arm, move it to the center of the scissor arm and rotate down to a JS07N·JS07·JS08·JS12·JS14...
- Page 51 It provided with two control components: the overload pressure transducer and the scissors angle sensor. This procedure should be performed every 250 The overload pressure transducer is used to hours or quarterly, whichever comes first. determine the pressure of the cylinder and JS07N·JS07·JS08·JS12·JS14...
- Page 52 Emergency Stop button to the off position. 7. Raise the platform a little to return the safety arm. This procedure should be performed every 500 8. Raise the platform to the highest position hours or six months, whichever comes first. JS07N·JS07·JS08·JS12·JS14...
- Page 53 5. Turn the key switch to ground control and pull out the red Emergency Stop button to ¤ Result: The measurement is less than x the on position at both the ground and mm. Replace the Scissor Arm Wear Pads platform controls. JS07N·JS07·JS08·JS12·JS14...
- Page 54 Do not Cap the dustproof plug on the pump and pipe allow the pump to activate. head. 5. Remove the hydraulic tank retaining fas- teners. Remove the hydraulic tank from the machine. JS07N·JS07·JS08·JS12·JS14...
-
Page 55: Electrical Schematic Diagram
Electrical Schematic Diagram JS0407NE,JS0407NELi JS07N·JS07·JS08·JS12·JS14... - Page 56 Electrical Schematic Diagram JS0607,JS0607Li,JS0607W,JS0607WLi,JS0808,JS0808Li,JS0612,JS0612Li, JS0812,JS0812Li,JS1012,JS1012Li,JS1212,JS1212Li BAT1+ BAT1+ BAT2+ BAT2+ 24V+(常电) 24V+(常电) 24V+(I N ) 24V+(I N ) JS07N·JS07·JS08·JS12·JS14...
- Page 57 Electrical Schematic Diagram JS0607E,JS0607ELi,JS0607WE,JS0607WELi,JS0808E,JS0808ELi,JS0612E, JS0612ELi,JS0812E,JS0812ELi,JS1012E,JS1012ELi,JS1212E,JS1212ELi BAT2+ BAT2+ 24V+( 24V+( 常电 24V+(IN) 24V+(IN) JS07N·JS07·JS08·JS12·JS14...
- Page 58 Electrical Schematic Diagram JS1414,JS1414Li BAT1+ BAT1+ BAT2+ BAT2+ J1-9 J1-9 J1-12 J1-12 J1-16 J1-16 J1-17 J1-17 J1-18 J1-18 PWRV+ PWRV+ 24V+(常电) 24V+(常电) 24V+(I N ) 24V+(I N ) JS07N·JS07·JS08·JS12·JS14...
- Page 59 Electrical Schematic Diagram JS1414E,JS1414ELi BAT1+ JS07N·JS07·JS08·JS12·JS14...
-
Page 60: Hydraulic Schematic Diagram
Hydraulic Schematic Diagram JS0607,JS0607Li,JS0607W,JS0607WLi 28-35bar 28-35bar B1 B1 AS AS BS BS BR BR 207bar B1 B1 2.5L/Min 109bar 241bar B2 B2 T1 T1 11.2L/min 11.2L/min 10 10 μ m 2950rpm 2950rpm 1.5bar 1.5bar JS0407NE,JS0407NELi,JS0607E,JS0607ELi,JS0607WE,JS0607WELi Y1 Y1 JS07N·JS07·JS08·JS12·JS14... - Page 61 Hydraulic Schematic Diagram ① ① JS0808,JS0808Li ,JS0612,JS0612Li,JS0812,JS0812Li,JS1012 ,JS1012Li JS1212 ① ,JS1212Li ① , JS1414 ② ,JS1414Li ② G1/4-19 Y1 Y1 JS0808E,JS0808ELi ,JS0612E,JS0612ELi,JS0812E,JS0812ELi,JS1012E ① ① ① ① ② ② JS1012ELi ,JS1212E , JS1212ELi ,JS1414E ,JS1414ELi Y1 Y1 120bar 210bar JS07N·JS07·JS08·JS12·JS14...
-
Page 62: Maintenance Record
Maintenance Record Maintenance Record Date Note JS07N·JS07·JS08·JS12·JS14... - Page 63 Operator’s and Service Manual www.helichina.com Address/China Hefei Fangxing Avenue 668No Postcode/230000 2023/04 03 Edition Customer Service Hotline /4001-600761 Service Call/+86-551-63648005,63689000 Mailboxes/heli@helichina.com Copyright exclusive, infringement will be prosecuted...
Need help?
Do you have a question about the JS07N and is the answer not in the manual?
Questions and answers