Table of Contents
Advertisement
Quick Links
Advertisement
Table of Contents

Related Manuals for Panasonic QUICKDRAW MC-UG589


Summary of Contents for Panasonic QUICKDRAW MC-UG589
- Page 1 This Owner's Manual is provided and hosted by Appliance Factory Parts. PANASONIC MC-UG589 Owner's Manual Shop genuine replacement parts for PANASONIC MC-UG589 Find Your PANASONIC Vacuum Cleaner Parts - Select From 605 Models -------- Manual continues below --------...
- Page 2 VACUUM CLEANER Aspirateur Aspiradora MC-UG589 Operating Instructions Manuel d’utilisation Instrucciones de operación Before operating your vacuum cleaner, please read these instructions completely. Avant d’utiliser l’appareil, il est recommandé de lire attentivement ce manuel. Antes de usar su aspiradora, lea completamente estas instrucciones por favor.
- Page 3 Read and understand all instructions. TO OUR VALUED CUSTOMER We are very pleased to welcome you to the Panasonic family of products. Thank you for purchasing this product. Our intent is that you become one of our many satisfied customers.
-
Page 4: Important Safety Instructions
WARNING To reduce the risk of fire, electrical shock, injury: 1. Use your vacuum cleaner only as described in this manual. Use only with Panasonic recommended attachments. 2. Disconnect electrical supply before servicing or cleaning out the brush area. Failure to do so could result in the brush unexpectedly starting, causing personal injury from moving parts. -
Page 5: Table Of Contents
Guide de d TABLE OF CONTENTS CONSUMER INFORMATION ..................2 AVERTISSEMENT IMPORTANT SAFETY INSTRUCTIONS................5 PARTS IDENTIFICATION ....................10 FEATURE CHART......................11 Risque de chocs électriques ou lésions corpo Débrancher avant d’entretenir ou de nettoyer ASSEMBLY ........................12 provoquer des chocs électriques ou des lésio Attaching Handle ...................... -
Page 6: Parts Identification
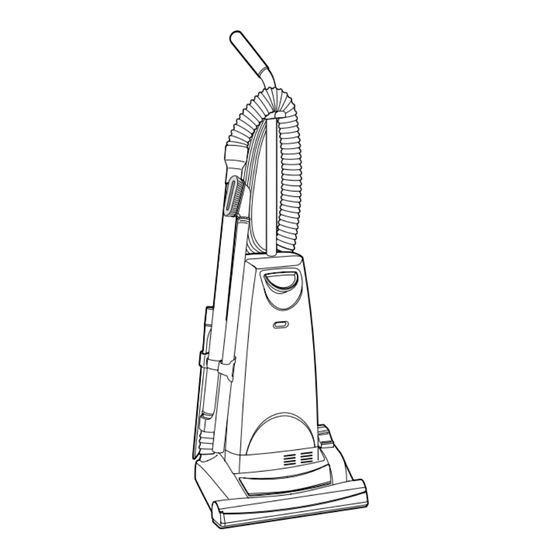
PARTS IDENTIFICATION Dégagement des obstructions Nomenclature Le tuyau situé à l’arrière de l’aspirateur Identificación de piezas transporte la poussière. En cas d’obstruction: Débrancher l’aspirateur. Ouvrir, en tirant, le couvercle d’entrée d’aspiration et vérifier qu'il n'y a pas d'obstruction. Séparer le tube du tuyau court et vérifier Hose Holder Porte-tuyau s’il y a obstruction dans l’un ou l’autre. -
Page 7: Feature Chart
FEATURE CHART Power Thermal Protector Cord Length Tools 10.7 m (35 Ft.) 120V AC(60Hz) Tableau des caractéristiques Protecteur thermique Longueur du cordon Alimentation Accessoires 10,7 m (35 pi) 120 V c.a. (60 Hz) D D i i a a g g r r a a m m a a d d e e c c a a r r a a c c t t e e r r í í s s t t i i c c a a s s P P r r o o t t e e c c t t o o r r t t e e r r m m a a l l V V o o l l t t a a j j e e E E x x t t e e n n s s i i ó... -
Page 8: Assembly
Assemblage de l’agitate ASSEMBLY Attaching Handle Brosse Cepillo Support de l’agitateur DO NOT plug in until assembly is Soporte del agitador Handle Hole complete. Filtre Manche Orifice Filtro Mango Orificio Bouchons Remove handle screw. Tapas del extremo Screw Insert handle. Tornillo Arbre d’entra Bride en E... -
Page 9: Using Cord Hook
Using Cord Hook Remplacement des brosses Remplacer les brosses lorsque leurs Detach plug head from power cord. poils ne touchent pas la surface d'une Cord Hook carte tenue contre la plaque inférieure. Crochet de Rotate cord hook down to release rangement cord. -
Page 10: Features
FEATURES Remplacement de la courroie Remettre l’agitateur en place. Automatic Self Adjusting Nozzle Refermer le couvercle arrière de la The nozzle of your Panasonic upright Shallow courroie et remettre le support de vacuum cleaner automatically Pile Carpet Nozzle l’agitateur. adjusts to any carpet pile height. -
Page 11: Thermal Protector
Nettoyer l'agitateur. Check dust bag when indicator indicates FULL. Enrouler la nouvelle courroie (de type UB8 Panasonic) autour de l’arbre du moteur et de la poulie de l’agitateur, If dust bag is full, change bag comme le montre l’illustration. according to CHANGING DUST BAG section. -
Page 12: To Operate Vacuum Cleaner
TO OPERATE VACUUM CLEANER AVERTISSEMENT Risque de chocs électriques ou de lésions corporelles. Power Cord Débrancher avant d’entretenir ou de nettoyer l’appa- NOTE: To reduce the risk of electrical shock, this vacuum cleaner has a polarized reil. L’omission de débrancher pourrait provoquer des plug, one blade is wider than the other. -
Page 13: Handle Adjustments
Panasonic de type U3 standard, U6 change handle position. électrostatique or U10 HEPA. Consulter un détaillant ou un centre de service Panasonic agréé pour l’achat de ces sacs à poussière. Soulever le loquet pour dégager le Move vacuum cleaner to upright couvercle du logement du sac à... -
Page 14: Routine Care Of Vacuum Cleaner
ROUTINE CARE OF VACUUM CLEANER Entretien de l’aspirateur Performing the following tasks will keep your new Panasonic vacuum cleaner operating at Les tâches décrites ci-dessous vous permettront peak performance levels and will ensure these high levels for years to come. Check the... -
Page 15: Changing Dust Bag
Changing Dust Bag Avec le pied, appuyer sur la pédale de Always operate vacuum cleaner with genuine Panasonic Type U3 Standard, U6 Electrostatic or réglage de l’inclinaison du boîtier pour U10 HEPA dust bags installed. Panasonic dust bags may be purchased through any mettre le boîtier à... -
Page 16: Removing And Installing Lower Plate
Fonctionnement WARNING Electrical Shock or Personal Injury Hazard Disconnect the electrical supply before servicing or cleaning the vacuum cleaner. Cordon d’alimentation Failure to do so could result in electrical shock or personal injury from vacuum cleaner suddenly starting. Remarque: Afin de prévenir tout risque de chocs électriques, cet appareil est muni d'une fiche secteur polarisée (lames de largeur différente). -
Page 17: Replacing Headlight Bulb
Eje del motor Clean agitator. remplacer selon les directives indiquées Carpet/Bare Floor Selector dans la section << Remplacement du Loop new belt (Panasonic Type UB8 Shaft sac à poussière >>. only) around motor shaft and Arbre d'entraînement du sélecteur agitator pulley; see illustration for Si le sac à... -
Page 18: Replacing Belt
Reinstall agitator back into nozzle Tête d’aspiration autoréglable housing grooves. Close rear belt cover and reinstall Cet aspirateur Panasonic incorpore un agitator holder. dispositif qui règle automatiquement la hauteur des brosses selon la longueur After reinstalling the agitator, turn it Groove des fibres de la moquette. -
Page 19: Replacing Brushes
Replacing Brushes Crochet de rangement du cordon When the bristles on the agitator are Détacher la fiche fixée au cordon Card worn so that they do not touch a card d'alimentation. Carte held across the lower plate, the Tarjeta brushes should be replaced. Tourner le crochet vers le bas pour libérer le cordon. -
Page 20: Agitator Assembly
Agitator Assembly Assemblage Montage du manche Brush Spacers (3) Brushes Ne brancher qu’une fois l’assemblage Agitator terminé. Holder Filter Retirer la vis du manche. Filter End Cap Insérer le manche. E-Clip End Cap Agitator Pulley Shaft Insérer la vis. Serrer la vis. Cleaning Exterior and Tools Unplug cord from wall outlet. -
Page 21: Removing Clogs
FEATURE Removing Clogs The hose located on the back of the Hose Power Thermal Protector vacuum cleaner carries the dirt from the Tuyau nozzle up to the dust bag. If the hose Manguera 120V AC(60Hz) should become clogged: Unplug vacuum cleaner. Cover Pull open suction inlet cover and Tableau des ca... -
Page 22: Before Requesting Service
BEFORE REQUESTING SERVICE Table des matières Renseignements importants ...... 3 WARNING Importantes mesures de sécurité ....6 Electrical Shock or Personal Injury Hazard Nomenclature ..........10 Tableau des caractéristiques ...... 11 Disconnect the electrical supply before servicing or cleaning the vacuum cleaner. Failure to do so could result in electrical shock or personal injury from vacuum Assemblage .......... -
Page 23: Warranty
Panasonic Platinum Series Vacuum Cleaner Limited Warranty Panasonic Consumer Electronics Company (collectively referred to as "the warrantor") will repair this product, in the event of a defect in materials or workmanship, with new or refurbished parts free of charge, in the U.S.A. or Puerto Rico, for the length of the period indicated on the chart below, from the date of original purchase. - Page 24 2. Disconnect electrical supply before servi do so could result in the brush unexpected Panasonic Canada Inc. warrants this product to be free from defects in material and workmanship and moving parts. agrees to replace the product for a period as stated below from the date of original purchase.
Need help?
Do you have a question about the QUICKDRAW MC-UG589 and is the answer not in the manual?
Questions and answers