Advertisement
Quick Links
IMPORTANT!! PLEASE READ ENTIRE
INSTRUCTION SHEET BEFORE ASSEMBLY!!
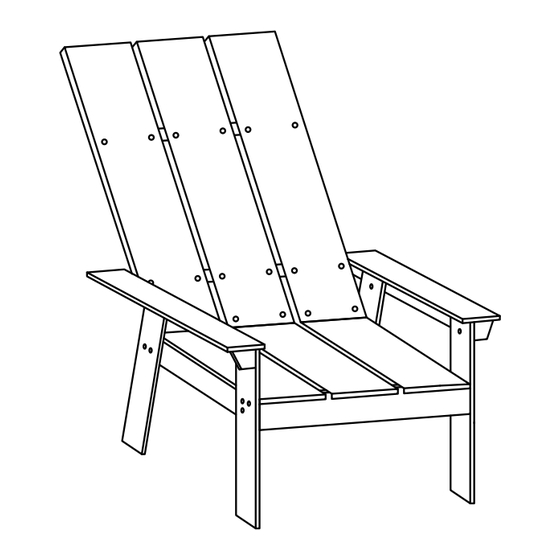
Layton Adriondack Chair
Identify all parts packed in the carton against the parts list. Remove all protective
materials. Place parts on a non-abrasive surface. If you are missing any parts or
Are unsure how to proceed with assembly, please call customer service center
Immediately at 844-836-4055 (Monday-Friday, 9: 00 am-5:00pm CST) or e-mail:
support@donglinusa.net
Do not attempt to assemble the product if any parts are missing or damaged .
A
Chair Back
B
Chair Seat
C
Rear Leg
D
Right Front Leg
E
Left Front Leg
F
Right Armrest
G
Left Armrest
Step 1
Place chair seat (B) on a flat, soft surface. Attach left front leg (E) & rear leg (C) to chair seat (B) by using
bolt (K) through each hole of the legs into the chair seat (B).
Repeat the step to attach right front leg(D) & rear leg (C) to chair seat.
C
C
K
K
D
K
K
Note: Do not fully tighten the bolts.
PART LIST
1
H
1/4" x 70mm Bolt
1
I
1/4" x 80mm Bolt
2
J
Nut
1
K
1/4" x 40mm Bolt
1
L
1/4" x 50mm Bolt
1
M
Allen Wrench
1
C
C
C
B
C
H
J
J
J
E
D
E
Step 2
Attach left armrest (G) & right armrest (F) to the front legs (D & E) and rear legs (C)
by using bolts (L) through each hole of the legs into the armrest (G & F).
Note: Do not fully tighten the bolts.
2
2
4
8
Step 3
4
Insert the nuts(J) into the hole of the bars on chair back (A).
Note: The threaded hole on the nut should be forward to the hole on the side of
1
the bars.
J
K
K
K
K
K
K
K
- 1 -
L
G
F
L
L
D
A
J
J
J
Make sure this hole faces outside.
J
L
E
Advertisement

Related Manuals for D&F DESIGN Layton

Summary of Contents for D&F DESIGN Layton
- Page 1 Attach left armrest (G) & right armrest (F) to the front legs (D & E) and rear legs (C) by using bolts (L) through each hole of the legs into the armrest (G & F). Layton Adriondack Chair Note: Do not fully tighten the bolts.
- Page 2 Step 4 Attach the bottom of chair back (A) to the seat frame by using bolts (I) through the each hole Now the chair is ready for your enjoyment. of the rear legs (C) and chair seat (B) into the bottom bar of chair back. Note: 1.
Need help?
Do you have a question about the Layton and is the answer not in the manual?
Questions and answers