LG LBC22520 Series Service Manual
Hide thumbs
Also See for LBC22520 Series:
- Specification sheet (2 pages) ,
- Owner's manual (68 pages) ,
- Service manual (49 pages)
Table of Contents
Advertisement
Quick Links
Advertisement
Table of Contents

Related Manuals for LG LBC22520 Series


Summary of Contents for LG LBC22520 Series
- Page 1 This Owner's Manual is provided and hosted by Appliance Factory Parts. LG LBC22520ST Owner's Manual Shop genuine replacement parts for LG LBC22520ST Find Your LG Refrigerator Parts - Select From 834 Models -------- Manual continues below --------...
- Page 2 REFRIGERATOR SERVICE MANUAL CAUTION BEFORE SERVICING THE PRODUCT, READ THE SAFETY PRECAUTIONS IN THIS MANUAL. Models : MODELS: LBC22520**...
-
Page 3: Table Of Contents
CONTENTS SAFETY PRECAUTIONS ................................ 1. SPECIFICATIONS ................................2. PARTS IDENTIFICATION ..............................3. DISASSEMBLY..................................3.1 Door ....................................3.2 Door Switch ..................................3.3 Fan and Fan Motor ................................3.4 Defrost Control Assembly ..............................3.5 Lamp ....................................3.6 Control Box refrigerator ..............................3.7 Multi Duct ..................................4. -
Page 4: Specifications
1. SPECIFICATIONS MODELS LBC22520** SPECIFICATIONS CAPACITY litre;(F/R/T) 195.98/438.97/634.95 DIMENSIONS in;(W*H*D) 32 7/8* 68 1/2* 34 WEIGHT kg HANDLE TYPE VISTA-Handle REVERSIBLE DOOR DOOR FINISH STAINLESS REFRIGERANT/gr R134a 120±3 ICE BANK SHELF WIRE BASKET DOOR PLASTIC(1) LAMP YES(1)/40w blue TRAY MEAT SHELF 4FIX MAGIC CRISPER... -
Page 5: Parts Identification
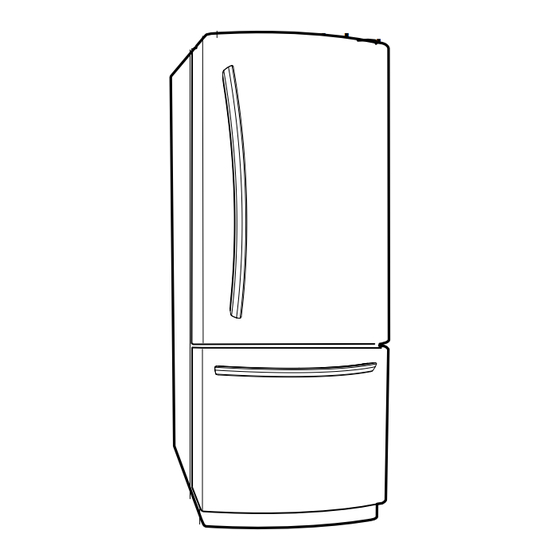
2. PARTS IDENTIFICATIONS PARTSANDFEATURES Use this section to become more familiar with the parts and features. NOTE: This guide covers several different models. The refrigerator you have purchased may have some or all of the items listed below. The locations of the features shown below may not match your model. Digital Sensor Control Dairy Bin Refrigerator Light... -
Page 6: Disassembly
3. DISASSEMBLY 3-1 DOOR Refrigerator Door Freezer Door • Remove the top hinge cover (1). •Lidt the door (10) slightly and remove it. • Remove the 3 screws and lift off the top hinge (2). • Loosen the 2 screws (11), the 2 screws (12), and lift off the •... -
Page 7: Fan And Fan Motor
3-3 FAN AND FAN MOTOR 3-5-1 Refrigerator Compartment Lamp 1. Remove the freezer shelf. (If your refrigerator has an 1. Unplug the power cord from the outlet. icemaker, remove the icemaker first) 2. Remove refrigerator shelves. 2. Remove the plastic guide for slides on left side by 3. -
Page 8: Adjsutment
4. ADJUSTMENT 4-2-3 PTC-Applied Circuit Diagram 4-1 COMPRESSOR Starting Method for the Motor 4-1-1 Role The compressor intakes low temperature and low pressure OVERLOAD PROTECTOR gas from the evaporator of the refrigerator and compresses this gas to high-temperature and high-pressure gas. In then delivers the condenser. -
Page 9: Olp (Overload Protector)
4-3 OLP (OVERLOAD PROTECTOR) 4-4 TO REMOVE THE COVER PTC 4-3-1 Definition of OLP (1) OLP (OVERLOAD PROTECTOR) is attached to the Compressor and protects the Motor by opening the circuit to the Motor if the temperature rises and activating the bimetal spring in the OLP. -
Page 10: Circuit Diagram
5. CIRCUIT DIAGRAM PWB(PCB) ASSEMBLY,DISPLAY CON101 STEPPING C-FAN F-FAN MOTOR PK WH BK YL CON5 CON6 CON4 CON8 RT-SENSOR PWB(PCB) ASSEMBLY, MAIN R-DOOR PERCEPTION S/W CON7 F-DOOR PERCEPTION S/W DEF-SENSOR R-SENSOR F-SENSOR POWER SUPPLY CON1 CON2 CON3 CORD GN/YL (GN) ICE MAKER PART GN/YL (GN) -
Page 11: Trobleshooting
6. TROUBLESHOOTING 6-1 COMPRESSOR AND ELECTRIC COMPONENTS (Reated Voltage Remove PTC-Starter Power Source. ±10%)? from Compressor and measure voltage between OLP terminal Terminals 5 or 6 of PTC. OLP disconnected? No Voltage. Replace OLP. Check connection condition. Reconnect. Applied voltage isn't Advise customer that in range of Rating power supply needs to be... -
Page 12: Ptc And Olp
6-2 PTC AND OLP Normal operation of Separate PTC-Starter Observation value is Compressor is from Compressor and 115V/60Hz : 6.8 ±30% measure resistance impossible or poor. between No. 5 and 6 of PTC-Starter with a Tester. (Figure 11) Replace PTC- The resistance value Starter. -
Page 13: Other Electrical Components
6-3 OTHER ELECTRICAL COMPONENTS Not cooling at all Check for open short or Compressor Cause incorrect resistance readings doesn't run. in the following components a. Starting devices Short, open, or broken. Poor contact b. OLP or shorted. Coil open or shorted. c. -
Page 14: Service Diagnosis Chart
6-4 SERVICE DIAGNOSIS CHART COMPLAINT POINTS TO BE CHECKED REMEDY No Cooling. • Is the power cord unplugged from the outlet? • Plug into the outlet. • Check if the power switch is set to OFF. • Set the switch to ON. •... -
Page 15: Refrigerator Cycle
6-5 REFRIGERATION CYCLE Troubleshooting Chart TEMPERATURE STATE OF STATE OF THE CAUSE REMARKS OF THE THE UNIT EVAPORATOR COMPRESSOR PARTIAL Freezer Low flowing sound of A little higher • Refrigerant level is low due LEAKAGE compartment and Refrigerant is heard and than ambient •... - Page 16 General Control of Refrigerating Cycle ITEMS UNIT STANDARDS PURPOSES REMARKS Pipe and Min. Pipe: within 1 hour. To protect The opening time should be reduced piping system Comp: within 10 minutes. moisture to a half of the standards during rain opening time Drier: within 20 minutes.
-
Page 17: Operation Principle And Repair Method Of Icemaker
7. OPERATION PRINCIPLE AND REPAIR METHOD OF ICEMAKER 7-1 OPERATION PRINCIPLE 7-1-1 Operation Principle of Icemaker Power On Start Position •Adjusts Ejector to Start Position with power on. Icemaking • Waits until water becomes cold after starting the Mode Icemaking operation. Harvest •... -
Page 18: Icemaker Functions
7-2 ICE MAKER FUNCTIONS 7-2-1 Ice Making Mode 1. Icemaking refers to the freezing of supplied water in the ice trays. Complete freezing is assured by measuring the temperature of the Tray with icemaking SENSOR. 2. Icemaking starts after completion of the water fill operation. 3. -
Page 19: Defect Diagnosis Functions
7-2-5 Function TEST 1. This is a compulsory operation for test, service, cleaning, etc. It is operated by pressing and holding the Cube Size button for 3 seconds. 2. The test works only in the Icemaking Mode. It cannot be entered from the Harvest or Fill mode. (If there is an ERROR, it can only be checked in the TEST mode.) 3. -
Page 20: Description Of Function & Circuit Of Micom
8. DESCRIPTION OF FUNCTION & CIRCUIT OF MICOM 8-1 FUNCTION 8-1-1 Function 1. When the appliance is plugged in, it is set to "4" for Refrigerator and "4" for freezer. You can adjust the Refrigerator and the Freezer control temperature by pressing the ADJUST button. 2. - Page 21 8-1-5 Alarm for Open Door 1. This feature sounds a buzzer when the freezer or refrigerator door is not closed within 1 minute after it is opened. 2. One minute after the door is opened, the buzzer sounds three times each for 1/2 seconds. These tones repeat every 30 seconds.
- Page 22 8-1-9 Defect Diagnosis Function 1. Automatic diagnosis makes servicing the refrigerator easy. 2. When a defect occurs, the buttons will not operate; but the tones. such as ding. will sound. 3. When the defect CODE removes the sign, it returns to normal operation (RESET). 4.
- Page 23 8-1-10 TEST Mode 1. The Test mode allows checking the PCB and the function of the product as well as finding out the defective part in case of an error. 2. The test mode is operated by pressing two buttons at Display panel. 3.
-
Page 24: Pcb Function
8-2 PCB FUNCTION 8-2-1 Power Circuit The secondary part of the TRANSFORMER is composed of the power supply for the display, the BLDC FAN Motor drive (15.5 V), the relay drive (12 Vdc) and the MICOM and IC (5 Vdc). The voltage for each part is as follows: PART VA 1... - Page 25 8-2-2 Oscillation Circuit This circuit generates the base clock for calculating time and the synchro clock for transmitting data from and to the inside logic elements of the IC1 (MICOM). Be sure to use specific replacement parts, since calculating time by the IC1 may be changed.
- Page 26 8-2-4 Load / Buzzer Drive & Open Door Detection Circuit 1. Load Drive Condition Check DEFROSTING COMP LAMP LOAD TYPE POWER MODE HEATER (OPTIONAL) Measurement Location (IC6) NO.14 NO.12 NO.11 NO.12 1V or below Condition 2. Fan motor driving circuit (freezing compartment fan) 1.
- Page 27 3. Cooling motor driving circuit (machine room) 1. This circuit makes standby power 0 by cutting off power supplied to Iss inside of the fan motor in the fan motor OFF. 2. This circuir prevents over-driving the fan motor by cutting off power applied to the fan motor in the lock of fan motor by sensing the operation RPM of the fan motor.
- Page 28 5. Open Door Detection Circuit Check REFRIGERATOR DOOR SWITCH FREEZER DOOR SWITCH Measurement Location Freezer/ (PIN NO.15 & PIN NO.14) Refrigerator Door Closed Open 8-2-5 Temperature Sensor Circuit FREEZER-SENSOR REFRIGERATOR-SENSOR DEFROST-SENSOR The upper CIRCUIT reads REFRIGERATOR temperature, FREEZER Temperature, and DEFROST-SENSOR temperature for defrosting and the indoor temperature for compensating for the surrounding temperature into MICOM.
- Page 29 8-2-6 Refrigeration Compartment Stepping Motor Damper Circuit * The circuit shown below is the damper circuit to regulate the refrigerator temperature. - 28 -...
- Page 30 8-2-7 Temperature Compensation & Overcooling/Undercooling Compensation Circuit 1. Refrigerator Temperature Compensation Table of Refrigerator temperature compensation. - 29 -...
- Page 31 8-2-8 Key Button Input & Display Light-On Circuit ? The circuit shown above determines whether a function control key on the operation display is pushed. It also turns on the corresponding function indication LED (LED Module) SEVEN SEGMENT DISPLAY (SEVEN SEGMENT DISPLA Y MODULE).
-
Page 32: Resistance Specification
8-3 RESISTANCE SPECIFICATION OF SENSOR TEMPERATURE DETECTED RESISTANCE OF FREEZER RESISTANCE OF REFRIGERATOR & BY SENSOR SENSOR DEFROST SENSOR & ROOM SENSOR -20º C 22.3 K 77 K Ω Ω -15º C 16.9 K Ω 60 K Ω -10º C 13.0 K Ω... -
Page 33: Troubleshooting
- 32 -... - Page 34 - 33 -...
-
Page 35: Main Pwb Assembly And Parts List
8-5 MAIN PWB ASSEMBLY AND PARTS LIST 8-5-1 Main PWB Assembly TOP VIEW BOTTOM VIEW - 34 -... - Page 36 8-5-2 Replacement Parts List - 35 -...
- Page 37 8-5-3 PWB Assembly, Display and Parts List - 36 -...
-
Page 38: Pwb Diagram
8-6 PWB DIAGRAM 8-6-1 PWB Main Assembly - 37 -... - Page 39 - 38 -...
-
Page 40: Exploded View & Replacement Parts List
#EV# 9. EXPLODED VIEW AND REPLACEMENT PARTS LIST CASE PARTS CAUTION: Use the part number to order part, not the position number 103A 281A 281B 103B 410A 409D 406B 503G 501F 503F 282E 282F 903D 503D 610A 145A 503C 501A 409B 503E 619B... - Page 41 #EV# FREEZER PARTS Caution: Use the part number to order part, not the position number 131A 149A 136C - 40 -...
- Page 42 #EV# REFRIGERATOR PARTS Caution: Use the part number to order part, not the position number. 143E 140B 140D 143E 140E 140B 140D 140E 143E 140B 140D 140E 143F 142D 140B 142E 103E 128A 170A 128B 167B 154A 151A 103E 155B 151A 151C...
- Page 43 #EV# DOOR PARTS CAUTION: Use the part number to order part, not the position number. 230A 241A 233A 231A 241B 286A 212G 281E 241C 244E 241E 244A 286A 241D 243A 205D 200A 203A 201A 281E 212A 243A 283F - 42 -...
- Page 44 #EV# ICE AND WATER PARTS CAUTION: Use the part number to order part, not the position number. 600C 602A 600A 622B 619C 618A 627A 616E 623A 619A 262D - 43 -...
- Page 45 #EV# LBC22520TT LOC NO PART NO DESCRIPTION LOC NO PART NO DESCRIPTION 103A 3650JJ2003H Handle,Rear 305C 4J04238A Pin,Common 103B 3650JJ2003D Handle,Rear 307A 2521JJ8008B Compressor,Set Assembly 103C 3551JJ1015H Cover Assembly,Lower 308A 6748JJ8005B Thermistor,PTC 103E 5218JJ3001A Rail,Slide 309A 6750JJ8004B Overload Protect 105A 5250JA2009B Tube,Drain 310A 3550JJ8003A...
- Page 46 #EV# LBC22520ST LOC NO PART NO DESCRIPTION LOC NO PART NO DESCRIPTION 103A 3650JJ2003H Handle,Rear 305C 4J04238A Pin,Common 103B 3650JJ2003D Handle,Rear 307A 2521JJ8008B Compressor,Set Assembly 103C 3551JJ1015H Cover Assembly,Lower 308A 6748JJ8005B Thermistor,PTC 103E 5218JJ3001A Rail,Slide 309A 6750JJ8004B Overload Protect 105A 5250JA2009B Tube,Drain 310A 3550JJ8003A...
- Page 47 #EV# LBC22520SW LOC NO PART NO DESCRIPTION LOC NO PART NO DESCRIPTION 103A 3650JJ2003E Handle,Rear 305B 4580JJ3001A Roller 103B 3650JJ2003A Handle,Rear 305C 4J04238A Pin,Common 103C 3551JJ1015B Cover Assembly,Lower 307A 2521JJ8008B Compressor,Set Assembly 103E 5218JJ3001A Rail,Slide 308A 6748JJ8005B Thermistor,PTC 105A 5250JA2009B Tube,Drain 309A 6750JJ8004B...
- Page 48 MFL49482602 March, 2008...
Need help?
Do you have a question about the LBC22520 Series and is the answer not in the manual?
Questions and answers