Advertisement
Quick Links
Advertisement

Summary of Contents for Owlet 117.0021
- Page 1 Smart Fan Assembly Guide...
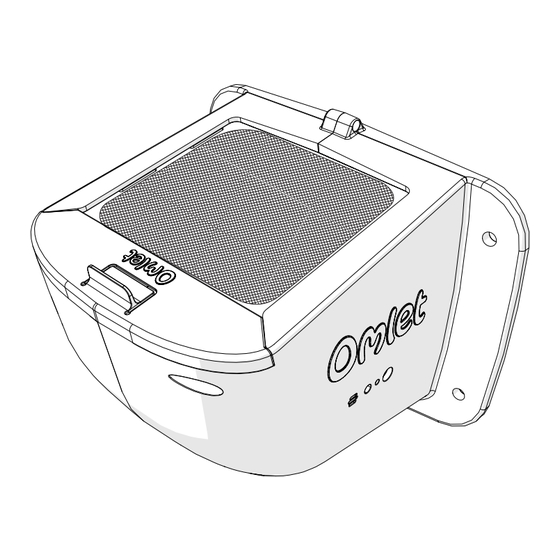
- Page 2 Important Information! Please read before use Thank you for buying an Omlet Smart Fan. It is designed for attachment to your Eglu Pro or to a wooden coop. The Smart Fan ensures a cool and comfortable environment for your chickens by ventilating stagnant hot air that builds up throughout the day, keep- ing the air fresh inside the coop.
- Page 3 Information importante! À lire avant utilisation Merci d’avoir acheté un Smart Fan Omlet. Ce produit est conçu pour être fixé à un poulail- ler Eglu Pro ou à un poulailler traditionnel en bois. Le Smart Fan assure un environnement frais et confortable pour vos poules en ventilant l’air chaud stagnant qui s’accumule tout au long de la journée, en maintenant l’air frais à...
- Page 4 Información importante. Por favor, leer antes de usar Gracias por comprar un Smart Fan de Omlet. Está diseñado para acoplarlo a tu Eglu Pro o a un gallinero de madera. El Smart Fan asegura un ambiente fresco y cómodo para tus gallinas ventilando el aire caliente que se acumula a lo largo del día, manteniendo así...
- Page 5 Viktig information! Läs innan du använder Tack för att du har köpt en Omlet Smart Fan. Den är designad för att fästas på din Eglu Pro eller på ett hönshus i trä. Denna Smart Fan säkerställer en sval och bekväm miljö för dina höns genom att ventilera stillastående varm luft som byggs upp under hela dagen, vilket håller luften fräsch inne i hönshuset.
- Page 6 Ważna informacja! Przeczytaj przed montażem Dziękujemy za zakup inteligentnego wentylatora Omlet Smart Fan. Przeznaczony jest do mocowania do Twojego Eglu Pro lub do drewnianego kurnika. Inteligentny wentylator zapewnia chłodne i wygodne środowisko dla kur, wentylując stojące gorące powietrze, które gromadzi się w ciągu dnia, utrzymując świeżość powietrza w kurniku. Podczas mon- tażu produktu prosimy o dokładne zapoznanie się...
- Page 7 Warning: Unplug cable before removing filter DE Warnhinweis: Ziehen Sie vor dem Entfernen des Filters das Kabel heraus. FR Avertissement : Débranchez le câble avant de retirer le filtre. NL Waarschuwing: ontkoppel de kabel voordat u het filter verwijdert. IT Attenzione: Scollegare il cavo prima di rimuovere il filtro. ES Advertencia: Desenchufe el cable antes de quitar el filtro.
- Page 8 DE Das haben Sie erhalten · FR Ce qui est fourni · NL Wat u heeft ontvangen IT Cosa avete ricevuto · ES Qué ha recibido · SE Vad du har fått DK Hvad du har modtaget · NO Hva du har fått · PL Co otrzymałaś/eś 117.0021 Boxed Smart Fan Smart Fan Inner Logo Plate...
- Page 9 117.0022 Boxed Fan Fixings Pack Wood Screw M6 x 12mm Wood Screw Cable Management 3.5x10mm Bolt 5x16mm Clamp 800.0515 800.0509 800.0353 117.1002 Screws provided are for wooden coops with a wall thickness above 3/8” (10mm). For thinner walls, follow recommendations for Step 9. DE Die mitgelieferten Schrauben sind für Holzställe mit einer Wandstärke von über 10 mm vorgesehen.
- Page 10 You will need... DE Das brauchen Sie... · FR Vous aurez besoin de... · NL Wat u nodig heeft... IT Avrai bisogno... · ES Necesitará... · SE Dubehöver... · DK Du skal bruge... NO Du vil trenge... · PL Czego potrzebujesz... For attachment to Eglu Pro DE Zur Befestigung am Eglu Pro.
- Page 11 How to attach your Smart Fan to your Eglu Pro or wooden coop DE Wie Sie Ihren Smart Fan am Eglu Pro oder an einem Holzstall befestigen. FR Comment fixer votre Smart Fan à un Eglu Pro ou à un poulailler en bois. NL Hoe bevestigt u de Smart Fan aan de Eglu Pro of een houten kippenhok.
- Page 12 Attaching to an Eglu Pro DE Befestigung am Eglu Pro. · FR Fixation à un poulailler Eglu Pro. NL Bevestigen aan de Eglu Pro. · IT Installazione a Eglu Pro. ES Fijación del gallinero a un Eglu Pro. · SE Anslut till en Eglu Pro. DK Fastgørelse til en Eglu Pro.
- Page 13 Roof removed in images for visual clarity DE Das Dach wurde in den Abbildungen für eine bessere Ansicht entfernt. FR Toit retiré dans les images pour plus de clarté. NL Dak verwijderd op de afbeeldingen voor visuele duidelijkheid . IT Il tetto è stato rimosso dalle immagini per una maggiore chiarezza visiva. ES Tejado eliminado en las imágenes para mayor claridad visual.
- Page 14 800.0353 117.0012...
- Page 15 114.1148 114.1130 Untighten and bend tabs to thread cable under channel cover, then retighten. 114.1130 Tray Runner removal optional for easier access. DE Lösen und biegen Sie die Laschen, um das Kabel unter die Kanalabdeckung zu führen, und ziehen Sie sie dann wieder fest. Für einen leichteren Zugang kann die Schubladenführung 114.1130 entfernt werden.
- Page 16 117.1008 117.1010 117.1003 117.1009 oder oder oder oppure oppure oppure eller eller eller...
- Page 17 117.1002...
- Page 18 Attaching to a Wooden Coop DE Befestigung an einem Holzstall. · FR Fixation à un poulailler en bois. NL Bevestigen aan een houten kippenhok. · IT Installazione a un pollaio in legno. ES Fijación a un gallinero de madera. · SE Fäst vid ett hönshus i trä. DK Fastgørelse til et træhus.
- Page 19 820.2680 Measure appropriate distance from the roof DE Messen Sie den korrekten Abstand zum Dach. FR Mesurez la distance appropriée par rapport au toit. NL Meet de juiste afstand vanaf het dak. IT Misurare una distanza adeguata dal tetto. ES Mida la distancia adecuada desde el tejado. SE Mät lämpligt avstånd från taket.
- Page 20 35/16” 56mm 35/32” 35/32” 28mm 28mm...
- Page 21 25/64” (10mm)
- Page 22 Sand edges smooth DE Schleifen Sie die Kanten glatt. · FR Poncez les bords pour qu’ils soient lisses. NL Schuur de randen glad. · IT Levigare i bordi in modo da renderli lisci. ES Lije los bordes para que queden lisos. · SE Sanda kanterna så att de blir släta. DK Slib kanterne glatte.
- Page 24 Drill pilot hole. Caution: Avoid drilling through wood DE Vorbohrung bohren. Vorsicht: Vermeiden Sie es, durch das Holz zu bohren. FR Percer un trou pilote. Attention : Évitez de percer le bois. NL Boor een geleidegat. Let op: vermijd door het hout heen te gaan. IT Praticare un foro pilota.
- Page 25 800.0509 A supporting sheet of wood is recommended for walls thinner than 3/8”(10mm) DE Für Wände, die dünner als 10 mm sind, wird eine stützende Holzplatte empfohlen. FR Il est recommandé d’utiliser une plaque de bois pour soutenir les murs d’une épaisseur inférieure à...
- Page 26 114.1135...
- Page 27 Drill pilot hole. Caution: Avoid drilling through wood DE Vorbohrung bohren. Vorsicht: Vermeiden Sie es, durch das Holz zu bohren. FR Percer un trou pilote. Attention : Évitez de percer le bois. NL Boor een geleidegat. Let op: vermijd door het hout heen te gaan.
- Page 28 800.0515 114.1136...
- Page 29 117.1002...
- Page 30 Maintenance of the Smart Fan DE Wartung des Smart Fans. · FR Entretien du Smart Fan. NL Onderhoud van de Smart Fan. · IT Manutenzione dello Smart Fan. ES Mantenimiento del Smart Fan. · SE Underhåll av Smart Fan. DK Vedligeholdelse af Smart Fan. · NO Vedlikehold av Smart Fan. PL Konserwacja wentylatora Smart Fan.
- Page 31 DE Entfernung des Staubfilters: 1. Ziehen Sie das Kabel des Ventilators heraus, bevor Sie das Filtergehäuse entfernen. 2. Ziehen Sie den Riegel, um den Filter zu entfernen. 3. Mit Druckluft oder Mikrofasertuch reinigen. 4. Setzen Sie den Filter wieder in das Gehäuse des Smart Fans ein. FR Dépoussiérage du filtre à...
- Page 32 Please À DÉPOSER À DÉPOSER Cet appareil, reuse & EN MAGASIN EN DÉCHÈTERIE ses accessoires recycle. et cordons se recyclent © Copyright Omlet Ltd. 2024 Design registered, patent pending Omlet is a registered trademark of Hebe Studio Ltd. 820.2701_Instruction Manual Smart Fan_17/05/2024...
Need help?
Do you have a question about the 117.0021 and is the answer not in the manual?
Questions and answers