Advertisement
Quick Links
Introduction
Summary
Before starting with actual labs, this will give you an overview of the Lego Mindstorms
NXT 2.0 kit and the RWTH Mindstorms NXT Toolbox for MATLAB.
A. MATLAB
B. RWTH Toolbox
C. Mindstorms NXT 2.0 kit
D. Basic robot
Required equipment
1) Lego Mindstorms NXT 2.0 kit
2) MATLAB 2010b (Windows) or 2010a (Mac) (32-bit)
3) RWTH NXT Toolbox for MATLAB (v4.07 or higher)
MATLAB
If MATLAB is not already installed on your computer, you can take it to CCIT and have
them install it for you. Be sure to ask for a 32-bit version. The RWTH Toolbox
requires installing additional software not described here to support 64-bit MATLAB.
For Mac users, the most recent version you will be able to use is 2010a. For Windows
users: 2010b. More recent versions are 64-bit only.
If you want to download and install MATLAB yourself, step-by-step instructions are
available on the course webpage under "RWTH Toolbox Setup Instructions."
RWTH Toolbox
The RWTH NXT Toolbox for MATLAB is available from:
http://www.mindstorms.rwth-aachen.de/trac/wiki/Download
Documentation may be found at:
http://www.mindstorms.rwth-aachen.de/trac/wiki/Documentation
Step-by-step instructions for installing the toolbox are available on the course webpage
under "RWTH Toolbox Setup Instructions."
Introduction
1
Advertisement

Summary of Contents for MATLAB LEGO Mindstorms NXT 2.0
- Page 1 3) RWTH NXT Toolbox for MATLAB (v4.07 or higher) MATLAB If MATLAB is not already installed on your computer, you can take it to CCIT and have them install it for you. Be sure to ask for a 32-bit version. The RWTH Toolbox requires installing additional software not described here to support 64-bit MATLAB.
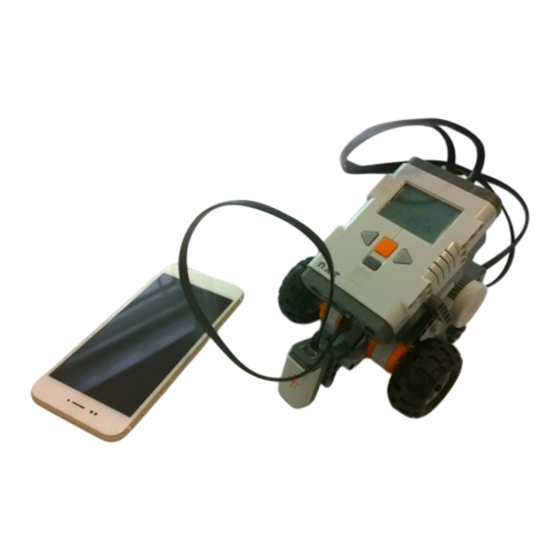
- Page 2 Mindstorms NXT 2.0 kit NXT Brick The NXT brick is the interface between MATLAB programs running on your computers and the robot. It can be connected to your computer via USB or Bluetooth and messages are passed back and forth between it and MATLAB to request sensor readings and control motors.
- Page 3 Sensors The Mindstorms NXT 2.0 kit comes with several different types of sensors. Touch Sensor The touch sensor allows the robot to sense when it is touching objects. It reads true or false indicating whether or not it is being pressed. The touch sensor can be used to detect if the robot has bumped into an obstacle or it can be used to have the robot perform an action on command.
- Page 4 Ultrasonic Sensor The ultrasonic sensor can be used to measure the distance to objects. It can be operated continuously or set to take snapshots when told to do so. The ultrasonic sensor could be used to have the robot avoid objects while moving around or to have the robot react to movement.
-
Page 5: Required Equipment
Lab 1: Connecting to the NXT Summary This lab will explain how to connect to your computer to the Lego Mindstorms NXT 2.0 brick using the RWTH Mindstorms NXT Toolbox for MATLAB. It will cover connecting via USB cable and Bluetooth. It will also explain how to work with the “handles”... - Page 6 Thus, you will need to create a separate .m file and enter your MATLAB commands in it. Then, you can run the entire file by clicking the “Run” button in the “Debug” menu of the MATLAB editor.
- Page 7 MOTOR_A, MOTOR_B, and MOTOR_C. To move one motor, run the following commands in MATLAB. Keep in mind that you must be connected to the NXT and have the default handle set for this to work. (See lab 1 for connection instructions) Create an NXTMotor instance for the motor on port B.
- Page 8 Keep in mind that MATLAB commands following SendToNXT will be executed while the motor is still in motion. This may not be desired. For example, if a robot was intended to move forwards and then backwards. Assume m_forward and m_backward are instances of NXTMotor which have already been set up appropriately.
- Page 9 m_forward.WaitFor() % Pauses until the motor finishes with m_forward m_backward.SendToNXT() m_backward.WaitFor() It is convenient to think of instances of the NXTMotor class as states of the motor or motors that they control. For example, if you were trying to program a robot that moved in a square pattern, you might create one instance of NXTMotor for the straight- line movement and another instance for the turning.
- Page 10 left_turn_r.SendToNXT() Try programming to robot to turn 180 degrees in place. There are three options for stopping a motor. You can use NXTMotor: m = NXTMotor( MOTOR_A ); m.Stop(); Also, there is a StopMotor function which does not require an NXTMotor instance. StopMotor( MOTOR_A, 'off' );...
- Page 11 m.SendToNXT() In most cases though, it is recommended that you use the NXTMotor class. It is both easier to use and provides more precise motor control. Part D: Figure eight This part of the lab will have you use what you’ve learned to move the robot in a figure eight pattern as shown below.
- Page 12 1) Lego Mindstorms NXT 2.0 kit 2) MATLAB 2010b (Windows) or 2010a (Mac) (32-bit) 3) RWTH NXT Toolbox for MATLAB (v4.07 or higher) Part A: Using the touch sensor The touch is very easy to use. It will return a 1 or 0 indicating whether it is being pressed or not.
- Page 13 Building Instructions Mount the touch sensor on the front of the robot. (See the lab manual introduction for instructions on how to build the base robot) Lab 3: Touch Sensor...
- Page 14 Assemble bumper and attach it to the touch sensor. Connect touch sensor to input port 1. Coding Instructions Open a new script in MATLAB and add the following code. First, open the touch sensors. OpenSwitch( SENSOR_1 ) Set up the NXTMotor instance to move the robot. It will just move forward until the sensor is pressed.
- Page 15 This is where the break statement comes in. When the touch sensor is pressed, the break statement will cause MATLAB to “break out” of the loop. Another way to exit an infinite loop is by pressing Ctrl+C. Sometimes though, this causes problems with the connection to the NXT, particularly when using Bluetooth.
- Page 16 Connect the touch sensors to input ports 1 and 2. Lab 3: Touch Sensor...
- Page 17 On the other hand, if the robot were programmed to follow a line, the path could be changed as often as desired with no reprogramming required. This lab will demonstrate a simple feedback control system using the Lego Mindstorms NXT 2.0 color sensor.
- Page 18 Building Instructions Mount the color sensor on the front of the robot. (See the lab manual introduction for instructions on how to build the base robot) Connect the color sensor to input port 1. Lab 4: Color Sensor...
- Page 19 Coding Instructions To use the color sensor, use the following code. OpenNXT2Color( SENSOR_1, 'FULL' ) % Puts the sensor in color mode GetNXT2Color( SENSOR_1 ) % Returns the color as a string CloseSensor( SENSOR_1 ) % After you are finished To use the color sensor as a light sensor, OpenNXT2Color( SENSOR_1, 'RED' ) GetNXT2Color( SENSOR_1 )
- Page 20 This position data can be used to have the robot keep itself on the line by having turning left when a white to black transition is detected and right when a black to white transition is detected. Notice that this will only work if the robot is on the left edge of the line.
- Page 21 Place the robot on the black line pointed in the clockwise direction and run the program. Questions to Consider a) How well did the robot follow the line along the straight edges? Along the curves? b) Turn the robot so that it is facing counterclockwise around the loop. How well does it follow the inside edge of the loop like this? Part C: Analog sensor feedback The precision of the line following program can be improved by using the color sensor...
- Page 22 Required equipment 1) Lego Mindstorms NXT 2.0 kit 2) MATLAB 2010b (Windows) or 2010a (Mac) (32-bit) 3) RWTH NXT Toolbox for MATLAB (v4.07 or higher) Part A: Using the ultrasonic sensor Building Instructions Mount the ultrasonic sensor on the front of the robot. (See the lab manual introduction...
- Page 23 Connect the ultrasonic sensor to input port 1. Coding Instructions The easiest way to use the ultrasonic sensor is in continuous mode. In this mode, it will continuously send out pings and measure echoes. To use it this way, run the following commands: OpenUltrasonic( SENSOR_1 ) % Turn on the sensor pause( 0.1 )
- Page 24 USMakeSnapshot( SENSOR_1 ) pause( 0.1 ) echoes = USGetSnapshotResults( SENSOR_1 ) echoes(1) The USMakeSnapshot function sends out a single ping and records up to eight echoes. The USGetSnapshotResults function returns the measured distances for those eight echoes. Usually, the first one is the most accurate. In either mode, the distance returned will be -1 if there was some error getting a reading, or 255 if the surface was out of range or didn’t reflect any sound.
- Page 25 Part C: Wall follower The ultrasonic sensor can be used as a feedback control system just as the color sensor was in lab 4. In this case, however, the robot can be made to follow a wall instead of a line. Create a program to have the robot follow a wall, staying a given distance away from it.
- Page 26 Attach brackets to NXT block Lab 5: Ultrasonic Sensor...
- Page 27 Attach sensor mount to NXT Lab 5: Ultrasonic Sensor...
Need help?
Do you have a question about the LEGO Mindstorms NXT 2.0 and is the answer not in the manual?
Questions and answers