
Summary of Contents for Brandon Basics CYPRESS B07MHV54FL
- Page 1 OWNERS MANUAL INSTALLATION & OPERATION B B B B B B B A S ELECTRIC TOWEL WARMERS CYPRESS COLLECTION Rev 9.0 ECO FRIENDLY BUILT-IN TIMER SAE 304 IP56 RATED 120v / 190W DESIGNED SPACE SAVINGS...
-
Page 2: Important Instructions
THANK YOU! Thank you for purchasing the Brandon Basics Towel Warmer. We know you will enjoy the aesthetic beauty of this product as well as the luxury of warm, dry towels. Not only that, but our warmer will greatly reduce bacteria growth on your towels by quickly eliminating the moisture that bacteria thrives on. -
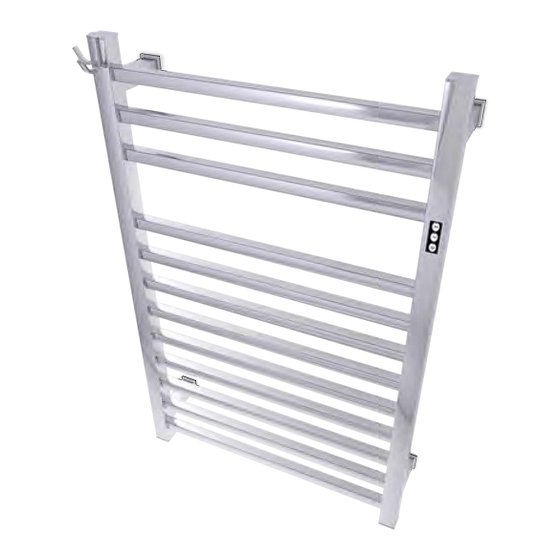
Page 3: Parts List
PARTS LIST DESCRIPTION DESCRIPTION Drywall Anchors Bypass Switch (used when installing in drywall) (turn ON to use your own timer) Built-in Timer Control Garment Hook (optional but included) (on/o , 1hr & 2 hr buttons) Leg Bolt Hex Key Power Cord (supplies power to the towel warmer) (secures Leg Mounts to warmer) Set Screw Hex Key... -
Page 4: Specifications
SPECIFICATIONS NOTE: SQUARE BAR WARMERS Slight dimensional variations may The garment hook will extend the width and depth of occur in production so avoid the warmer by 1.75” on the left side. installing strictly based on the ⁄ ” dimensions below. Please follow all installation instructions which ⁄... -
Page 5: Installation Options
INSTALLATION OPTIONS The unit can either be plugged into a wall outlet or hard-wired to a power source inside the wall cavity. In each case you can either use the Built-In Timer Control on the unit or use your own controller. The Bypass Switch must be set correctly for each option to work correctly (see below). - Page 6 PREP UNIT INSTALL LEGS ATTACH 3 STANDARD LEGS Bottom of Warmer Leg Mounts Leg Bolts Leg Inserts Attach the 3 by inserting the and their washers into the side of the leg and securing to the warmer using the Leg Bolt Hex Key .
- Page 7 DETERMINE INSTALLATION SITE INSTALL SITE CONSIDERATIONS LOCATION & HEIGHT CONSIDERATIONS When determining the install site, it’s a good practice to temporarily lean the warmer against the wall at the desired location and height by placing the warmer on books or other household items for easy adjustment.
- Page 8 MOUNT WARMER PLUG-IN The following 2 steps are for the Plugin option. Skip to page 8 if you are installing the hard-wired option. FOR LEGS THAT WILL BE SCREWED INTO WALL STUDS For legs aligned with a wall stud, there is no need to drill a hole. Simply place Wall Screw into a Wall Flange...
- Page 9 INSTALL HARD-WIRED OPTION ATTACH POWER LEG HARD-WIRED THREAD POWER CORD THROUGH LEG Remove the Power Leg Mount using the Leg Bolt Hex Key . Cut the power cord near the plug and pull o the Leg Grommet . Thread the cord through the power leg. Insert the Power Leg Bolt and washer from the opposite end through the internal bracket.
- Page 10 MOUNT WARMER (HARD-WIRED OPTION) For installations that DO NOT require a junction box, follow these instructions. Skip to page 10 for installations that require a junction box. HARD-WIRED NO JUNCTION BOX INSTALL INSTALL POWER LEG FLANGE Power Cord For this option, the cut is passed Wall Bushing through the...
- Page 11 MOUNT WARMER (HARD-WIRED OPTION) For installations that require a junction box, follow these instructions. The junction box is not included with the product. HARD-WIRED JUNCTION BOX INSTALL PREP WALL & ROUGH IN Using the existing markings for the power leg, center the junction box pro le over the markings, mark and cut out the wall section.
- Page 12 WIRING OPTIONS (HARD-WIRED OPTION) HARD-WIRING INTO EXISTING CIRCUITS HARD-WIRED The following are samples for hard-wiring your warmer to existing circuits in your home (your circuits may be di er). Before wiring, turn o the corresponding circuit breaker and use an electrical tester to ensure no voltage/current is detected.
-
Page 13: Operation
OPERATION Controlling the Brandon Basics towel warmer is dependent upon the type of installation performed. Both installation types are explained below: USING THE BUILT-IN CONTROL BUTTONS Built-In Timer Control If you want to use the unit’s , then the unit... - Page 14 HANGING TOWELS The Brandon Basics towel warmer has 12 rails for e cient heating & warming. The following are examples of how your towels can be hung. Avoid stacking more than two folded towels to prevent overheating of the warmer. The warmer temperature increases when towels are stacked.
-
Page 15: Care And Maintenance
Use only clean towels on the warmer to avoid towel discoloration. Dirt, makeup, detergent residue or other contaminants will heat up and appear scorched on the towels. This discoloration is simply the discoloration of the contaminant which Brandon Basics cannot be held liable for. CLEANING MAINTENANCE Turn o the warmer and wait for the unit to cool before cleaning. -
Page 16: Warranty
1 Year: Electrical and electronic components The determination of such a defect must be made by Brandon Basics. A suspected defect must be reported immediately upon discovery. EQUIPMENT WARRANTY EXCLUSIONS...
Need help?
Do you have a question about the CYPRESS B07MHV54FL and is the answer not in the manual?
Questions and answers