Table of Contents
Advertisement
Quick Links
Advertisement
Table of Contents

Subscribe to Our Youtube Channel
Related Manuals for Talkpod A36plus MAX


Summary of Contents for Talkpod A36plus MAX
- Page 1 A36plus MAX VHF/UHF DUAL BANDTRANSCEIVERS This device complies with Part 15 of the FCC Rules. Operation is subject to the condition that it does not cause harmful interference. This regulation applies to models A36 plus MAX. Talkpod Technology Co., Ltd...
-
Page 2: Features
Thank you for choosingthis TALKPOD product. This product is designed and built with TALKPOD state of the art technology and craftsmanship. With proper care, this product should provide you with years of Trouble-free operation IMPORTANT READ ALL INSTRUCTIONS carefully and completely before using the transceiver. -
Page 3: Supplied Accessories
DANGER! NEVER use or charge TALKPOD battery packs with non-TALKPOD transceivers or non- TALKPOD chargers. Only TALKPOD battery packs are tested and approved for use with TALKPOD transceivers or charged with TALKPOD chargers. Using third-party or counterfeit battery packs or chargers may cause smoke, IP54, or cause the battery to burst. - Page 4 WARNING! NEVER hold the transceiver so that the antenna is very close to, or touching exposed parts of the body, especially the face or eyes, while transmitting. WARNING! NEVER operate or touch the transceiver with wet hands. This could cause an electric shock or damage the transceiver.
- Page 5 Precautions (Continued) BE CAREFUL! The transceiver meets IP56* requirements for dust tight and waterproof protection. However, once the transceiver has been dropped, waterproof protection cannot be guaranteed because of possible damage to the transceiver's case or waterproof seal. * Only when the battery pack, fexible antenna,and jack cover are attached. Even when the transceiver power is OFF, a slight current still fows in the circuits.
- Page 6 CAUTION: DO NOT use the battery if it emits an abnormal odor, heats up, or is discolored or. deformed If any of these conditions occur, contact your TALKPOD dealer or distributor. CAUTION: DO NOT use the battery pack out of the specifed temperature range -20°C ~ +60°C(-4°F ~ +140°F).
-
Page 7: Fcc Information
CAUTION: DO NOT charge the battery pack outside of the specified temperature range: 10°C ~ 40°C (50°F ~ 104°F). TALKPOD recommends charging the pack at 25°C (77°F). The pack may heat up or rupture if charged out of the specified temperature range. Additionally, battery performance or battery life may be reduced. - Page 8 · Force majeure, including, but not limited to, fires, earthquakes, storms, floods, lightning, or other natural disasters, disturbances, riots, war, or radioactive contamination · The use of T ALKPOD transceivers with any equipment that is not manufactured or approved by TALKPOD.
-
Page 9: Table Of Contents
TABLE OF CONTENTS Important ..........Enable Your S-Meter Display ....Features ..........S-Meter Display Explanation ....Explicit defnitions ......Lock Function ..........Supplied accessories ....... Using The Single Display Mode ....Precautions ........II-IV Set the Menu Battery Cautions ....... IV-VI Using the Basic Menu Setting .... -
Page 10: Panel Description
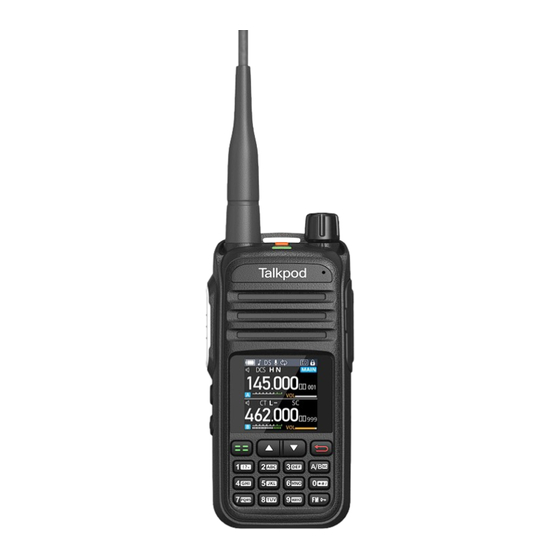
PANEL DESCRIPTION 1. AntennaInterface: SMA antenna interface, used for installing the provided antenna or other brand antennas compatible with the SMA interface. 2 . Sta t us I n dica to r Lig ht : Illuminates red during transmission and green when a signal is received. 3 . -
Page 11: Display Description
DISPLAY DESCRIPTION BATTERY STATUS Icon The battery has sufficient capacity. The battery is exhausted a little. The battery is nearing exhaustion. The battery is almost fully exhausted. Immediately charge thebattery pack. *After a while, the icon blinks and the transceiver will beturned OFF. Icon Function Descri... - Page 12 Icon Funct io n Descri ption In frequency mode. Enables side tone, indicating that the transceiver emits a tone when transmitting Tone DTMF signals. Enables dual-band standby function, which can simultaneously monitor the two frequencies or channels displayed in standby mode. Enables voice-activated transmission function, which activates transmission when the microphone s sound pressure level reaches the set value.
-
Page 13: Attach/Detach The Battery
ATTACH/DETACH THE BATTERY Attach or detach the battery pack, as illustrated below. Battery Installation: Align the battery with the two small notches at the bottom of the walkie-talkie casing. Press the battery towards the metal plate. Simultaneously press down on the small sliders located on the left and right sides at the top (marked with arrow symbols) until you hear a''... -
Page 14: Charging Time
CHARGING TIME Charging Instructions: *Approximately 8 hours for the A36Plus Insert the charger's power plug into a 120V AC outlet. Ensure that the charging indicator light turns red, signaling that charging has begun. Charging typically takes about 8 hours. When the indicator light turns green, it indicates that the Place the battery or the walkie-talkie battery is fully charged. -
Page 15: Belt Clip
BELT CLIP Attaching the Belt Clip: Detaching the Belt Clip: Remove the battery. Slide the Remove the battery. Press on the elastic plastic belt clip into the smooth slot on the part in the middle of the belt clip towards the back of the battery. -
Page 16: Power Switch/Volume Control
POWER SWITCH / VOLUME CONTROL Volume Adjustment: Power Switch Operation To turn on the walkie-talkie, rotate the The volume control knob is the same as the power switch knob clockwise. switch knob. Rotate it clockwise to increase the volume and counterclockwise to decrease it. To turn off the If background noise is walkie-talkie, rotate... -
Page 17: Basic Operation Receiving
BASIC OPERATION Receiving The following are basic settings for receiving. · Adjusting the squelch level (p. 9) · Selecting the Frequency selecting mode (p. 10) · Selecting the operating band (p. 11) · Selecting the operating mode (p. 11) · Setting a frequency (p. 12) Adjusting Your Squelch The noise squelch function allows audio to be heard only when receiving signals that are above a set threshold. -
Page 18: Selecting The Frequency Mode
Note: The principle of setting the squelch level is based on the environment and requirements of use. When a greater communication distance is required, which weakens the received signals, a higher sensitivity is needed, and thus a lower squelch level should be set; for example, set to Level 1. For shorter communication distances with stronger received signals, sensitivity can be decreased by setting a higher squelch level, which reduces noise;... -
Page 19: Monitor Function
Monitor Function The Monitor function is used to listen to weak signals without changing the squelc setting. Press and hold [Side Key 3] to enter Monitor mode (instant squelch open). NOTE: While monitoring, the transmission light on top of the intercom glows green. Long Press Selecting the operating band Select the operating band in the VFO mode, as shown below. -
Page 20: Using The Fm Radio Function
Using the FM Radio Function In standby mode, press the [FM Key] to enter Radio Mode. In this mode, you can use the up and down keys to change the reception frequency, or directly enter the desired frequency. [ FM ] Short press Press [AB] briefly to search for the next frequency. -
Page 21: Fm Scan Function
FM Scan Function The A36Plus supports changing the FM frequency range for scanning, helping you find the range you want. In standby mode, press the [FM Key] to enter Radio Mode. Press the [Menu] Key to Enter the FM Menu, which supports FM Scan Function and FM Channel Save Function. -
Page 22: Exit Set Mode
Exit Set Mode Push [Back] to exit the Set mode. Short press Detailed Tuning Steps and Their Uses Tuning Step (kHz) Typical Use Fine tuning for precision frequency control Standard amateur radio frequency steps 12.5 Common for land mobile radio systems Slightly broader tuning for quick adjustments Useful for commercial broadcasting tuning Standard public service band tuning... -
Page 23: Set A Frequency
Setting a Frequency Select VFO Mode Repeatedly press the MENU Button to select the VFO mode. Set Frequency Use the ten-key pad to directly input the desired frequency. Example:Set 433.580 MHz To set 433.580 MHz, press [4], [3], [3], [5], [8], [0]. 433580 Long Press Change Frequency... -
Page 24: Transmitting
Transmitting Making a simplex call WARNING!NEVER transmit for long periods of time. During prolonged transmissions at high power or mid-power, the transceiver radiates heat to protect itself from overheating. The transceiver's chassis will become hot and may cause a burn.To prevent the transceiver's overheating, the default setting of the time-out timer function is set to 5 minutes. - Page 25 Short press ·Note: Select a power level that suits your operating requirements. ·When selecting medium or low power, is displayed. ·When selecting high power, the power icon shows Hold down the [PTT] button to transmit, and speak into the microphone at your normal voice level.
-
Page 26: Introduction To S-Meter Display
Introduction to S-Meter Display The S-Meter display function indicates the strength and readability of the received signal. By enabling this feature, users can get a more intuitive understanding of signal quality, allowing for effective communication adjustments. Enable Your S-Meter Display Press the menu button and choose the menu option 49. -
Page 27: Lock Function
Lock Function The lock function prevents accidental frequency changes and unnecessary function access. Lock Your Radio Hold down the [FM] key until you hear a voice prompt to toggle the Key Lock function ON or OFF. When activated, the screen displays a '' '' icon [ FM ] ote:... -
Page 28: Using The Basic Menu Setting
USING THE MENU You can use the Menu to set infrequently changed values or function settings. The transceiver has two types of Menu modes, as shown below. Using the Basic Menu Setting Example: Selecting a 25 kHz tuning step The Menu interface is now displayed. Press the Menu button. -
Page 29: Set Mode Items
Set mode items Number Menu Sub-menu (Options) Menu Description High Power High power transmission on the current frequency or channel. Medium Power Medium power transmission on the current frequency or channel. Low Power Low power transmission on the current frequency or channel Squelch levels range from 0 to 9, with lower levels being more prone to interference and higher levels having reduced sensitivity. - Page 30 Menu Description Numbe Menu Sub-menu (Options) Directly input frequencies In frequency mode, the difference between the transmit and receive frequencies from 00.000 to 99.995 can be adjusted (whether an offset is applied is controlled by the offset direction using the keyboard. setting).
- Page 31 Menu Description Number Menu Sub-menu (Options) The MAIN icon indicates which frequency or channel will be transmitted. If【 Side Key 2 】is set to PTT B, this function is disabled. Regardless of where the MAIN icon is selected, transmission occurs only on the frequency or channel of Segment A.
- Page 32 Menu Description Number Menu Sub-menu (Options) Turn off DTMF encoding. Press PTT to encode Press the PTT button to transmit a DTMF code. DTMF CODE Encode simultaneously Press and release the PTT button to transmit a DTMF code. Release PTT to encode Release the PTT button to transmit a DTMF code.
- Page 33 Menu Description Number Menu Sub-menu (Options) No beep after receiving. If the transmitting device activates the tail tone elimination feature, the receiver GSTAR will hear a simulated GSTAR signal beep. If this feature is not activated, the TAIL receiver will first hear the persistent click sound. FM Radio Activates the FM radio function.
- Page 34 Menu Description Number Menu Sub-menu (Options) FM Radio Activates FM radio function. Transmit Power Switch between high and low power. Scan Scan frequencies or channels. Turn off power-saving mode. Normal Saving Engage standard power-saving. SAVE Super Saving Engage enhanced power-saving. Deep Saving Engage maximum power-saving.
- Page 35 Turn off Chinese voice prompts during menu operations. VOICE Enable Chinese voice prompts during menu operations. POWER Default Icon Default to Talkpod logo. Battery Voltage Display current battery voltage. MENU 5s、10s、15s、20s Set the duration after which the system automatically exits to standby mode EXIT 25s、30s、35s、40s...
-
Page 36: Entering Memory Channels
Entering Memory channels The transceiver has a total of 999 Memory channels to save often-used frequencies. In the Memory mode, you can quickly select the saved memories. This section describes the basic channel content entry. xample: Entering 145.800 MHz into Channel 11 Press and hold the menu button to switch to VFO mode. -
Page 37: Scan Function Scanning In The Vfo Mode
SCANNING FUNCTION Scanning is a versatile function that can automatically search for signals. A scan makes it easier to locate stations to contact or listen to, or to skip unwanted channels or frequencies. This section describes the basic scan operation. See the Advanced manual for details. Example: Scanning in VFO Mode Hold on MENU Key to select the VFO mode. -
Page 38: How To Set These Mode
Search (SE) Mode: The radio exits scanning and stays on the frequency when it detects a signal. How To Set These Mode: Press The Menu Button. Press The ''Up'' Button multiple times to Menu Option 42. Use the ''Up & Down'' to choose your scan function. Press the ''MENU''to save your choice. -
Page 39: Dtmf Code
DTMF CODE Dual-tone multi-frequency (DTMF) signaling is a method used for telecommunication signaling over analog telephone lines. It is employed for various applications including automated dialing, remote control of systems, and as an access method for secure communications. Each DTMF code is a combination of two specific frequencies, representing a unique digit or character, enabling precise and reliable command transmission. -
Page 40: Sub-Audio
SUB-AUDIO CTCSS (Continuous Tone Coded Squelch System) is a technology that adds a frequency (67-254.1Hz) lower than the audio frequency to the audio signal for transmission. It is also known as sub- audio because its frequency range is below the standard audio, i.e., less than 300Hz. -
Page 41: Super Mode
Please observe the relevant laws and regulations, and you must replace the corresponding shortwave antenna when using 18-30MHz. This mode only work in Talkpod A36Plus MAX RESETTING If the transceiver has a malfunction caused by an external factor such as static electricity, reset it using the Partial Reset or All Reset function. -
Page 42: Edit Your Radio Name
Edit Your Radio Name( Only Avaliable in A36Max) Example: Setting your walkie-talkie name to Talkpod Press the Menu key and select menu 55 Press the Menu key and enter T, A, L, K, P, O, D. -
Page 43: Common Issues
COMMON ISSUES Issue Description Reason Description This function is not available in software versions prior to V1.13. If needed, you can No receive end tone function upgrade tosoftware version V1.14 or later. No DC1200 signaling end tone on the The repeater failed to decode the signaling. Please confirm if the repeater has repeater. -
Page 44: Information
Fault Description Analysis Solution Too far away from other members Get closer to other members. during communication. Excessive background Poor location, such as being obstructed Move to an open and flat area, then retry noise. by tall buildings or being in a basement. - Page 45 Modes: M13B5UV3 The number of Memory channels: 999 channels –20°C ~ +60°C, –4°F ~ +140°F Usable temperature range: Tuning steps: 2.5 5.0 6.25 10.0 12.5 20.0 25.0 50.0 kHz ±2.5 ppm Frequency stability: (–20°C ~ +60°C, –4°F ~ +140°F) Power supply: 7.2 V DC nominal Current drain: Transmit...
- Page 46 About CE and DOC Hereby, Talkpod Inc. declares that the versions of A36Plus which have the ''CE'' symbo on the product comply with the essential requirements of the Radio Equipment Directive, 2014/53/EU, and the restriction of the use of certain hazardous substances in electrical and electronic equipment Directive, 2011/65/EU.
Need help?
Do you have a question about the A36plus MAX and is the answer not in the manual?
Questions and answers