Advertisement
Quick Links
C O N T E N T S
1 X ROCKSTAR BODY
4 x Screws
V O L T A G E
F U RN I T URE
240 V, 50 Hz
ROCKSTAR BAR
INSTALL ATION MANUAL
C A R E I N S T R U C T I O N S
Use mild detergent and soft damp cloth.
I M P O R T A N T S A F E T Y I N S T R U C T I O N S
This appliance is not to be used by persons (including children) with reduced physical, sensory or mental capabili-
ties, or lack of experience and knowledge, unless under strict supervision by a capable adult.
This appliance is not to be used by children.
If the external cable or cord of this product is damaged it should be replaced by the manufacturer or his service
agent in order to avoid a hazard.
Buster and Punch encourages all of its customers to make note of this symbol and avoid
putting any waste electrical goods in your domestic waste bin or container. Please ensure
you take your waste electrical goods to a suitable facility for disposal.
B U S T E R A N D P U N C H . C O M
L 0042
Advertisement

Related Manuals for Buster+Punch ROCKSTAR BAR


Summary of Contents for Buster+Punch ROCKSTAR BAR
- Page 1 V O L T A G E F U RN I T URE 240 V, 50 Hz ROCKSTAR BAR INSTALL ATION MANUAL C A R E I N S T R U C T I O N S Use mild detergent and soft damp cloth.
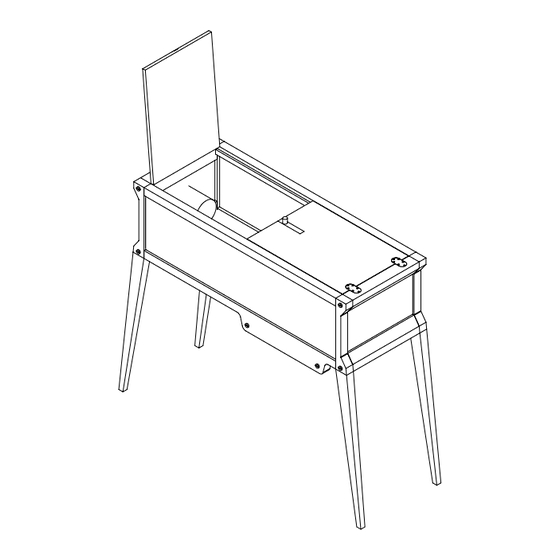
- Page 2 TH E ROC K S TAR B A R / I N STA L L AT I ON ENSURING THE SCREWS ARE PROPERLY INSTALLED, CAREFULLY STAND THE ROCKSTAR UPRIGHT. Using a sheet for protection underneath, keep the rockstar on its back. Carefully fold out the legs, making sure the metal plate is flush against the timber.
- Page 3 FEED LIGHT FITTING THROUGH HOLE IN THE SIDE OF THE BAR. RE-ATTACH METAL RING BACK ONTO THE LIGHT FITTING, THROUGH THE METAL CAGE. FIX LIGHT BULB INTO LIGHT FITTING, AND CLOSE CAGE LID FOR SAFETY. PLUG IN THE LIGHT CABLE. CONGRATULATIONS, YOU’RE A ROCKSTAR! [end.
Need help?
Do you have a question about the ROCKSTAR BAR and is the answer not in the manual?
Questions and answers