Table of Contents
Advertisement
Quick Links
Advertisement
Table of Contents

Related Manuals for Harman Martin JEM AF-1 MkII


Summary of Contents for Harman Martin JEM AF-1 MkII
- Page 1 READ AND SAVE THESE INSTRUCTIONS USER MANUAL...
- Page 2 DIMENSIONS All dimensions are in millimeters AF-1 Mkll ◄ ► AF-2 � 7 50-- -� _ 1 � �-- 7 00 ____ _, o � L ..__. JEM AF-1 mk11 & JEM AF-2 User manual, P/N 35000166 Rev. H...
-
Page 3: Table Of Contents
©2021 HARMAN PROFESSIONAL DENMARK ApS. All rights reserved. Features, specifications and appearance are subject to change without notice. HARMAN PROFESSIONAL DENMARK ApS and all affiliated companies disclaim liability for any injury, damage, direct or indirect loss, consequential or economic loss or any other loss occasioned by ®... - Page 5 AF-2™ EU model a – Remote in b – Power inlet c – Main fuseholder d – DMX out (5-pin XLR) e – DMX in (5-pin XLR) f – DMX out (3-pin XLR) g – DMX in (3-pin XLR) h – DIP switch i –...
-
Page 6: Introduction
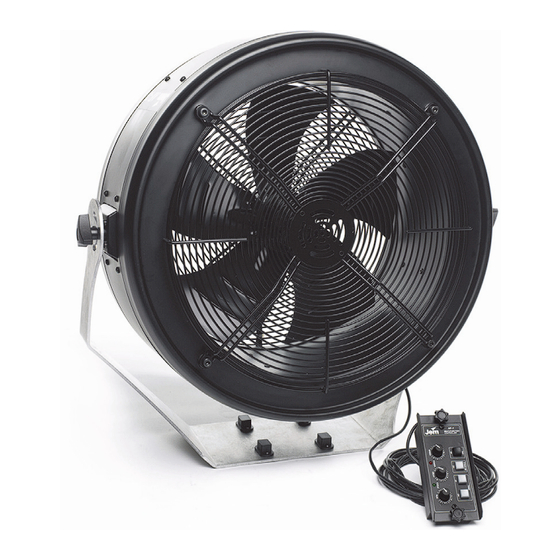
NTRODUCTION Thank you for selecting a Jem AF series fan. The AF-1 MkII™ and AF-2™ fans are powerful machines designed for professional and semi-professional use in clubs, TV studios, theaters and touring contexts. They are suitable for a wide range of applications including smoke and haze dispersal, sending smoke through ducting, wind effects and cooling performers or equipment. -
Page 7: Safety Information
Safety information Warning! This product is not for household use. It presents risks of lethal or severe injury due to electric shock, falls and fast-moving blades. To reduce the risk of fire or electric shock, do not use this fan with any solid-state speed control device. -
Page 8: Unpacking
• Do not operate the machine if the ambient temperature (T ) exceeds 55° C (131° F). Preventing injuries • Never allow any object or part of your body to enter the path of the fan blades, and ensure that clothing, cables or other items cannot be sucked into the fan. -
Page 9: Installation
NSTALLATION This product must be installed by qualified personnel only. AC power AF-1 MkII™ and AF-2™ fans are available in two models: • US model: 115 V, 50/60 Hz (for use with 100-120 VAC, 60 Hz power supplies) with integral power cord •... -
Page 10: Physical Installation
Following the mains plug manufacturer’s instructions, connect the power cable’s green and yellow wire to ground (earth), blue wire to neutral and brown wire to live. Table 1 shows some pin identification schemes. Physical installation AF-1 MkII™ and AF-2™ fans may be suspended from a suitable support such as a truss, placed on a horizontal surface or fastened to a surface using the bracket provided. - Page 11 2. Check that all rigging clamps and fasteners are undamaged and can support at least 10 times the machine’s weight. • AF-1 MkII fan: Bolt a rigging clamp to the machine’s flying bracket using a grade 8.8 (minimum) M12 bolt and lock nut, or as recommended by the clamp manufacturer, through the 13 mm hole in the center of the mounting bracket.
-
Page 12: Installing Control Hardware
NSTALLING CONTROL HARDWARE The AF-1 MkII™ and AF-2™ can be operated either using the Jem multifunction remote control unit supplied with each machine, or via DMX using a DMX control device and serial data link. Remote control installation To connect the remote control unit: 1. - Page 13 best results, use shielded cable with at least one twisted pair specifically designed for RS-485 applications. Your local Martin service center can supply suitable high quality cable in various lengths. AF-1 MkII™ and AF-2™ both connect to a serial DMX data link using either their 3-pin or their 5-pin XLR DMX In and Out connectors.
- Page 14 Specifying DMX control channels AF-1 MkII™ and AF-2™ use a single DMX control channel to receive instructions from the controller. This control channel is the DMX address. To control machines individually, each must have its own unique DMX address. To control identical machines as a group, they can all be given the same DMX address.
- Page 15 For example, to set the DMX address to 101, you need to set DIP-switch pins 1, 3, 6 and 7 to ON, as highlighted in the table. DIP switch pins setting 0 = OFF 1 = ON 96 128 160 192 224 256 288 320 352 384 416 448 480 97 129 161 193 225 257 289 321 353 385 417 449 481 98 130 162 194 226 258 290 322 354 386 418 450 482 99 131 163 195 227 259 291 323 355 387 419 451 483...
-
Page 16: Operation
PERATION Before powering on, check that the fan is correctly and safely installed. Using fans with smoke machines When using a fan in combination with a smoke machine, fog machine or hazer, place the fan behind the machine, as illustrated on the right. - Page 18 the fan will run, and the wait/off time during which the fan will switch to idle. To set up timer operation: 1. Press TIMER SET. The ON LED will flash. You are now setting the On/Run time. 2. Turn the LEVEL / TIMER control to the required "run" time, as shown on the scale (OFF - 255 seconds).
- Page 19 5. Press TIMER SET once more. The timer is now programmed to one-shot mode and this will be remembered even after the unit has been powered off. To produce a timed fan burst, press RUN briefly. To stop the timed burst early, press RUN briefly again.
-
Page 20: Remote Control Operation
AF-2™ remote control AF-2 Multifunction remote overview TIMER POWER CYCLE SPEED DELAY A INSTANT FAN OPERATION BUTTON – Press to run the fan at the speed set on the fan speed control. B STANDBY – Puts the fan into standby mode. Must be set to ON to operate in any mode. -
Page 21: Dmx Control
To set timer operation using the remote control: 1. Set the desired amount of airflow using the SPEED control 2. Set wait/off time intervals between operating periods by setting the DELAY control to between 1 and 9. 3. Set duration of operating periods by setting the RUN control to between 1 and 9. -
Page 22: Service And Maintenance
ERVICE AND MAINTENANCE Any service procedure not described here should be referred to a qualified technician. Warning! Disconnect the fan from power before removing any grills or covers. Cleaning Clean the outside of the fan with a damp cloth only. Do not use solvents. Periodic cleaning of the fan blades and grills is necessary to maintain peak performance. - Page 23 AF-2 cleaning access 1. Disconnect the fan from power. 2. Remove the 16 cross-head screws from the covers (see illustration above), and remove the covers. 3. Reaching into the fan housing for access to the locking nuts, remove the four 6mm Allen screws holding the front grill (see illustration on right), collecting all washers and grommets for re-...
-
Page 24: Replacing The Main Fuse (Eu Models)
grommets (A) are seated in the fan housing (B). If this assembly sequence is not respected, the AF-2 will be excessively noisy. Replacing the main fuse (EU models) EU models have a main fuse that can be changed by the user. On US models the main fuse is internal. -
Page 25: Troubleshooting
ROUBLESHOOTING Problem Probable cause(s) Suggested remedy Check power supply and No power connections Remote control not set to Press Standby button Standby (AF-2™ only) Remote control not Check connections connected No light from status LEDs on remote control RUN / TIMER button not or fan pressed (AF-1 MkII™... -
Page 26: Mkii™ Specifications
AF-1 M II™ SPECIFICATIONS Physical (flying bracket installed) Width..........380 mm (15.0 in.) Height . - Page 27 Typical Power and Current US model at 115 V, 60 Hz ......175 W, 1.48 A EU model at 230 V, 50 Hz .
-
Page 28: Specifications
AF-2™ SPECIFICATIONS Physical Dimensions (L x W x H) ......600 x 310 x 600 mm . - Page 29 Electrical US model AC power ....... 110-120 V nominal, 50/60 Hz Main fuse (not user-changeable) .
- Page 30 Specifications subject to change without notice. For latest specifications and product information see www.martin.com...
- Page 31 Martin products are supplied in compliance with Directive 2012/19/EC of the European Parliament and of the Council of the European Union on WEEE (Waste Electrical and Electronic Equipment), where applicable. Help preserve the environment! Ensure that this product is recycled at the end of its life. Your supplier can give details of local arrangements for the disposal of Martin products...
- Page 32 www.martin.com...
Need help?
Do you have a question about the Martin JEM AF-1 MkII and is the answer not in the manual?
Questions and answers