Advertisement
Advertisement
Table of Contents

Subscribe to Our Youtube Channel
Related Manuals for Fisher-Price Ultimate Playhouse HTW98


Summary of Contents for Fisher-Price Ultimate Playhouse HTW98
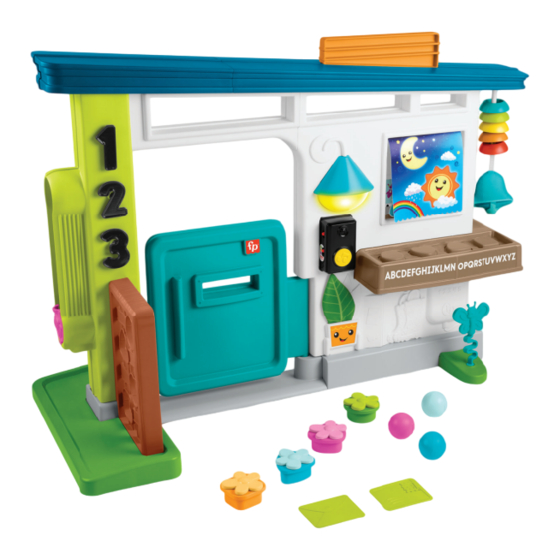
- Page 1 HTW98 ™ Ultimate Playhouse ASSEMBLY GUIDE...
- Page 2 From bright colors that delight their eyes and textures made ® for squishing, to friends that keep tummy time exciting, Fisher-Price toys are made just right for your newborn.
-
Page 3: Before You Begin
Before You Begin Keep these instructions for future reference as they contain important information. Clean with a damp cloth. Do not immerse. Adult assembly is required (because we needed to fit this toy in the box). Plan on about 40 minutes for assembly. You’ll need a Phillips screwdriver (not included) for assembly and battery installation. - Page 4 Assembled Parts...
- Page 5 Assembled Parts...
- Page 6 Assembled Parts CAUTION: This package contains M4,5 x 19 mm small parts. For adult assembly only.
- Page 7 Assembly Match the openings on the planter box to the three supports on the table.
- Page 8 Assembly Press the planter box and the table together until the edges are flush. These parts do not snap together.
- Page 9 Assembly The legs are designed to fit the table one way. If a leg doesn’t seem to fit, turn it around and try again. The wall is designed to fit into the base one way. If the wall doesn’t seem to fit, turn it around and try again.
- Page 10 Assembly Bottom View Carefully lay the assembly down to reveal the bottom.
- Page 11 Assembly The support beam is designed to fit one way. If it doesn’t seem to fit, turn it around and try again.
- Page 12 Assembly These parts do not snap together.
- Page 13 Assembly Bottom View Carefully lay the assembly down to reveal the bottom. Carefully return the assembly to upright position.
- Page 14 Assembly Carefully lower the wall assembly onto the door hinge and the threshold. Make sure the door swings properly. If it doesn’t, lift the wall assembly and try again. Bottom View Carefully lay the assembly down to reveal the bottom.
- Page 15 Assembly Door Frame Column Wall Carefully pull the wall and the column apart. Align the triangle shapes on the door frame and wall.
- Page 16 Assembly Locate the number inside the small roof parts and press together until the edges are flush.
- Page 17 Assembly Locate the number on the inside of the large roof parts and press together until the edges are flush.
- Page 18 Assembly...
-
Page 19: Install Batteries
Assembly You may need to rotate the butterfly toy in order to “snap” it. Pull on both toys to be sure they are secure. Fit the strap on the bell into the opening at the bottom of the windchime. Make sure the tab on the end of the strap forms a “T”... - Page 20 Power-Volume and Mode Switches Locate the power-volume and mode switches on the side of the doorbell. Locate the power-volume and mode Explore – Enjoy fun sounds, songs, switches on the side of the doorbell. first words and phrases that Slide to turn power ON with low introduce opposites, colors, shapes, volume , ON with high volume...
-
Page 21: Welcome Home
Welcome home! On... Off! Hi there! Ding Dong! Rainbow Fishy! Press to cycle through different types of dance music! Press again and again to cycle through different beats and music. Get all the news baby needs to know with the “Podcast” button. Listen to weather related sounds and phrases. - Page 22 Each sold separately and subject to availability. lity. Battery Safety Information In exceptional circumstances, batteries may leak fluids that can cause a chemical burn injury or ruin your product. To avoid battery leakage: • Do not mix old and new batteries or batteries of different types: alkaline, standard (carbon-zinc) or rechargeable.
-
Page 23: Fcc Statement (United States Only)
FCC STATEMENT (UNITED STATES ONLY) This equipment has been tested and found to comply with the limits for a Class B digital device, pursuant to Part 15 of the FCC rules. These limits are designed to provide reasonable protection against harmful interference in a residential installation. This equipment generates uses and can radiate radio frequency energy and, if not installed and used in accordance with the instructions, may cause harmful interference to radio... -
Page 24: Great Britain
Mattel Europa B.V., Gondel 1, 1186 MJ Amstelveen, Nederland. UNITED STATES Fisher-Price, Inc., 636 Girard Avenue, East Aurora, NY 14052. Consumer Services: 1-800-432-5437. CANADA Mattel Canada Inc., 6155 Freemont Blvd., Mississauga, Ontario L5R 3W2 Consumer Services/Service à la clientèle : 1-800-432-5437.
Need help?
Do you have a question about the Ultimate Playhouse HTW98 and is the answer not in the manual?
Questions and answers