Table of Contents
Advertisement
Quick Links
Advertisement
Table of Contents

Related Manuals for GE GCG1550F0CC


Summary of Contents for GE GCG1550F0CC
- Page 1 This Owner's Manual is provided and hosted by Appliance Factory Parts. GE GCG1550F0CC Owner's Manual Shop genuine replacement parts for GE GCG1550F0CC Find Your GE Trash Compactor Parts - Select From 67 Models -------- Manual continues below --------...
-
Page 2: Table Of Contents
Safety Instructions ... . .2–4 Owner’s Manual and Installation Operating Instructions Compacting ......7 GCG1520 Features . - Page 3 IMPORTANT SAFETY INFORMATION. READ ALL INSTRUCTIONS BEFORE USING. WARNING! For your safety, the information in this manual must be followed to minimize the risk of fire, electric shock or personal injury. SAFETY PRECAUTIONS I This compactor is for household use only. I Be careful when cleaning the inside of the Use this appliance only for its intended cabinet or trash drawer.
- Page 4 WARNING! For your safety, the information in this manual must be followed to minimize the risk of fire, electric shock or personal injury. SAFETY PRECAUTIONS I Never compact aerosol cans containing PRECAUTIONS AGAINST UNREASONABLE USE OF YOUR COMPACTOR: explosive or highly toxic chemicals.
- Page 5 IMPORTANT SAFETY INFORMATION. READ ALL INSTRUCTIONS BEFORE USING. ELECTRICAL SAFETY When using electrical appliances, basic safety precautions should be followed, including the following: To prevent hazard of electrical shock, this Do not, under any circumstances, cut or compactor must be properly installed and remove the third grounding prong from the grounded in accordance with the Installation power cord.
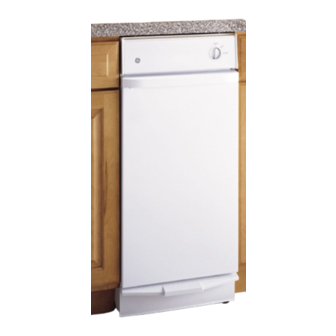
- Page 6 About the trash compactor. ge.com Features DRAWER HANDLE DRAWER MONITOR SWITCH DOOR PANEL MODEL AND SERIAL NUMBER LABEL TOUCH-TOE BAR DRAWER OPENER BAG RETAINER BUTTONS SIDE-LOCK LATCH TOE PLATE KEY-KNOB START/OFF SWITCH...
- Page 7 About using the trash compactor. What It Does and How It Works Your compactor reduces household trash to as little as 1/4 of its original volume. It compacts most refuse, including paper, cans, bottles, jars, plastic containers, wrappings, sweepings and some food wastes. Drop trash into a disposable bag that lines the trash drawer and close the drawer.
-
Page 8: Compacting
Loading I Folded newspaper will also help prevent Lift the trash drawer handle or press the touch-toe bar and pull the drawer out. glass fragments from flying out of the drawer when compacting a large glass Remember: bottle, or several bottles or jars, or any I Bottles and large cans compact best when other items that might shatter. -
Page 9: Removing A Full Trash Bag
About using the trash compactor. Removing a Full Trash Bag Pull the drawer completely open. Push the side-lock latch down and tilt the drawer side open. Remove the top of the bag from the bag retainer buttons. Pull up all four bag cuffs. -
Page 10: Care And Cleaning
Stainless Steel Magic (Cat. No. WX10X15) and Appliance Polish and Wax Cleaner (Cat. No. WR97X216) are available from GE Parts by calling 800-626-2002. To clean the drawer interior: Remove the bag. See About using the trash compactor section. -
Page 11: Installation Instructions
Installation Instructions. Before you start… Proper installation is your responsibility. Make WARNING sure you have everything necessary for correct installation. It is the personal responsibility and obligation of the customer to contact a qualified installer to assure that electrical installation meets national and all local codes and ordinances. - Page 12 WARNING Electrical ground is required on this compactor. DO NOT ground to a gas pipe. DO NOT change the power supply cord plug. If it does not fit the outlet, have a proper outlet installed by a qualified electrician. DO NOT have a fuse in the neutral or grounding circuit.
- Page 13 Installation Instructions. Starting to Install…with the compactor in the room where it will be installed. DO NOT grasp console to move compactor. DO NOT allow the rear frame of the compactor to touch the floor covering Slide the compactor onto cardboard or when lifting or moving compactor.
- Page 14 Measure the height of your cabinet opening. Position B: 34-1/4″ to 34-7/16″ The top of the compactor should be at least (87 to 87.5 cm) 1/8″ (3 mm) from the top of the cabinet Position C: 34-7/16″ to 34-5/8″ opening. (87.5 to 88 cm) The rear wheels are preset for a cabinet Tighten screw.
- Page 15 Installation Instructions. Move the compactor close to its final position. Plug the power supply cord into a properly grounded receptacle. Carefully lift the front slightly and roll compactor into the cabinet opening until the retaining brackets stop the unit. Using the two #8 -18 x 1/2″ screws, fasten the retaining brackets to the underside of the countertop with the mounting screws.
- Page 16 To order a color-matched trim kit for the Custom-made panel dimensions installation of a custom-made panel, contact your local authorized GE dealer. To locate an authorized GE dealer in your area, call the GE Answer Center at 800-626-2000. ″ Available kits for custom-made panels are: ⁄...
-
Page 17: Custom Panels
Installation Instructions. Trimless Panel with Handle Dimensions for trimless panel with handle Installation: 1. Remove foot pedal, toe guard and Use these dimension drawings to create a decorative panel. custom panel for use without a trim kit. 2. Align the top of the custom panel with the The panel should be 1/2″... - Page 18 Trimless Panel without Handle Dimensions for trimless panel without handle Installation: 1. Remove foot pedal, toe guard, decorative Use these dimension drawings to create a panel and handle. custom panel for use without a trim kit. 2. Align the bottom of the custom panel with The panel should be 1/2″...
-
Page 19: Troubleshooting Tips
Before you call for service… Troubleshooting Tips Save time and money! Review the charts on the following pages first and you may not need to call for service. Problem Possible Causes What To Do Compactor won’t operate Compactor is unplugged •Make sure cord is plugged securely into a working outlet. - Page 20 This warranty is extended to the original purchaser and any succeeding owner for products purchased for home use within the USA. If the product is located in an area where service by a GE Authorized Servicer is not available, you may be responsible for a trip charge or you may be required to bring the product to an Authorized GE Service location for service.
-
Page 21: Consumer Support
Contact Us ge.com If you are not satisfied with the service you receive from GE, contact us on our Website with all the details including your phone number, or write to: General Manager, Customer Relations GE Appliances, Appliance Park...
Need help?
Do you have a question about the GCG1550F0CC and is the answer not in the manual?
Questions and answers