Table of Contents
Advertisement
Available languages
Available languages
Quick Links
Advertisement
Table of Contents

Summary of Contents for National Geographic Bresser Astro Planetarium Multimedia
- Page 1 ASTRO PLANETARIUM MULTIMEDIA Bedienungsanleitung Operating instructions Mode d’emploi Handleiding Istruzioni per l’uso Instrucciones de uso Руководство по эксплуатации Art.No. 9105000...
- Page 2 1& 1& 3x AA OPEN CLOSE Bedienungsanleitung ����������������������������������������������������4 Operating Instructions ������������������������������������������������ 10 Mode d’emploi ����������������������������������������������������������� 16 Handleiding �������������������������������������������������������������� 22 Istruzioni per l’uso ����������������������������������������������������� 28 Instrucciones de uso �������������������������������������������������� 34 Руководство по эксплуатации ����������������������������������� 40...
- Page 3 Fig. 1 Fig. 2 1% 1$ 1# 1@ 2! 2)
-
Page 4: Allgemeine Warnhinweise
Allgemeine Warnhinweise • GEFAHR eines STROMSCHLAGS! Dieses Gerät beinhaltet Elektronikteile, die über eine Stromquelle (Netzteil und/oder Batterien) betrieben werden. Die Nutzung darf nur, wie in der Anleitung beschrieben erfolgen, andernfalls besteht GEFAHR eines STROMSCHLAGS! • ERSTICKUNGSGEFAHR! Kinder sollten das Gerät nur unter Aufsicht benutzen. Verpackungsmaterialien (Plastiktüten, Gummibänder, etc.) von Kindern fernhalten! Es besteht ERSTICKUNGSGEFAHR! •... - Page 5 Entsorgung Entsorgen Sie die Verpackungsmaterialien sortenrein. Beachten Sie bitte bei der Entsorgung des Geräts die aktuellen gesetzlichen Bestimmungen. Informationen zur fachgerechten Entsorgung erhalten Sie bei den kommunalen Entsorgungsdienstleistern oder dem Umweltamt. Werfen Sie Elektrogeräte nicht in den Hausmüll! Gemäß der Europäischen Richtlinie 2012/19/EG über Elektro- und Elektronik-Altgeräte und deren Umsetzung in nationales Recht müssen verbrauchte Elektrogeräte getrennt gesammelt und einer umweltgerechten Wiederverwertung zugeführt werden.
-
Page 6: Einlegen Der Batterien
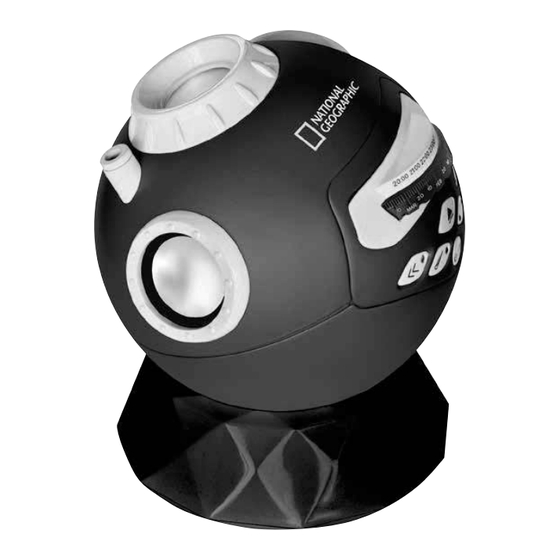
KOMPONENTEN EIN-/STOPP-/AUS-Taste Schlummerfunktion (30/60 Minuten) Rechts-Rotieren-Taste Links-Rotieren-Taste Ausfahrknopf Scheibenfach Sternschnuppentaste Datum-Einstellrad Zeitskala 1,8 m - 2,0 m Fokusierungsregler Ständer Sternen-Diascheibe (2 Stück) Lautsprecher EIN-/AUS-Taste CH+/Vol+ Kanal- und Lautstärken-Taste CH-/Vol– Kanal- und Lautstärken-Taste MODUS-Taste (AUX/Radio) Scheibenfach 1& Lautsprecher Sternschnuppen- Projektionsobjektiv Hauptprojektionsobjektiv Audio-IN-Anschluss 5V-DC-IN-Anschluss Audiokabel... - Page 7 Aufstellen des Planetariums 1. Setze das Gerät auf den Ständer (10) auf einer ebenen und robusten Plattform (z. B. ein Tisch). Der optimale Projektionsabstand beträgt etwa 1,8 m bis 2 m. 2. Drücke den Ausfahrknopf für das Scheibenfach (5), um die Konsole zu öffnen und die Sternen-Dia- scheibe (11) einzulegen.
- Page 8 Beispiel 2: Willst du den Sternenhimmel am 30. Dezember um 22:30 Uhr betrachten, richte auf der Zeitskala 22:30 auf den 30. Dezember aus, wie in der Abbildung gezeigt. Ein kurzer Strich steht für 3 Tage. 4. Schließe das Fach. Stelle das Gerät in Richtung Norden auf. Du kannst die Links-Rotieren-Taste (4) oder Rechts-Rotieren-Taste (3) verwenden, sobald das Gerät eingeschaltet ist.
-
Page 9: Technical Specifications
Verwendung der Schlummerfunktion Drücke den Einstellknopf der Schlummerfunktion (2) für 30 oder 60 Minuten Schlummerzeit. Die entspre- chende LED Kontrolleuchte zeigt die jeweils ausgewählte Zeit. Zum Deaktivieren der Schlummerfunktion solange den Knopf drücken, bis das Anzeigenlicht erlischt. Auch mit deaktivierter Schlummerfunktion schaltet sich das Gerät nach 2 Stunden über den Energiesparmodus aus. -
Page 10: General Warning
General Warning • Risk of electric shock — This device contains electronic components. Only use the device as described in the manual; otherwise, you run the risk of an electric shock. • Choking hazard — Children should only use the device under adult supervision. Keep packaging mate- rial, like plastic bags and rubber bands, out of the reach of children, as these materials pose a choking hazard. -
Page 11: Warranty
Disposal Dispose of the packaging materials properly, according to their type, such as paper or cardboard. Contact your local waste-disposal service or environmental authority for information on the prop- er disposal. Do not dispose of electronic devices in the household garbage! As per the Directive 2012/19/EC of the European Parliament on waste electrical and electronic equipment and its adaptation into German law, used electronic devices must be collected sepa- rately and recycled in an environmentally friendly manner. -
Page 12: Battery Installation
COMPONENTS On/Stop/Off switch Sleep timer button (30/60 Minutes) Rotate right button Rotate left button Star disc tray eject button Falling star button Date dial Time scale 1�8 m - 2�0 m Focus dial Stand Star disc (2 pieces) Speaker On/Off button Channel+/Volume+ button Channel-/Volume- button Mode (AUX/Radio) button... - Page 13 3. While the Star disc tray is still opened, set the time and date of the night sky you want to view by align- ing the desired date on date dial with the desired hour on the time scale. Time scale (fixed): The Star disc tray needs to be open.
-
Page 14: Using The Sleep Timer Function
4. Close the tray. Place the unit, facing to the north. You can use the Rotate left (4) or Rotate right button (3) while the unit is turned on. Please do not turn the date dial when the tray is closed. You first need to open the tray if you want to change the date again. -
Page 15: Using Ac/Dc Adapter
Using the FM radio Turn the speaker on or off by pressing and holding the Speaker On/Off button (12) for 1 second. If the Audio-in connector (20) is unplugged, the planetarium will enter radio mode automatically. If the Audio-in connector (20) is connected, select radio mode by pressing the Mode (AUX/Radio) button (15). -
Page 16: Consignes Générales De Sécurité
Consignes générales de sécurité • RISQUE D’ELECTROCUTION ! Cet appareil contient des pièces électroniques raccordées à une source d’alimentation électrique (par bloc d’alimentation et/ou batteries). L’utilisation de l’appareil doit se faire exclusivement comme décrit dans ce manuel, faute de quoi un RISQUE d’ELECTROCUTION peut exister ! •... -
Page 17: Garantie
Elimination Eliminez l’emballage en triant les matériaux. Pour plus d’informations concernant les règles ap- plicables en matière d’élimination de ce type des produits, veuillez vous adresser aux services communaux en charge de la gestion des déchets ou de l’environnement. Ne jamais éliminer les appareils électriques avec les ordures ménagères ! Conformément à la directive européenne 2012/19/CE sur les appareils électriques et électroniques et ses transpo- sitions aux plans nationaux, les appareils électriques usés doivent être collectés séparément et être recyclés dans le respect des réglementations en vigueur en matière de protection de l’envi-... -
Page 18: Installation Des Piles
COMPOSANTS Touche Marche/Arrêt/Stop Touche timer mise en veille (30/60 minutes) Touche de rotation à droite Touche de rotation à gauche Touche d’éjection du disque de diapositives Touche des étoiles filantes 1,8 m - 2,0 m Disque de réglage de la date Echelle temporelle Disque de mise au point Support... - Page 19 Réglage du planétarium 1. Place le planétarium sur son support (10) sur une surface plate et stable (ex. une table), la distance de projection optimale est de 1.8 m à 2 m. 2. Appuie sur la touche d’éjection du disque (5) pour ouvrir le plateau chargeur et installer la diapositive (11).
- Page 20 Exemple 2: Si tu souhaites regarder le ciel nocturne le 30 décembre, 22 : 30 h, aligne 22 :30 sur l’échelle temporelle avec le 30 décembre. Comme indiqué sur la figure. Une petite marque représente 3 jours. 4. Referme le plateau chargeur. Note que tu es orienté vers le Nord quand tu fais face au projecteur. Ne pas tourner le disque de réglage de la date lorsque le chargeur est fermé.
-
Page 21: Mise Hors Tension
Utilisation de la fonction mise en veille Appuie sur la touche timer de mise en veille (2) pour active ce mode sur 30 ou 60 minutes, l’indicateur LED correspondant montrera le timer sélectionné. Pour désactiver cette fonction, appuie sur la touche timer jusqu’à... -
Page 22: Algemene Waarschuwingen
Algemene waarschuwingen • GEVAAR VOOR ELEKTRISCHE SCHOK! Dit toestel bevat elektronische onderdelen die door een elektrici- teitsbron (voeding en/of batterijen) worden gevoed. Het toestel mag alleen gebruikt worden zoals in de handleiding wordt beschreven, anders bestaat er GEVAAR op een STROOMSTOOT! •... - Page 23 Afval Scheid het verpakkingsmateriaal voordat u het weggooit. Informatie over het correct scheiden en weggooien van afval kunt u bij uw gemeentelijke milieudienst inwinnen. Gooi elektronische apparaten niet bij het huisvuil! Volgens de Europese richtlijn 2012/19/EG over elektrische en elektronische apparaten en de toepassing hiervan in nationale wetten moeten afgedankte elektrische apparaten gescheiden worden ingezameld en op milieuvriendelijke wijze worden afgevoerd.
-
Page 24: De Batterijen Plaatsen
OVERZICHT VAN DE ONDERDELEN Aan-/stop-/uit-toets Toets om de slaapmodus in te stellen (30/60 minuten) Rotate knop rechts Rotate knop links Knop om het dia-vak te openen Vallende-ster-functie-toets Wiel om de datum mee in 1,8 m - 2,0 m te stellen Tijdschaal Wieltje voor de scherpteregeling Standvoet... - Page 25 Gebruiksklaar maken van het astro-planetarium 1. Zet de standvoet (10) van de planetariumbol op een vlakke en stabiele ondergrond (bijv. op een tafel) en doe de planetariumbol (1) erin. Daarbij moet het objectief parallel staan met het projectievlak (de wand of het plafond). De ruimte tussen het objectief en de wand of het plafond moet ongeveer 1,80 tot 2 m bedragen.
- Page 26 Voorbeeld 2: Je wilt de nachthemel van 30 december, 22:30 met je Planetarium bekijken (projecteren). Draai daarvoor het wiel om de datum mee in te stellen zo ver door, tot de streep voor 22:30 bovenop de tijdschaal kort voor de lange streep voor de maand januari (JAN) staat.
-
Page 27: Technische Gegevens
Gebruik van de Slaapmodus Druk op de toets om de slaapmodus (2) in te stellen als u wilt dat het apparaat na 30 of 60 minuten auto- matisch uitgaat. De betreffende LED-lamp licht op. Na de ingestelde tijd schakelt het apparaat over naar de slaapmodus (ook energie-spaar-modus). -
Page 28: Avvertenze Di Sicurezza Generali
Avvertenze di sicurezza generali • RISCHIO DI FOLGORAZIONE! Questo apparecchio contiene componenti elettronici azionati da una sor- gente di corrente (alimentatore e/o batterie). L’utilizzo deve avvenire soltanto conformemente a quanto descritto nella guida, in caso contrario esiste il PERICOLO di SCOSSA ELETTRICA! •... -
Page 29: Garanzia
Smaltimento Smaltire i materiali di imballaggio in maniera differenziata. Le informazioni su uno smaltimento conforme sono disponibili presso il servizio di smaltimento comunale o l’Agenzia per l’ambiente locale. Non smaltire gli apparecchi elettronici con i rifiuti domestici! Secondo la Direttiva Europea 2012/19/CE riguardante gli apparecchi elettrici ed elettronici usati e la sua applicazione nel diritto nazionale, gli apparecchi elettronici usati devono essere raccolti in maniera differenziata e destinati al riciclaggio ecologico. - Page 30 COMPONENTI Tasto ON/STOP/OFF Tasto per l'impostazione della modalità di sospensione (30/ 60 minuti) Tasto per la rotazione dell'immagine a destra Tasto per la rotazione dell'immagine a sinistra Tasto per aprire il vano diapositive 1,8 m - 2,0 m Tasto per l'attivazione della funzione stelle cadenti Ruota per l’impostazione della data Scala del tempo...
- Page 31 Montaggio del planetario astronomico 1. Ora posiziona la base della sfera planetaria (10) su un piano stabile e regolare (per es. su un tavolo) e inserisci la sfera planetaria. La distanza tra l’obiettivo e la parete (o il soffitto) deve essere di circa 1,8 –...
- Page 32 Esempio 2: Con il tuo planetario astronomico vuoi proiettare il cielo notturno del 30 dicembre alle ore 22:30. Gira la ruota per l’impostazione della data finché il trattino che corrisponde a “22:30” in alto sulla scala del tempo non si troverà immediatamente prima del trattino lungo per il mese di gennaio (JAN). 4.
-
Page 33: Dati Tecnici
Utilizzo della funzione modalità di sospensione Premere il tasto per l'impostazione della modalità di sospensione (2) per attivare il tempo di spegnimento automatico desiderato (30 o 60 minuti). La luce a LED corrispondente si accende. Trascorso il tempo im- postato, l'apparecchio passa in modalità di sospensione (detta anche modalità di risparmio energetico). Per disattivare la modalità... -
Page 34: Advertencias De Carácter General
Advertencias de carácter general • ¡PELIGRO DE DESCARGA ELÉCTRICA! Este aparato contiene componentes electrónicos que funcionan mediante una fuente de electricidad (equipo de alimentación y/o pilas). El uso se deberá realizar de la forma descrita en el manual; de lo contrario, existe PELIGRO de DESCARGA ELÉCTRICA. •... - Page 35 Eliminación Elimine los materiales de embalaje separados por tipos. Obtendrá información sobre la elimina- ción reglamentaria en los proveedores de servicios de eliminación comunales o en la agencia de protección medioambiental. ¡No elimine los electrodomésticos junto con la basura doméstica! Conforme a la directiva europea 2012/19/UE sobre aparatos eléctricos y electrónicos usados y a su aplicación en la legislación nacional, los aparatos eléctricos usados se deben recoger por separado y conducir a un reciclaje que no perjudique al medio ambiente.
-
Page 36: Instalación De Las Pilas
PARTES Encendido On/Apagado Off Temporizador modo sueño (30/60 minutos) Tecla para girar hacia la derecha Tecla para girar hacia la izquierda Botón salida de bandeja de disco de estrellas Botón de estrellas fugaces 1,8 m - 2,0 m Escala de fechas Escala de tiempo Rueda de enfoque Base... - Page 37 Configuración del planetario 1. Coloque la unidad sobre el soporte (10) sobre una superficie plana y estable (por ejemplo, una mesa), la distancia de proyección óptima es de aproximadamente 1,8 metros a 2 metros. 2. Pulse el botón de expulsión de la bandeja de salida del disco de estrellas (5) para insertar el disco (11).
- Page 38 Ejemplo 2: Si desea ver el patrón de estrellas a las 22:30 (10:30 pm) el 30 de diciembre, ajustar a las 22:30 en la escala de horas del 30 de diciembre como se muestra en la figura. La pequeña marca representa 3 días. 4.
-
Page 39: Especificaciones Técnicas
Función de temporizador modo sueño Pulse el botón temporizador modo sueño (2) de 30 o 60 minutos de apagado, en el indicador LED corres- pondiente se mostrará el temporizador seleccionado. Para desactivar el temporizador de modo sueño, presione el botón del temporizador hasta que ambas luces indicadoras del temporizador estén apagados. Sin embargo, el proyector se apagará... - Page 40 Общие предупреждения • ОПАСНОСТЬ ПОРАЖЕНИЯ ЭЛЕКТРОТОКОМ! Этот прибор содержит электронные компоненты, при- водимые в действие от источника тока (сетевой адаптер и/или батарейки). Использование долж- но осуществляться в соответствии с приведенными в руководстве инструкциями, в противном случае существует ОПАСНОСТЬ ПОРАЖЕНИЯ ЭЛЕКТРОТОКОМ! •...
- Page 41 УТИЛИЗАЦИЯ Выполняйте утилизацию упаковочных материалов по их типам. Информацию по правиль- ной утилизации можно получить в коммунальной службе утилизации или в отделе по защите окружающей среды. Не выбрасывайте электроприборы вместе с бытовыми отходами! Согласно Европейской директиве 2012/19/EG по отслужившим свой срок электрическим и электронным прибо- рам...
-
Page 42: Установка Батареек
Детали астропланетария: Кнопка включения прибора и остановки программы Кнопка включения таймера (30 или 60 минут) Кнопка поворота вправо Кнопка поворота влево Кнопка извлечения лотка для дисков 1,8 m - 2,0 m Кнопка включения режима падающих звезд Шкала настройки даты Шкала времени Кольцо... - Page 43 Подготовка астропланетария 1. Разместите прибор на подставке (10) и расположите конструкцию на ровной и устойчивой по- верхности. Оптимальное расстояние проекции составляет от 1,8 до 2 м. 2. Нажмите кнопку извлечения лотка для дисков (5) и вставьте в лоток программный диск (11). Обратите...
- Page 44 Пример №2: Если вы хотите увидеть звездное небо тридцатого декабря, в 22:30, совместите 22:30 на шкале вре- мени с тридцатым декабря на шкале настройки даты (см. рис.). 4. Закройте лоток для дисков. Расположите астропланетарий так, чтобы прибор был обращен на север.
-
Page 45: Выключение Прибора
Таймер Нажмите кнопку включения таймера (2), чтобы ограничить время проекции. Индикатор на кнопке включения таймера (2) покажет выбранный режим (30 или 60 минут). Чтобы отключить таймер, нажмите и удерживайте кнопку (2) до тех пор, пока оба светодиодных индикатора не потухнут. Об- ратите... - Page 48 © National Geographic Partners LLC. All rights reserved. NATIONAL GEOGRAPHIC KIDS and Yellow Border Design are trademarks of National Geographic Society, used under license. Visit our website: kids.nationalgeographic.com Bresser GmbH Bresser UK Ltd Suite 3G, Eden House Gutenbergstr. 2 · DE-46414 Rhede Enterprise Way, Edenbridge, www.bresser.de ·...
Need help?
Do you have a question about the Bresser Astro Planetarium Multimedia and is the answer not in the manual?
Questions and answers