Table of Contents
Advertisement
Quick Links
ENglIsh VErsIoN
MM220 Sweex Wi-Fi Internet Radio
Introduction
• Do not expose the Sweex Wi-Fi Internet Radio to extreme temperatures. Do not place the device in direct sunlight or in the direct vicinity of heating elements.
• Do not use the Sweex Wi-Fi Internet Radio in extremely moist or dusty surroundings.
• Protect the device against powerful shocks and falls – they may damage the internal electronics.
• Never attempt to open the device yourself, there are no serviceable parts inside. Opening the device will cause the warranty to lapse.
Package contents
In this package you will find:
• Wi-Fi Internet Radio Deluxe
• CD with this manual
If you find that any of the package contents are missing, please return the package to the sales point where it was bought.
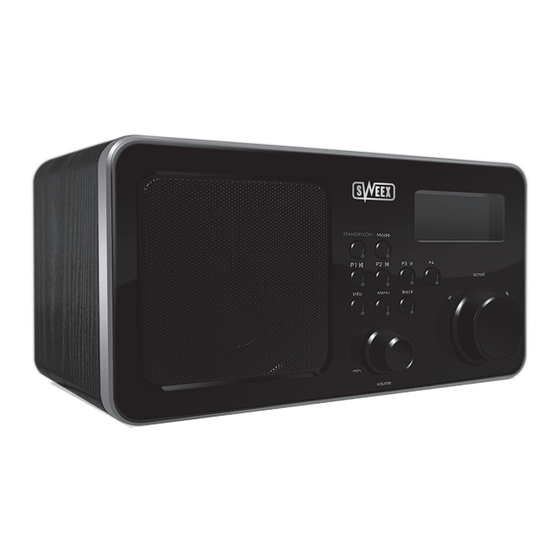
Product description
Front side:
Control
Internet radio
FM mode
Music Player
AUX IN mode
STANDBY/ON
Press to turn the radio on/off
Mode
Press to switch between Internet Radio, Music Player, FM and Auxiliary Input mode.
4
Advertisement
Table of Contents

Subscribe to Our Youtube Channel
Related Manuals for SWEEX MM220 - QUICK_START_GUIDE

Summary of Contents for SWEEX MM220 - QUICK_START_GUIDE
- Page 1 Introduction • Do not expose the Sweex Wi-Fi Internet Radio to extreme temperatures. Do not place the device in direct sunlight or in the direct vicinity of heating elements. • Do not use the Sweex Wi-Fi Internet Radio in extremely moist or dusty surroundings.
-
Page 2: Internet Radio
Press to go back one menu level Increase volume by turning the knob clockwise Decrease volume by turning the knob anti-clockwise Turn the knob to navigate menus and change options, press to select FM mode: turn to change frequency, press to search stations No function... -
Page 3: First Use
First use Before you can start using the radio, you will need to connect to your wireless network first, this is done in 5 easy steps. 1. After you turn on the radio for the first time, the following screen will appear: 2. -
Page 4: Text Input
5. If your wireless network is secured, the radio will now ask you to enter the network key. This key may also be known as WEP, WPA or Pre-shared (PSK) key. You can use the scroll knob to select the right characters and press select to enter them. -
Page 5: Internet Radio Mode
Auxiliary mode This mode plays back sound received on the Auxiliary input on the back of the radio. You can connect for example a MP3 player, CD player or other device to the AUX input. Auxiliary input mode has no menu, options or settings. -
Page 6: Menu Reference
• Main menu > Internet radio > My Favourites In this menu you can select stations from your lists of favourite stations. For information on managing favourites, please refer to the on-line services section of this manual. > Stations > Location Here you can browse radio stations by region and country first, then state and finally genre. - Page 7 Press “Select” to go to Auxiliary Input mode • Sleep This menu option lets you configure the sleep time. From off to 90 minutes in steps of 15 minutes. After the sleep time has passed, the radio will switch to stand-by automatically. • Alarms In this menu you can set the alarm clocks of the radio.
- Page 8 • Wlan region In this menu you can change the WLAN region. The WLAN region controls which frequencies the wireless networking module of the radip may operate on. Do not set the WLAN region to a different region than your current region, you may violate local regulations if you do this! The choices are: >...
-
Page 9: Set 12/24 Hour
You can view and delete the preconfigured wireless networks in this menu. The network the radio is currently connected to cannot be deleted. • Time setup In this menu you can set the time and time display options of the radio. By default, the radio uses it’s wireless connection to retrieve the current time from the Internet. > Set clock >... -
Page 10: Online Services
ENglIsh VErsIoN On-line services You can manage your favourite radio stations and add unlisted stations manually using a web-interface. To do this, you will first need to register using the access code that can be found in the “Help” menu. - Page 11 Add a station manually Sometimes it may happen that a station is not present in the list of stations. In that case you can contact us by clicking the “Suggest a station” link at the bottom left of the webpage. You can also add a station manually so that it appears in the “My Added stations” list: Simply fill out the form and press when you’re done! Note: some technical knowledge is required.
- Page 12 Check the “Share my media” checkbox and click OK: Your computer should now become visible under “Shared media”, you still have to authorise it however. Upon connecting, you will receive an error message on your radio and on your computer, the following message will appear:...
-
Page 13: Troubleshooting
• My wireless network is not listed > This may happen if your wireless network is hidden, or out of range. First try placing the radio closer to your wireless router or access point. If your network is hidden, it has to be added manually. - Page 14 • In a standard manner a warranty period of 2 years as from the purchase date is available for this Sweex product within the EU. • Should you wish to invoke this warranty within the first 2 years after the purchase then you can directly apply to the point of sale where you purchased the product for the conditions and procedures.
Need help?
Do you have a question about the MM220 - QUICK_START_GUIDE and is the answer not in the manual?
Questions and answers