
Related Manuals for ViSAGE MAXIMUS PC220537


Summary of Contents for ViSAGE MAXIMUS PC220537
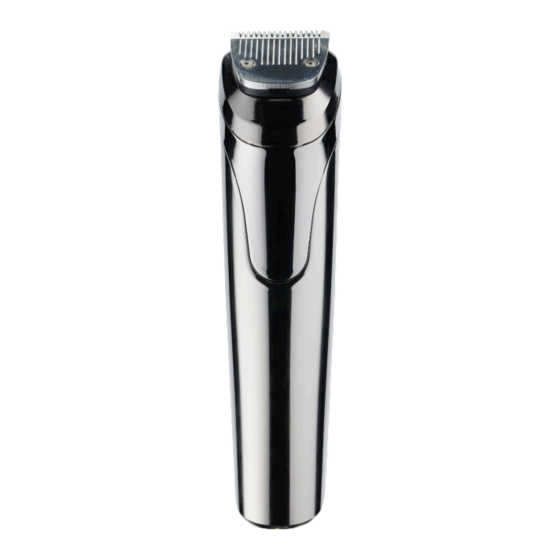
- Page 1 GROOMING KIT Ultimate professional grooming Model Number: PC220537 Product Number: 713814 USER GUIDE Version 1.2 - Issued 14/06/23...
- Page 2 Welcome Congratulations on choosing to buy a Visage® product. All products brought to you by Visage® are manufactured to the highest standards of performance and safety, and, as part of our philosophy of customer service and satisfaction, are backed by our comprehensive 1 Year Warranty.
-
Page 3: Table Of Contents
Contents Welcome Warranty Details General Information & Safety Instructions Features Technical Specifications Assembly & Parts List Getting Started Charging the battery Optimising the lifetime of the rechargeable batteries Lubricating the blades Cutting guide Attaching the guide combs Operation Styling/contouring your beard Trimming your beard neckline Trimming nose and ear hair Storage... -
Page 4: Warranty Details
GROOMING KIT Warranty Details REGISTER YOUR PURCHASE AT www.aldi.com.au/en/about-aldi/product-registration/ TO KEEP UP-TO-DATE WITH IMPORTANT PRODUCT INFORMATION The product is guaranteed to be free from defects in workmanship and parts for a period of 12 months from the date of purchase. Defects that occur within this warranty period, under normal use and care, will be repaired, replaced or refunded at our discretion. - Page 5 Warranty Note If you experience any issues with this product, or its performance is not what you had expected, please contact us at Balco Brands It is likely that we can resolve any problems for you via phone or email. We can be reached on: Phone: 1300 663 907 (Mon - Fri;...
-
Page 6: General Information & Safety Instructions
General Information & Safety Instructions Read this manual thoroughly before first use and keep it in a safe place for future reference, along with warranty card, purchase receipt and packaging. The safety precautions enclosed herein reduce the risk of fire, electric shock and injury when correctly adhered to. Follow all instructions and take notice of all warnings to reduce risk of fire or electric shock. -
Page 7: Features
Features • Stainless steel blades • 600mAh lithium rechargeable battery • 90min charge time / 90min run time • Interchangeable combs - 1/2/3/6/9/12mm • IPX7 • LED digital display • Nose hair trimmer • Displays battery life, charge time & safety lock Technical Specifications Model Specification: PC220537 Warranty:... -
Page 8: Assembly & Parts List
Assembly & Parts List 1. Trimmer blade 5. 6 x guide combs 9. Oil 2. Groomer body 6. Nose hair trimmer 10. Scissors* attachment head 3. On/Off/Lock 11. Carry case* button 7. USB charging 12. User guide* cable 4. LED display 13. -
Page 9: Getting Started
Getting Started Charging the battery • Before using your groomer for the first time, charge it fully for 90 minutes • Plug the USB charging cord into your groomer and then plug the USB end into a USB power source (not included). -
Page 10: Attaching The Guide Combs
Attaching the guide combs 1. The groomer can be used with or without the guide comb attachments. To attach the guide combs, slide one onto the trimmer blade head until it clicks into position NOTE: The appliance must be switched off while the guide comb is being attached or removed. -
Page 11: Operation
Operation NOTE: Whilst this grooming kit can be used in the shower, ensure it is not plugged in or charging whilst being used in the shower Styling/contouring your beard You can use the groomer to contour or cut shapes in beard hair. It cuts hair very close to the skin, at a length of 1mm. -
Page 12: Storage
Storage When not in use, unplug the appliance and store out of reach of children in a safe, dry location. Never wrap the cord around the appliance as this will cause the cord to wear prematurely and break. Handle the cord carefully, and avoid jerking, twisting or straining especially at plug connection Cleaning &... -
Page 13: Faq
Problem Solution Why isn’t my groomer • Ensure the battery is fully charged, see Charging turning on? the battery on page 9 for reference What does the LED display • Displays battery life, charge time & safety lock show? How long does it take to •... -
Page 14: Repair And Refurbished Goods Or Parts Notice
GROOMING KIT Repair and Refurbished Goods or Parts Notice Unfortunately, from time to time, faulty products are manufactured which need to be returned to the Supplier for repair. Please be aware that if your product is capable of retaining user-generated data (such as les stored on a computer hard drive, telephone numbers stored on a mobile telephone, songs stored on a portable media player, games saved on a games console or les stored on a USB memory stick) during the process of repair, some or all of your... - Page 15 Notes...
Need help?
Do you have a question about the MAXIMUS PC220537 and is the answer not in the manual?
Questions and answers