
Summary of Contents for Matheson DS-R Series
- Page 1 DS-R Series Electronic Cylinder Scales Instructions READ AND COMPLY WITH THESE INSTRUCTIONS BEFORE INSTALLING, OPERATING, OR SERVICING MINT-0297 rev B...
-
Page 3: Table Of Contents
Table of Contents I. SERVICE ......................1 II. LIMITED WARRANTY ................... 2 III. USER RESPONSIBILITY ................. 3 IV. YOUR NEW SCALE ..................4 V. CONTROLS AND INDICATORS ..............7 VI. SYSTEM OPERATION................. 10 VII. CONFIGURATION AND CALIBRATION ............16 VIII. MENU TREE DIAGRAM ................20 IX. -
Page 5: Service
(All repairs must be made by MATHESON or an assigned and approved facility to maintain any warranties or guarantees). If the unit is under an applicable warranty, return the unit to MATHESON for repair or replacement. To arrange for warranty service, call 1-800-828-4313 and ask for the Warranty Administrator. -
Page 6: Limited Warranty
MATHESON's sole discretion, the equipment or part which is telephonically reported to be a problem to the local MATHESON Branch Location, and which if so advised, is returned with a written statement of the observed deficiency, not later than seven days... -
Page 7: User Responsibility
Should such repair or replacement become necessary, MATHESON recommends that a telephonic or written request for service advice be made to the MATHESON Equipment Engineering Group in Montgomeryville, Pennsylvania or to the nearest MATHESON branch location. -
Page 8: Your New Scale
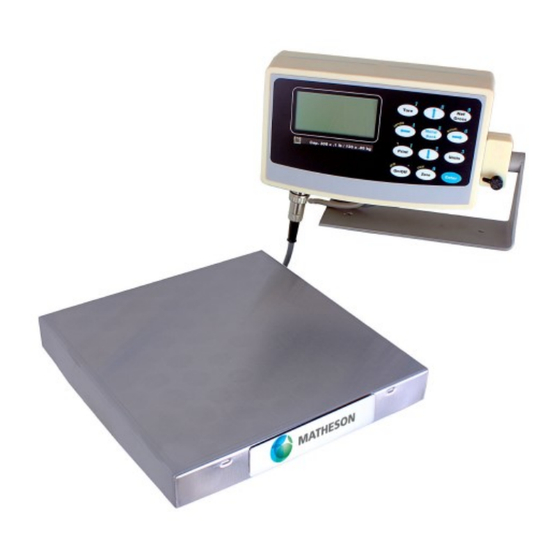
IV. YOUR NEW SCALE Congratulations on your purchase of this MATHESON Digital Scale. This Scale offers a combination of versatility, accuracy and simplicity in an easy to use and easy to maintain package. Advanced menu driven operating software, large memory capacity and an easy to use menu structure allows the scale to be configured for almost any application. - Page 9 PRECAUTIONS Prevent flammables and liquids from entering scale head. Always use the included wall transformer when using AC outlet. NEVER replace the wall transformer with a plug. This could cause electrical shock and severely damage to the scale. Allow clearance on all sides of scale platform for accurate weighing. Do not drop large loads on scale platform.
- Page 10 will display the prompt (“ready”). Press the ON/OFF key to activate the unit. Press and hold the ON/OFF key to return the scale to the ready state. For battery pack equipped scales, the screen will remain blank until you press the ON/OFF key.
-
Page 11: Controls And Indicators
V. CONTROLS AND INDICATORS MAIN DISPLAY SCREEN The scale is equipped with 128x64 LCD Graphics Display with a wide viewing angle and variable contrast. For normal operations, you have a choice of viewing weight information from two main screens. For parts counting scales, two more screens are available. - Page 12 FRONT PANEL / KEYBOARD The front panel has a twelve button, click touch key panel that allows easy menu navigation as well as full text and floating point entry. The main scale functions are shown in black, menu navigation and floating point numeric entry keys are blue and the secondary functions are yellow.
- Page 13 Main Navigation Keys MENU/BACK Using this key from the weight display will access the setup menu. In all other areas it is used to back out from menus or to complete an operation. ENTER This key is used to select items and to complete operations in the various menus.
-
Page 14: System Operation
VI. SYSTEM OPERATION BASIC MENU OPERATION The scale operating system uses a menu driven interface that is both intuitive and easy to use. To access the setup menu press the MENU/BACK key. There are two basic menu types. The first is a simple list of items. To select an item in the list, use the UP and DOWN ARROW keys to line up on the desired item and then press ENTER. - Page 15 Editing Tares You can edit any tare by using the arrow keys to line up on it and the “EDIT” function in the lower menu and then press ENTER. The next screen will show the tare with its description and weight value in pounds. The lower menu allows you to change the description (“DESCR”), enter the value directly (“VALUE”) or acquire it automatically from the platform (“ACQUI”).
- Page 16 SAMPLE ACQUISITION There are two methods for acquiring samples. First is the “Quick Sample” method and the second is to define a sample in the scale’s memory for permanent storage. In general, the more parts that you use during your sample acquisition the more accurate your parts counting will be.
- Page 17 Deactivating Samples If you wish to clear a sample from memory, simply press and hold the SAMPLE key until it clears. COUNTING PARTS With sample acquisition complete you may now count your parts. On the top of the counting screen is displayed the sample’s description (or “taken from keyboard” if a quick sample was used) and the actual piece weight.
- Page 18 SYSTEM MEMORY ALLOCATION AND USAGE The scale’s memory is organized as 485 memory slots. The operating system uses ten of these for internal tasks and the setup for the default platform uses four. This leaves 471 slots available for user definitions that can take the form of tares, counting samples and other functions.
- Page 19 Zero lock can be enabled/disabled. Zero lock disables the front panel ZERO key. When this function is enabled the user must press the ZERO and the PRINT key simultaneously to zero the scale. Erase User Memory The entire user memory can be erased at one time, if necessary, using this option. It will erase all user-defined tares, counting samples, text definitions, print frames and setpoints but will leave platforms and other system memory intact.
-
Page 20: Configuration And Calibration
VII. CONFIGURATION AND CALIBRATION PLATFORM ADVANCED SET-UP The scale’s operating system revolves around one or more platform definitions that are stored in memory, with most scales only having one weighing platform. Each platform is fully configurable as to it capacity, displayed resolution, filtering, calibration and many other parameters which will be outlined in detail below. - Page 21 The remaining conversions are troy ounces, pennyweights, grains and a user defined conversion. Each conversion unit’s resolution can be set individually. To do this, select RESOLUTION-OVERLOAD from the platform menu. A list of conversions is displayed and each active conversion will have a check mark to its right. Select the conversion you wish to modify and press ENTER.
- Page 22 CALIBRATION AND TROUBLESHOOTING Your scale has been precisely calibrated at the factory before shipping. It has the capability to adjust its own calibration to a certain degree to compensate for aging electronics, and temperature changes. This being the case, it is possible that you will never have to calibrate the scale.
- Page 23 SPAN CALIBRATION Span calibration is used to set the internal gain of the indicator so that it reads correctly. A calibrated weight is needed in order to perform a span calibration. Any weight may be used within the capacity range of the scale but a weight of 50% of capacity is recommended.
-
Page 24: Menu Tree Diagram
VIII. MENU TREE DIAGRAM The following menu tree will help you navigate through the various system menus. -
Page 25: Specifications
IX. SPECIFICATIONS Model Capacity Resolution Platform Dimensions DS-R-60-925 60 lbs./27.3 kgs. .01 lb./.0005 kg . 9.25” x 9.25” DS-R-300-925 300 lbs./136 kgs. .05 lb./.0005 kg. 9.25” x 9.25” DS-R-300-14 300 lbs./136 kgs. .05 lb./.0005 kg. 14” x 14” DS-R-500-14 500 lbs./227 kgs. .1 lb./.0005 kg. - Page 26 NOTES...
- Page 27 NOTES...
- Page 28 Copyright 2019 Matheson Tri-Gas, Inc. All Rights Reserved. All contents of this document are subject to change without notice and do not represent a commitment on the part of Matheson Tri- Gas, Inc. Every effort is made to ensure the accuracy of this information. However, due to differences in actual and ongoing operational processes and product improvements and revisions, Matheson Tri-Gas, Inc.
Need help?
Do you have a question about the DS-R Series and is the answer not in the manual?
Questions and answers