Table of Contents
Advertisement
Quick Links
THE PERFECT BALANCE OF FUNCTION & ST YLE
LAUNDRY DISHWASHING COOKING COOLING
Installation & Operating Instructions
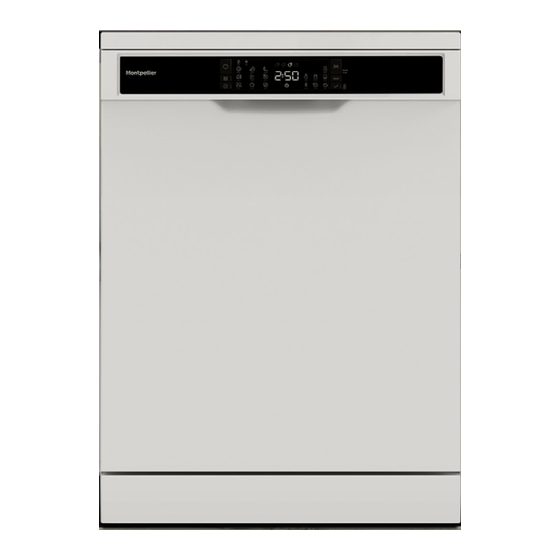
60cm Freestanding Dishwasher
White
MDWC1496W
Please read these instructions carefully before attempting to install or use this appliance.
We recommend that you keep these instructions in a safe place for future reference.
Advertisement
Table of Contents

Related Manuals for montpellier MDWC1496W


Summary of Contents for montpellier MDWC1496W
- Page 1 LAUNDRY DISHWASHING COOKING COOLING Installation & Operating Instructions 60cm Freestanding Dishwasher White MDWC1496W Please read these instructions carefully before attempting to install or use this appliance. We recommend that you keep these instructions in a safe place for future reference.
- Page 2 Welcome Thank you for choosing this Montpellier appliance. We recommend that you keep this manual in a safe place for future reference. Our appliances have been designed to provide you with the best combination of style, reliability and Your appliance is covered by a comprehensive two year Parts &...
-
Page 3: Table Of Contents
Contents 1 Putting Your Safety First 1.1 General Safety Warnings 1.2 Installation Warnings 1.3 During Usage 2 INSTALLATION 2.1 Machine Positioning 2.2 Water Connection 2.3 Water Inlet Hose 2.4 Drain Hose 2.5 Electrical Connection 2.6 Fitting the Machine Undercounter 3 TECHNICAL SPECIFICATIONS 3.1 General Appearance 3.2 Technical Specifications 4 BEFORE USING THE APPLIANCE... -
Page 4: Putting Your Safety First
Putting Your Safety First connected in line with safety regulations. 1 Putting Your Safety First 1.1 General Safety Warnings All electrical connections must match the values on the rating plate. Read these instructions carefully before using your Ensure the machine does not stand on the appliance and keep this manual for future reference. - Page 5 Putting Your Safety First Only put items in the machine which are • Material unsuitable for domestic waste suitable for dishwashing, and take care not must be disposed of at recycling centres. to overfill the baskets. • Contact a relevant recycling centre to obtain Do not open the door while the machine is in information about disposal of different materials.
-
Page 6: Installation
Installation 2.3 Water Inlet Hose 2 Installation 2.1 Machine Positioning When positioning the machine, place it in an area where dishes can be easily loaded and unloaded. Do not put the machine in an area where the ambient temperature falls below 0°C. Read all warnings located on the packaging before removing the packaging and positioning the machine. -
Page 7: Electrical Connection
Installation IMPORTANT: Items will not wash properly if a drain To remove the top panel, remove the screws that hold hose longer than 4m is used. it on, located at the rear of the machine. Then, push the panel 1 cm from the front towards the rear and lift it. Adjust the machine feet according to the slope of the floor (3). -
Page 8: Technical Specifications
Technical Specifications 3 Technical Specifications 3.1 General Appearance Worktop Cuttlery tray Upper basket with racks Upper spray arm Cuttlery basket Lower basket with racks Mug shelves Upper basket track latch Lower basket wheels Detergent and rinse-aid dispenser Salt dispenser Filters (Antibacterial) Lower spray arm Super Active Drying Unit: This system provides better drying performance for... -
Page 9: Technical Specifications
Before Using Your Appliance 3.2 Technical Specifications Only add water to the salt compartment before first use. Capacity 14 place settings Use softener salt specifically produced for use in dishwashers. Dimensions (mm) Height When you start your dishwasher, the salt compartment Width is filled with water, therefore put the softener salt in Depth... -
Page 10: Test Strip
Before Using Your Appliance 4.4 Test Strip Run water through Keep the strip in Wait Set the hardness Shake the strip the tap (1min ) the water (1sec ) (1min) level of your machine NOTE: The level is set to 3 as default. If the water is well water or has a hardness level above 90 dF, we recommend that you use filter and refinement devices. -
Page 11: Detergent Usage
Before Using Your Appliance 4.8 Detergent Usage 4.10 Using Combined Detergents Only use detergents specifically designed for These products should be used according to the domestic dishwashers. Keep your detergents in cool, manufacturer’s instructions. Never put combined dry places out of reach of children. Add the proper detergents into the interior section or the cutlery detergent for the selected programme to ensure the basket. -
Page 12: Filling The Rinse-Aid And Setting
Before Using Your Appliance 4.12 Filling The Rinse-aid And Setting To fill the rinse- aid compartment, open the rinse-aid compartment cap. Fill the compartment with rinse- aid to the MAX level and then close the cap. Be careful not to overfill the rinse- aid compartment and wipe up any spills. -
Page 13: Loading Your Dishwasher
Loading Your Dishwasher WARNING: To avoid any possible injuries, place 5 Loading Your Dishwasher long-handle knives on the knife rack or horizontally For best results, follow these loading guidelines. on the baskets and sharp-pointed knives in the cutlery basket with their sharp points facing down. Loading the household dishwasher up to the capacity indicated by the manufacturer will contribute to energy 5.2 Basket Adjustments... - Page 14 Loading your Dishwasher Soft Touch Upper Basket Folding racks Height Adjustment The foldable racks in the upper basket enable the placement of large items such as pots and pans. Each These racks are designed to increase the capacity of section can be folded separately. The foldable racks the top basket.
- Page 15 Loading your Dishwasher Upper Basket Height Adjustment When Full Upper Cutlery Tray The upper basket includes a mechanism that allows The upper cutlery tray is designed for you to place the height of the basket to be adjusted to the upper forks, spoons and knives, long utensils and small items.
-
Page 16: Alternative Basket Loads
Loading your Dishwasher 5.3 Alternative Basket Loads Incorrect Loads Lower Basket Incorrect loading can cause poor washing and drying performance. Please follow the manufacturer’s recommendations for good performance results. Upper Basket Unsuitable Items For Dishwashing • Cigarette ash, candle leftovers, polish, paint, chemical substances, iron-alloy materials. -
Page 17: Programme Table
Programme Table 6 Programme Table... - Page 18 Programme Table • The programme duration may change according to • To assist drying, we recommend slightly opening the amount of dishes, the water temperature, the the door after a cycle is complete. ambient temperature and selected additional • You can access the product database where the functions.
-
Page 19: The Control Panel
The Control Panel 7 The Control Panel 16a 16b 16c 16d 2:50 On/Off Button Delay Button Programme Selection Button You can delay the start time of the programme for Programme Indicators 1-2...24 hours by pressing the delay button before Delay Button the programme starts. -
Page 20: Selecting A Programme
The Control Panel Salt Indicator Washing Step Indicators When there is insufficient softening salt, the salt lack The display will show the indicator corresponding to warning indicator turns on and you should fill up the the status of the programme in operation. While the salt chamber. -
Page 21: Cancelling A Programme
The Control Panel / Cleaning & Maintenance 7.3 Cancelling a programme Buzzer Sound Control If you would like to cancel a programme when To change the buzzer sound level, follow the below it is running. steps: Press the Start/Pause button for 3 seconds. Open the door and press Half Load and Energy During cancellation, the End light blinks. -
Page 22: Cleaning & Maintenance
Cleaning & Maintenance Select a programme which runs at high temperature 8.2 Spray Arms and run the Dishwasher empty. • Make sure that the spray holes are not clogged and that no food waste or foreign objects are If this does not clean your Dishwasher sufficiently, use stuck to the spray arms. -
Page 23: Troubleshooting
Troubleshooting 9 Troubleshooting Fault Possible Cause Troubleshooting Your Dishwasher is not plugged in Plug your Dishwasher in Switch your Dishwasher on Your Dishwasher is not switched on by pressing the On/Off button Fuse blown Check your indoor fuses The programme does not start Water inlet tap is closed Tum on the water inlet tap Your Dishwasher door is open... - Page 24 Troubleshooting Automatic Fault Warnings and What to Do Trouble Code Possible Fault What to Do Make sure the water inlet tap is open and water is flowing Separate the inlet hose from the Water inlet system failure tap and clean the filter of the hose Contact for service if the error continues Pressure system failure Contact for service...
-
Page 25: Product Fiche
PARTS & LABOUR GUARANTEE Product Information Sheet Commission delegated regulation (EU) 2019/2017 with regard to energy labelling of household dishwashers Montpellier Domestic Appliances Ltd. Unit 1, Tewkesbury Retail Park, Northway Lane, Tewkesbury, Gloucestershire. GL20 8JU Model Identifier: MDWC1496W General Product Perameters Parameter... -
Page 26: Here For You
Should your appliance develop a fault, please THIS DOES NOT AFFECT YOUR STATUTORY RIGHTS. call the Montpellier customer service helpline on: Your new Montpellier appliance carries a free guarantee 01759 487 839 which protects you against the cost of repairs during... - Page 27 Montpellier Domestic Appliances Ltd. Unit 1, Tewkesbury Retail Park, Northway Lane, Tewkesbury, Gloucestershire GL20 8JU www.montpellier-appliances .com The symbol on the product or on its packaging indicates that this product may not be treated as household waste. Instead it shall be handed over to the applicable collection point for the recycling of electrical and electronic equipment. By ensuring this product is disposed of correctly, you will help prevent potential negative consequences for the environment and human health, which could otherwise be caused by inappropriate waste handling of this product.
Need help?
Do you have a question about the MDWC1496W and is the answer not in the manual?
Questions and answers