
Summary of Contents for DeatschWerks 9-201-5005
- Page 1 DeatschWerks 9-201-5005, 9-301-5006, 9-401-5007, 9-441-C102-5008 Install Guide 9-201-5005, 9-301-5006, 9-401-5007, 9-441-C102-5008 Universal Fuel Tank Pump Mount Installation Guide...
-
Page 2: Required Tools
DeatschWerks 9-201-5005, 9-301-5006, 9-401-5007, 9-441-C102-5008 Install Guide Table of Contents Included Parts ……………………………………………………………………….. Page 2 Important Notes …………………..……………………………………………….. Page 3 Suggested Tools …………………….………………………………………………. Page 3 Prepping Tank for Install ………………….……………………………………. Page 4 Drilling the Tank ……………………………………………………………………. Page 5 Installing the Bolt Ring …………………..……..………………………………. - Page 3 DeatschWerks 9-201-5005, 9-301-5006, 9-401-5007, 9-441-C102-5008 Install Guide PLEASE READ : This guide is intended to aid in the installation of our products. It is recommended that factory manuals or instructions are followed to remove the fuel pump assembly from the vehicle. Instructions in this guide are generic and are intended to aid in the installation of our Universal Fuel Pump Mount.
- Page 4 DeatschWerks 9-201-5005, 9-301-5006, 9-401-5007, 9-441-C102-5008 Install Guide Prepping the Fuel Tank 1 – Find a relatively flat space that the Universal Mount can sit mostly flush. You’ll notice below it is not perfectly flat. That is fine as the supplied gasket will take up most of the corrugation in the tank or most imperfections.
- Page 5 DeatschWerks 9-201-5005, 9-301-5006, 9-401-5007, 9-441-C102-5008 Install Guide Drilling the Tank 3 – Take your 3-inch hole saw and drill your marked hole from step 2. Clean your surface to easily see where you have marked for each hole. This will help later on.
- Page 6 DeatschWerks 9-201-5005, 9-301-5006, 9-401-5007, 9-441-C102-5008 Install Guide Installing the Bolt Ring 5 – Drill each bolt hole with a ¼-inch drill bit. This will allow for some error in the pattern with no affect in the mounting of the adapter. As you can see in the 2 picture below my drill marks were not perfect, but this will work none the less.
- Page 7 DeatschWerks 9-201-5005, 9-301-5006, 9-401-5007, 9-441-C102-5008 Install Guide 6b – To Install with no adhesive, take one hand and put a couple fingers through the top black ring of the mount with gasket under it. Use your other hand to rotate the bolt ring around into the tank keeping tension on it from the hand in the mount.
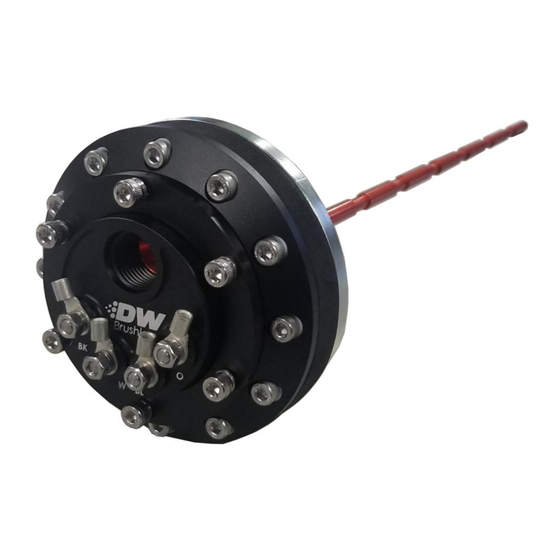
- Page 8 DeatschWerks 9-201-5005, 9-301-5006, 9-401-5007, 9-441-C102-5008 Install Guide Installing the 3.5 or 3.5Brushless Adapter 8 – This mount is made for our 3.5 surge tank adapters. Swap out the rod that comes with the adapter for the longer one that comes with the mount. Measure the depth of your tank and subtract 2 inches (50mm). Cut the rod at that length.
- Page 9 DeatschWerks 9-201-5005, 9-301-5006, 9-401-5007, 9-441-C102-5008 Install Guide 10 – Most aftermarket fuel systems require a return fuel line to the tank. There is no return port on the Universal Fuel Tank Pump Mount. You can repurpose the OEM fuel feed sending unit as your new return, be sure to remove the filter sock as it could get clogged and create high fuel system pressure.
Need help?
Do you have a question about the 9-201-5005 and is the answer not in the manual?
Questions and answers