Table of Contents
Advertisement
Quick Links
Advertisement
Table of Contents

Summary of Contents for Matrix Audio MP-1
- Page 1 User Manual...
-
Page 2: Table Of Contents
Catalog P r e a m p l i f i e r Packing list ..........01 Front . -
Page 3: Packing List
Packing list P r e a m p l i f i e r Product Remote control Power cable (RM4C) Trigger cable User manual & warranty card ... -
Page 4: Front
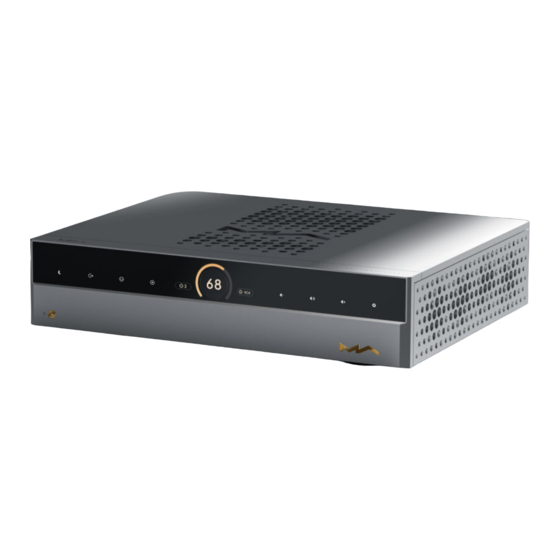
Parts and names P r e a m p l i f i e r Front Power on/Standby Touch button for volume up and down After connecting to power supply, press this button to power on Single touches change volume step by step, hold the button to the unit. Hold it for 1 second to let the device enter standby. change volume rapidly. LED indicator Touch button for mute and unmute The LED indicator will go off when the device is standby. It Use this button to mute and unmute. flashes when the device is delayed starting, and will keep lit up after the device is started. Touch button for settings menu Enter the settings menu by touching this button. Touch button for Dimmer Enable or disable Dimmer mode. -
Page 5: Rear
Parts and names P r e a m p l i f i e r Wear Analog input Power input There are three pairs of RCA and three pairs of XLR inputs. Please use a power cable which includes an earth wire and ensure you have a reliable earth wire connection. Otherwise, the casing of the device may have a slightly charged touch. Analog output There is one pair of RCA outputs and two pairs of XLR outputs. Trigger input/output Connect to audio devices with trigger ports through a ø3.5 mm USB Type‑C mono plug cables, to achieve a linkage control between the MP‑1 For firmware update. and other devices. The trigger output provides a 12V DC signal. Power switch If you need the device to be turned off completely, please turn off this switch. Otherwise, there is still about 1W power consumption in standby ... -
Page 6: Settings
Settings P r e a m p l i f i e r 1. Balance adjust Set the balance of left and right channels. Every step changes 0.5dB, the maximum adjustment per channel is 3dB. 5. Startup volume Set the default volume when the device is turned on. The device can remember the volume before it was shut down or set to any volume between 1‑60. 2. Input level adjust Set the level of every input channel, to achieve the level of different input channels to keep consistent. Every step changes 0.5dB, the maximum adjustment is 6dB. 3. Output mode 6. Remote control Enable or disable some output modes. Output modes which are disabled will not be displayed in the output options, at least 1 output Enable or disable IR remote control functionality. If there are multiple method must be selected. Matrix Audio devices that work at the same time, you can set the address code of the IR remote control to avoid misoperation. 4. Volume control method When the option "Independent volume" is selected, different volume values will be saved for every output channel. -
Page 7: Programmable Button
Settings P r e a m p l i f i e r 10. Language 7. Programmable button Select your preferred language for the user interface. Chinese and Set the functionality of programmable button on the IR remote English are available. control. They can be defined as a specific input channel or a volume level. 11. Load default Reset all the settings to default. 8. Backlight brightness Set the brightness of the display and the touch buttons. 12. Product info View the basic information of the device. 9. Auto dimmer Enable or disable the device automatically enters dimmer mode when there is no operation. When this option is set to "Off", the device will still enter dimmer mode by pressing the Dimmer button on the IR remote or the touch button on the device. -
Page 8: Appendix
Appendix P r e a m p l i f i e r Audio Specifications Weight & size Weight꞉ 15.7kg (34.6 pounds) Size꞉ Width꞉ 430 mm (16.93 inches) Depth꞉ 349 mm (13.74 inches) Height꞉ 106 mm (4.17 inches) Input Impedance 40kΩ 20kΩ Output Impedance 40Ω 20Ω Maximum Input Level 9Vrms 4.5Vrms Maximum Output Level 36Vrms 18Vrms ± Frequency Response 20‑20kHz 0.1 250kHz @‑3dB 129dB@A‑weighting 125dB@A‑weighting Dynamic Range Output 125dB@Unweighting 120dB@Unweighting <0.00040%@A‑weighting <0.00015%@A‑weighting... - Page 9 Attention P r e a m p l i f i e r • This product is for indoor use only. • For full ventilation, it is recommended to reserve a space of larger than 5 cm around the device. • Do not cover the air vents with stuffs such as papers, tablecloths, and curtains to obstruct ventilation. • Do not place stuff with flame, such as lighted candles, on the device. • If the device is used in tropical areas, please be careful to prevent insects from entering the unit through the air vents. • The device must not be subject to water droplets or splashes. Please do not place stuffs filled with liquids such as vases and cups on or near the device.
- Page 10 +86‑29‑86211122 Room 206 Block B, #58 Mingguang Road Xi'an, Shaanxi...


Need help?
Do you have a question about the MP-1 and is the answer not in the manual?
Questions and answers