Table of Contents
Advertisement
Quick Links
Advertisement
Table of Contents

Summary of Contents for AIO SV242
- Page 1 SV242 SV270 All-In-One USER’S MANUAL ENGLISH...
-
Page 2: Table Of Contents
CONTENTS TAKING CARE OF YOUR AIO ............Safety Precautions ..................... 3 BEFORE YOU START................ Make sure you have everything ................5 Familiarize yourself with the AIO................6 POWER SYSTEM ....................6 OVERVIEW .................... 7 LEFT SIDE VIEW ..................8 RIGHT SIDE VIEW .................. -
Page 3: Taking Care Of Your Aio
TAKING CARE OF YOUR AIO Safety Precautions The following safety precautions will increase the life of the AIO. Follow all precautions and instructions. Except as described in this manual, refer all servicing to qualified personnel. Do not use damaged power cords, accessories, or other peripherals. - Page 4 If an extension cord is used with this AIO , make sure that DO NOT press or touch the display the total ampere rating of the panel. DO NOT place together with small items that may scratch or equipment plugged into the enter the AIO.
-
Page 5: Before You Start
BEFORE YOU START Make sure you have everything When you receive your AIO , unpack it carefully, and check to make sure you have all the items listed below. For a pre-configured model you should have the following: • •... -
Page 6: Familiarize Yourself With The Aio
BEFORE YOU START Familiarize yourself with the AIO POWER SYSTEM Connect the DC plug to power adapter port. Power Adapter Port Connect the AC power cord to the AC adapter. Connect the AC power cord to an AC outlet. -
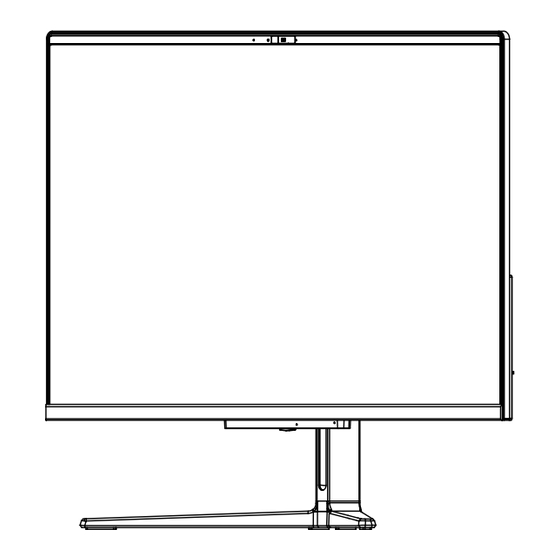
Page 7: Overview
The display panel is a color LCD panel with back lighting for the display of text and graphics. Power Led The LED lights when the AIO is turned ON and blinks slowly when the AIO is in the Save-to-RAM (Suspend) mode. The LED is off when the AIO is turned OFF. -
Page 8: Left Side View
BEFORE YOU START LEFT SIDE VIEW The following is a brief description of the left side view of the AIO. -
Page 9: Right Side View
BEFORE YOU START RIGHT SIDE VIEW The following is a brief description of the right side view of the AIO. -
Page 10: Top Side View
BEFORE YOU START TOP SIDE VIEW The following is a brief description of the top side view of the AIO. Fan Outlets Fan Outlets These are open ports for the fan to dissipate heat from the computer's internal components. Do not block or place the computer in such a position that you inadvertently allow the outlet to become blocked. -
Page 11: Bottom Side View
BEFORE YOU START BOTTOM SIDE VIEW The following is a brief description of the bottom side view of the AIO. Speaker Mesh Suspend/ Power On Button Speaker Mesh For the sound playing. Suspend/Power On Button This button turns your AIO on and off or puts it to sleep. -
Page 12: Back Side View
USB 2.0 Ports HDMI Port Power Adapter Port The power adapter port allows you to plug in the AC adapter to power your AIO. LAN (RJ-45) Port The LAN port is designed to support a 10/100/1000 Base-T standard RJ-45 plug. - Page 13 Microphone Jack It is designed to connect the microphone used for Skype, voice narrations, or simple voice recordings. Kensington Lock Slot The Kensington lock slot allows you to secure your AIO to an immovable object with an optional security cable.
-
Page 14: Getting Started
POWER ON Suspend/Power On Button The suspend/power on switch is used to turn on your AIO from its off state. Once you have connected your AC adapter , you can power on your AIO by pressing the suspend/power on button located at the bottom right corner on the back. If you need to take an extended break press the button again to turn it off. -
Page 15: Troubleshooting
4.Make sure that any devices connected to the external connectors are plugged in properly. You can also disconnect such devices, thus eliminating them as possible causes of failure. 5.Turn on your AIO. Make sure it has been off at least 10 seconds before you turn it on. 6.Go through the boot sequence. -
Page 16: Memo
MEMO This equipment has been tested and found to comply with the limits for a Class B digital device, pursuant to part 15 of the FCC Rules. These limits are designed to provide reasonable protection against harmful interference in a residential installation. This equipment generates, uses and can radiate radio frequency energy and, if not installed and used in accordance with the instructions, may cause harmful interference to radio communications.
Need help?
Do you have a question about the SV242 and is the answer not in the manual?
Questions and answers