Table of Contents
Advertisement
Quick Links
REVISION B
Form No. 3316146.000 10/16
©2016 Dometic Corporation
LaGrange, IN 46761
RV
COMPACT REMOTE CENTRAL VAC
(X) = UNIT COLOR
Read these instructions carefully. These
instructions MUST stay with this product.
USA
SERVICE OFFICE
Dometic Corporation
1120 North Main Street
Elkhart, IN 46514
RECORD THIS INFORMATION FOR FUTURE
REFERENCE:
Model Number
Serial Number
Date Purchased
Retailer / Qualified Installer
PLUS
™
ac
MODEL
DI-CSRM(X)
E - EBONY
CANADA
Dometic Corporation
46 Zatonski, Unit 3
Brantford, ON N3T 5L8
CANADA
SERVICE CENTER &
DEALER LOCATIONS
Please Visit:
www.eDometic.com
Advertisement
Table of Contents

Related Manuals for Dometic RVac Plus DI-CSRM Series


Summary of Contents for Dometic RVac Plus DI-CSRM Series
- Page 1 SERVICE CENTER & DEALER LOCATIONS REVISION B SERVICE OFFICE Dometic Corporation Form No. 3316146.000 10/16 Dometic Corporation 46 Zatonski, Unit 3 Please Visit: ©2016 Dometic Corporation 1120 North Main Street Brantford, ON N3T 5L8 www.eDometic.com Elkhart, IN 46514 CANADA LaGrange, IN 46761...
-
Page 2: Table Of Contents
These instructions will ensure the unit is properly serviced. Dometic Corporation reserves the right to modify appliance appearances and specifications without notice. TABLE OF CONTENTS INTRODUCTION ..................................2 DOCUMENT SYMBOLS ................................2... -
Page 3: Important Safety Instructions
IMPORTANT SAFETY INSTRUCTIONS General Safety Messages This manual has safety information and instructions to help you eliminate or reduce the risk of accidents and injuries. Failure to obey the following warn- Recognize Safety Information ings could result in death or serious injury: ●... -
Page 4: Specifications
IMPORTANT SAFETY INSTRUCTIONS ● Do NOT pick up anything that is burning or smok- ● Do NOT pick up large objects such as waste pa- ing, such as cigarettes, matches, or hot ashes. per or cloth, which may clog the hose. ●... -
Page 5: General Information
OPTIONAL ACCESSORIES Description Item Number New dust bags (x5) and motor filter (x1) Y11-5 Dometic VacPort™ DI-A900ELED Dometic VacPort with installation kit DI-A900ELEDIK Mini Turbo brush DI-X451 24" flexible crevice tool DI-X511 INTENDED USE The DI-CSRM(X) central vacuum cleaner is for installation in a suitable wall cavity or in existing fixtures in RVs, towables,... -
Page 6: Technical Description
The vacuum cleaner system can be extended, using the The suction hose must be turned on and off using the Dometic VacPort (not included). This automatic dust pan switch when using it while connected to the central vacuum can be fitted, for example, in the entrance or kitchen area cleaner. -
Page 7: Installation Instructions
INSTALLATION INSTRUCTIONS ELECTRICAL SHOCK HAZARD. screws with "clamps." Do NOT overtighten. See (FIG. 5). Only the 120 Vac cable supplied may be used with this unit. No grounding required. The vacuum is FIG. 5 double-insulated. Failure to obey the following notices could damage product or property: ●... -
Page 8: Operating Instructions
INSTALLATION INSTRUCTIONS 2. Use a jigsaw to enlarge the hole so the inlet 4. Connect the supplied wire to the inlet valve. See valve can lay flush with the wall. See (FIG. 7). (FIG. 9). a. Strip the covering off the ends of the wire. FIG. -
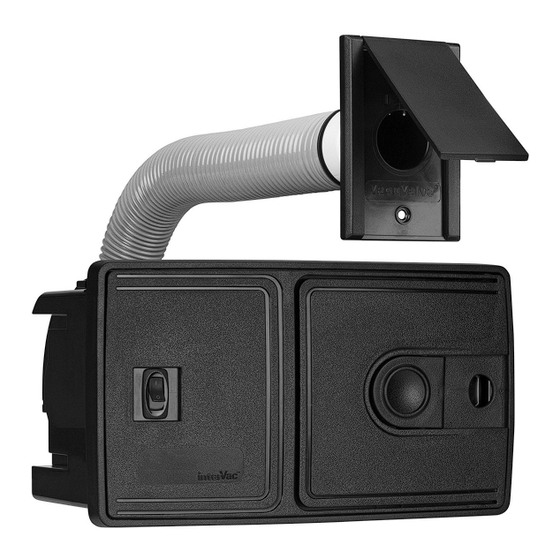
Page 9: Using The Remote Inlet Valve
OPERATING INSTRUCTIONS frame, until the lock / latch clicks into place. See FIG. 10 (FIG. 11). Close FIG. 11 Open Using the Remote Inlet Valve U se the sliding cover to close up the hose FIG. 12 connection on the front of the unit if you are vacuuming from the external hose inlet. -
Page 10: Cleaning And Maintenance Of The Unit
OPERATING INSTRUCTIONS Cleaning and Maintenance of the Unit FIG. 14 Do NOT use sharp or hard objects or cleaning agents for cleaning as these may dam- age the unit. 1. C lean the unit with a damp cloth as needed. TROUBLESHOOTING Cleaning of the Stretch Hose ... -
Page 11: Warranty Information
Claims ing toll free 1-888-499-1925 to receive exact in- must be submitted in writing to the Dometic War- structions on how to return the product, which is ranty Department for arbitration. - Page 12 Cut line - 6" (152 mm) from edge of paper Paper Template W608 for all CS Models...
Need help?
Do you have a question about the RVac Plus DI-CSRM Series and is the answer not in the manual?
Questions and answers