Table of Contents
Advertisement
Advertisement
Table of Contents

Related Manuals for Quicke Q700 Series

Summary of Contents for Quicke Q700 Series
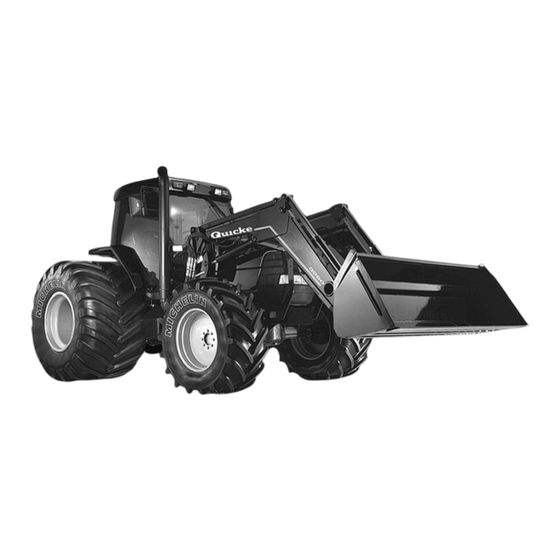
- Page 1 700 & Series Loaders Technical Manual...
-
Page 2: Table Of Contents
SUBFRAME SYSTEM US / UM / UL..................6 REGULAR MAINTENANCE INTERVALS................. 7 SUBFRAME CAPSCREW TORQUE CHART ................8 SAFETY PRACTICES ........................9 Q700 Series Implement Ram (Previous to 2002)..............14 Q700 Series Implement Ram (2002-) ..................15 Q900 Series Implement Ram (Previous to 2002).............. - Page 3 TABLE OF CONTENTS...
-
Page 4: General Information
GENERAL INFORMATION This manual is written to serve as a guide for the proper repair and maintenance of all Quicke Loaders and is structured to provide sufficient information to troubleshoot some of the more common problems that may be encountered. -
Page 5: Subframe
PRODUCT IDENTIFICATION Page 5 (69) SUBFRAME Fig. C&D... -
Page 6: Subframe System Us / Um / Ul
PRODUCT IDENTIFICATION Page 6 (69) SUBFRAME SYSTEM US / UM / UL Fig. 3 EURO (8) TOOL CARRIER (Standard in North America) Hook Set Positioning Fig. 4... -
Page 7: Regular Maintenance Intervals
GENERAL MAINTENANCE Page 7 (69) REGULAR MAINTENANCE INTERVALS Item Service Service Interval Hydraulic System Oil Level Check Daily / 10 Hours As Specified in Tractor Hydraulic System Oil/Filter Replace Operator's Manual Tire Inflation Check Weekly / 50 Hours Loader Pivot Points and Tool Carrier Engagement Shafts Lubricate Daily / 10 Hours Check for Leaks and Wear. -
Page 8: Subframe Capscrew Torque Chart
GENERAL MAINTENANCE Page 8 (69) Use the following table as a reference for proper torque specifications. Improperly tightened hardware may cause structural damage to loader and/or tractor. • If the Subframe comes with extensions, install as per instructions. • Once the Subframe has been properly installed, you may proceed with the installation of the loader. -
Page 9: Safety Practices
SAFETY Page 9 (69) SAFETY PRACTICES The safety of the operator and maintenance personnel is very important. Avoid personal injury! Study the following personal safety instructions and insist that all operating and service personnel adhere to them. 1. Properly park the tractor! When dismounting and/or leaving the operator’s seat FOR ANY REASON, always: Lower the loader to the ground. - Page 10 SAFETY Page 10 (69) 3. Stay away from a raised loader. DO NOT stand or walk under a raised loader. Keep all people (especially children), pets, and livestock away from work area. Fig. 6 4. Wear Protective clothing. Avoid loose-fitting clothing. Loose clothing can catch on machine controls or moving parts and cause bodily injury.
- Page 11 SAFETY Page 11 (69) Battery gas can explode. Keep sparks and open flame away from the top of the battery, especially when changing the battery. Make sure that no fuel has been spilled on the engine. 7. Prepare for Emergencies. Keep a first aid kit and fire extinguisher handy at all times.
- Page 12 SUBFRAME INSTALLATION Page 12 (69) USE THE FOLLOWING INSTRUCTIONS AS A GUIDE FOR INSTALLING YOUR QUICKE LOADER SUBFRAME. Important: Loader frames are designed for particular tractor models. Do not install a loader frame on a different tractor model without consulting Alo North America Technical Support Group.
- Page 13 HYDRAULIC RAM SERVICE Page 13 (69) Bucket Level Indicator Installation Identify all parts. Remove nut from Bucket Level Indicator (BLI) Tube attachment capscrew. Install BLI attachment capscrew in RH bucket ram rod end eye. Note: The capscrew will bottom out, resulting in the tube being loose when the bolt is tight, allowing tube movement during movement of the implement.
-
Page 14: Q700 Series Implement Ram
HYDRAULIC RAM SERVICE Page 14 (69) Fig. 10 Q700 Series Implement Ram (Previous to 2002) Item Part Number Description Dimension Quantity Bearing Piston Piston Rod Bushing Greaser Barrel Bushing Retaining Ring Retaining Ring SEAL ASSEMBLY Scraper Piston Seal Seal Support Ring... -
Page 15: Q700 Series Implement Ram
HYDRAULIC RAM SERVICE Page 15 (69) Q700 Series Implement Ram (2002-) Part Number Dimension Item Description Quantity Bearing Piston Piston Rod Bushing Barrel Bushing Retaining Ring Retaining Ring SEAL ASSEMBLY O-ring Guide Ring Guide Ring Wiper Piston Seal Seal Cover Seal Refer to Spare Parts Manual Note: Implement Rams prior to the year 2002 will have a six digit part number. -
Page 16: (Previous To 2002)
HYDRAULIC RAM SERVICE Page 16 (69) Q900 Series Implement Ram (Previous to 2002) Item Part Number Description Dimension Quantity Bearing Piston Piston Rod Bushing Rear Rod Guide Barrel Bushing Stop Screw Retaining Ring Retaining Ring SEAL ASSEMBLY Scraper Seal Piston Seal Support Ring O'-ring O'-ring... - Page 17 HYDRAULIC RAM SERVICE Page 17 (69) Q900 Series Implement Ram (2002-) Part Number Dimension Item Description Quantity Bearing Piston Piston Rod Bushing Barrel Bushing Retaining Ring Retaining Ring Guide Stop Screw Rear Rod SEAL ASSEMBLY O-ring Guide Ring Guide Ring Wiper Piston Seal Seal...
- Page 18 HYDRAULIC RAM SERVICE Page 18 (69) Q 700 & 900 Series Lift ram (2002-) Item Description Dimension* Quantity Bearing Piston Piston Rod Bushing Barrel Left Barrel Right Bushing Retaining Ring Retaining Ring SEAL ASSEMBLY O-ring Guide Ring Guide Ring Wiper Piston Seal Seal Cover Seal...
-
Page 19: (Previous To 2002)
HYDRAULIC RAM SERVICE Page 19 (69) Q 700 & 900 Series Lift ram (previous to 2002) Item Description Dimension* Quantity Bearing Piston Piston Rod Bushing Barrel Left Barrel Right Bushing Retaining Ring Retaining Ring SEAL ASSEMBLY Scraper Piston Seal Seal Support Ring O-ring O-ring... -
Page 20: Seal Assembly Replacement
HYDRAULIC RAM SERVICE Page 20 (69) SEAL ASSEMBLY REPLACEMENT DISASSEMBLY Begin by drawing out the piston rod at least 100mm. Remove the retaining ring Note: Prior to replacing Hydraulic with pliers, and Carefully Extract the Ram Seals, check that the piston, O-ring. - Page 21 HYDRAULIC RAM SERVICE Page 21 (69) the outside surface of the guide, file them off. REASSEMBLY When reinserting piston Before the piston is reassembled on to assembly, thread the guide on the piston the piston rod, clean the threads and rod and insert the two pieces together.
- Page 22 HYDRAULIC RAM SERVICE Page 22 (69) Fig. 17...
- Page 23 HYDRAULIC RAM SERVICE Page 23 (69) Fig. 18...
-
Page 24: Seal Assembly
HYDRAULIC RAM SERVICE Page 24 (69) SEAL ASSEMBLY Fig. 19... -
Page 25: Open Center Hydraulic Control Valve 521782 / 521822 Sdm
HYDRAULIC VALVE SERVICE Page 25 (69) Walvoil OPEN CENTER HYDRAULIC CONTROL VALVE 521782 / 521822 SDM 143/2 Fig. 20... -
Page 26: Walvoil
HYDRAULIC VALVE SERVICE Page 26 (69) Walvoil OPEN CENTER HYDRAULIC CONTROL VALVE Item Part Number Description Quantity 521782 Control Valve SDM 143/2 521822 SDM 143/2 Control Valve 521685 Slide Control 521894 Slide Control (Float) 521895 Relief Valve 185 Bar 5037017 O-ring 20.35 x 1.78 (70Sh) 5038434... -
Page 27: Nord Hydraulic
HYDRAULIC VALVE SERVICE Page 27 (69) Nord Hydraulic OPEN CENTER HYDRAULIC CONTROL VALVE 10550083 / 10550191 / 1055192 RMC 202 Fig. 21... -
Page 28: Open Center Hydraulic Control Valve
HYDRAULIC VALVE SERVICE Page 28 (69) Nord Hydraulic OPEN CENTER HYDRAULIC CONTROL VALVE Item Part Number Description Quantity 10550083 Control Valve RMC 202, 1 1/16" JIC 10550191 Control Valve RMC 202, 1/2" BSP 10550192 Control Valve RMC 202, 3/4" BSP Slide Control 10550063 10550064... -
Page 29: Walvoil
HYDRAULIC VALVE SERVICE Page 29 (69) Walvoil LOAD SENSING HYDRAULIC CONTROL VALVE 521622 / 521632 DLM/2 Fig. 22... -
Page 30: Load Sensing Hydraulic Control Valve
HYDRAULIC VALVE SERVICE Page 30 (69) Walvoil LOAD SENSING HYDRAULIC CONTROL VALVE Item Part Number Description Quantity 521622 Control Valve DLM 142/2 521632 Control Valve DLM 142/2 521685 Slide Control (Float) 521894 Slide Control 521688 Check Valve 5037057 O-ring 14.00 x 1.78 (70Sh) 521689 Seal Retainer 3ANE134041... - Page 31 ELECTRICAL WIRING DIAGRAMS Page 31 (69) JOYSTICK ELECTRICAL CONNECTION OPTIONS ERGO DRIVE Table 6...
-
Page 32: Control Cable Replacement
CONTROL JOYSTICK AND CABLES Page 32 (69) CONTROL CABLE REPLACEMENT To replace Control Cables within the To replace the Control Cables at the Joystick Controller: Control Valve: First use a screwdriver to slide back the Remove the screws from the Adjusting Sleeve Joystick Collar according to Fig. - Page 33 CONTROL JOYSTICK AND CABLES Page 33 (69) Important: If float position cannot be maintained, disconnect lift ram cable from control valve and try moving the spool carefully using a screwdriver. If it works now, adjust the cable. Fig. 23...
- Page 34 CONTROL JOYSTICK AND CABLES Page 34 (69) Third Hydraulic Function on Loader Control Lever (Refer to Fig. 24) • The third hydraulic function is controlled by a switch, (1), on the front of the hydraulic control lever knob. • When the switch IS NOT pressed, (A), and the lever is moved side-to-side, the lever controls bucket dump and roll-back.
-
Page 35: Soft Drive
OPTIONAL EQUIPMENT Page 35 (69) SOFT DRIVE Description / Control Check of Accumulator A (refer to Fig. 25 and Fig. 26) Connect a manometer to the hose from The SOFT DRIVE unit consists of two the loader lift rams (the + side) (BLUE or three hydrogen charged accumulators hose) with the shut-off valve in open (depending on the loader model) and a... - Page 36 OPTIONAL EQUIPMENT Page 36 (69) Fig. 25 Table 7 Warning ! Risk for injury by squeezing. When the shut-off valve for the accumulators is opene, the loader MUST be lowered to the ground and pressure in the hydraulics MUST be relieved. If close manoeuvring is needed, shut off the accumulators to avoid lifting and sinking movements...
-
Page 37: Selecto Valve
OPTIONAL EQUIPMENT Page 37 (69) SELECTO VALVE DESCRIPTION SELECTO (3+4) The Selecto hydraulic control valve is an The Selecto (3+4) kit consists of: electrically activated hydraulic flow A hydraulic diverter valve with two diverter spool permitting additional double-acting functions. hydraulic functions (one or two double- basically a Selecto 3 with another acting) for the implements. - Page 38 OPTIONAL EQUIPMENT Page 38 (69) WARNING! Incorrect installation of the electrical wiring will destroy the built-in diodes in the connectors on the valve. NOTE: Connect the electrical wiring after the tractor safety switch. The wires are supplied with a fuse (8A) to be fitted on the leader (+) between the connector and current source.
- Page 39 OPTIONAL EQUIPMENT Page 39 (69) Fig. 32 Fig. 33...
-
Page 40: Hydro Quick
OPTIONAL EQUIPMENT Page 40 (69) HYDRO QUICK DESCRIPTION The Hydro Quick is a device for quick and easy connection / disconnection of the loader hydraulics. One lever connects all four hoses at the same time. This system helps eliminate faulty connections and oil leakages. Fig. - Page 41 OPTIONAL EQUIPMENT Page 41 (69) PROBLEM IDENTIFICATION / SOLUTIONS Leakage Locate the leaking coupling and disconnect the Hydro-Quick Does Not Disconnect lower and upper components of the Hydro Quick. Push the safety button “C” before lifting the lever, and verify whether the lever is Replace the seal of the male coupler that is deformed.
- Page 42 OPTIONAL EQUIPMENT Page 42 (69) HYDRAULIC IMPLEMENT LOCK The Hydraulic Implement Lock operates the Tool Carrier Locking Pins using the Attachment / Detachment Instructions Joystick Controller. With this device the (refer to Fig. 40) implement ATTACHED - Push button D so that red is shown. DETACHED using the hydraulic control - Push button C.
- Page 43 OPTIONAL EQUIPMENT Page 43 (69) Fig. 37 Fig. 38...
- Page 44 OPTIONAL EQUIPMENT Page 44 (69) Fig. 40B Fig. 40 Fig. 41...
- Page 45 OPTIONAL EQUIPMENT Page 45 (69) Fig. 42...
-
Page 46: Automaticangle Control (Aac)
OPTIONAL EQUIPMENT Page 46 (69) AUTOMATICANGLE CONTROL (AAC) DESCRIPTION AAC is the equipment for the automatic return of the loader implement to a preselected position. This kits consists of: Reference # 1 valve assembly Fig. 43-5 1 electrical unit Install the sensor box 2 as well as the level 1 valve indicator 6, 15 on the right or left bucket 1 restrictor/check valve... - Page 47 OPTIONAL EQUIPMENT Page 47 (69) Implement dumped (NOTE! Must be out of unwanted movements, keep preselected position). The position of the control lever position inductive sensor in relation to the metal “lowering” ONLY; when the AAC plate in the level indicator must be as is activated.
- Page 48 OPTIONAL EQUIPMENT Page 48 (69) Fig. 43-2 Fig. 43-3...
- Page 49 OPTIONAL EQUIPMENT Page 49 (69) Fig. 43-4 Fig. 43-5...
- Page 50 OPTIONAL EQUIPMENT Page 50 (69) Fig. 43-6...
- Page 51 OPTIONAL EQUIPMENT Page 51 (69) Fig. 43-7...
- Page 52 OPTIONAL EQUIPMENT Page 52 (69) Fig. 44...
- Page 53 OPTIONAL EQUIPMENT Page 53 (69) Fig. 45...
- Page 54 OPTIONAL EQUIPMENT Page 54 (69) Fig. 46 Fig. 47...
- Page 55 OPTIONAL EQUIPMENT Page 55 (69) Fig. 48...
-
Page 56: General Maintenance Issues
SERVICE DIAGNOSTICS Page 56 (69) GENERAL MAINTENANCE ISSUES Loader malfunction is often caused by factors unrelated to the loader. Follow this quick checklist for problem diagnostics: • Check oil level in tractor hydraulic reservoir. Fill to correct level. • Be sure correct hydraulic fluid is being used. Use only the hydraulic fluuid specified in your tractor operator’s manual. - Page 57 SERVICE DIAGNOSTICS Page 57 (69) SPECIFIC WINTER RELATED ISSUES To assure smooth operation in cold weather, allow tractor to warm up. SLOWLY, cycle the loader and attachment several times to warm fluid in the hydraulic system. The loader may operate erratically until the hydraulic fluid has warmed to operating temperatures. Frozen Cables To prevent the freezing of control cables, it is recommended that you use a “red line”...
-
Page 58: Trouble Shooting Chart
SERVICE DIAGNOSTICS Page 58 (69) TROUBLE SHOOTING CHART PROBLEM POSSIBLE CAUSE CORRECTION Lift and Bucket Rams Low hydraulic fluid level. Check and replenish hydraulic Inoperative. Fluid. Hydraulic hoses connected Check and correct hydraulic hose incorrectly. connections. Hydraulic hoses to/from control Check for damaged (kinked) hoses, valve "Blocked". - Page 59 SERVICE DIAGNOSTICS Page 59 (69) PROBLEM POSSIBLE CAUSE CORRECTION Slow or erratic Lift. Low hydraulic fluid level. Cold Check/Replenish hydraulic fluid. hydraulic fluid. Allow hydraulic system to warm up to operating temperature. Engine RPM too slow (hydraulic Increase engine speed to obtain pump RPM is too slow).
- Page 60 SERVICE DIAGNOSTICS Page 60 (69) PROBLEM POSSIBLE CAUSE CORRECTION System relief valve squeals. Cold hydraulic fluid. Allow hydraulic fluid to warm up to operating temperature. Excessive load in bucket. Weight Reduce loads. exceeds specified loader capacity. Relief valve setting below Check relief valve pressure specifications.
- Page 61 SERVICE DIAGNOSTICS Page 61 (69) PROBLEM POSSIBLE CAUSE CORRECTION Lift Ram rods bend when Lift Excessive shock load on lift Replace defective parts. Review Rams are extended. during transport. and observe proper and safe operational practices. Bucket Ram rods bend when Back grading or dozing with Replace defective parts.
- Page 62 DEFINITIONS...
- Page 63 TECHNICAL SPECIFICATIONS Page 63 (69) Table 9...
- Page 64 TECHNICAL SPECIFICATIONS Page 64 (69) Table 10 BSP Hydraulic Fittings Part Numbers for Crimp-on Hose ends from Outside Part Suppliers. Hose End Description Hose ID Supplier Part Number Gates Parker Weatherhead 3/8" BSPP FS @ 180 G25830-06-06 19243-6-6 06U356 1/2" BSPP FS @ 180 G25830-08-08 19243-8-8 09U358...
- Page 65 LOADER SPECIFICATIONS Page 65 (69) Fig. 49 Specifications shown are based on ASAE S301.3 standard. Specifications may vary with tractor model, front axle configuration, tire size and type of attachment. Alo reserves the right to make changes in specifications shown herein at any time without notice or obligation. LOADER MODEL Front Tires 11.2R20...
- Page 66 LOADER SPECIFICATIONS Page 66 (69) Fig. 50 Specifications shown are based on ASAE S301.3 standard. Specifications may vary with tractor model, front axle configuration, tire size and type of attachment. Alo reserves the right to make changes in specifications shown herein at any time without notice or obligation. LOADER MODEL Front Tires 14.9R30...
- Page 67 LOADER SPECIFICATIONS Page 67 (69) Fig. 51 Specifications shown are based on ASAE S301.3 standard. Specifications may vary with tractor model, front axle configuration, tire size and type of attachment. Alo reserves the right to make changes in specifications shown herein at any time without notice or obligation. LOADER MODEL Front Tires 12.4R24...
- Page 68 LOADER SPECIFICATIONS Page 68 (69) Fig, 52 Specifications shown are based on ASAE S301.3 standard. Specifications may vary with tractor model, front axle configuration, tire size and type of attachment. Alo reserves the right to make changes in specifications shown herein at any time without notice or obligation. LOADER MODEL Front Tires .014.9R24...
- Page 69 Selecto – Fix Quick coupling device of hydraulic Hose Sets implements for Quicke front loaders. Hydraulic Hoses and Hydraulic Fittings for the connection of the loader to a Softdrive Unit tractor Hydraulic Valve. Nitrogen Gas charged accumulator and...
Need help?
Do you have a question about the Q700 Series and is the answer not in the manual?
Questions and answers
proper way to remove cylinder from loader?